
In 2024, Preparation to Beat Giovani in Pokemon Go For Vivo S18e | Dr.fone
Preparation to Beat Giovani in Pokemon Go For Vivo S18e
Are you ready to defeat Giovani effortlessly in Pokemon Go? Keep reading.
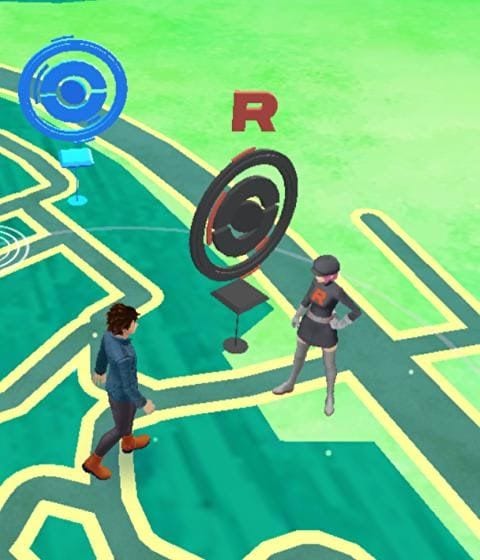
Giovani is the grand commander of the Team Go Rocket crime syndicate. The big boss appears stronger every month as he also changes his lineup of creatures monthly. This means your lineup of Pokemon Go Giovani counters would have to change subsequently. So how do you know the best Giovani Pokemon Go counters to use against the Team Go Rocket boss when next you meet him? Well, that’s left for this guide to answer. Here you will learn about how to defeat this monster and how to find him. Without wasting your time, let’s start with how to find Giovani in Pokemon.

Part 1. How to Find the Giovani in Pokemon
Locating Giovani’s hideout is never a walk in the park as you need to complete some daunting tasks. A detailed explanation of each task is given below:
1. A Troubling Situation Task
This four-step storyline Special Research task introduces players to the Team Go Rocket Invasion and Shadow Pokemon feature in the Pokemon Go game. Players leverage the task to learn how to stop the Team Go Rocket crime syndicate by reclaiming PokeStop and then purifying Shadow Pokemon.
How to Complete ’A Troubling Situation’ Task in Pokemon Go Giovani
Below you will find all the four steps you need to complete in the ‘A Troubling Situation’ task with their rewards:
Pokemon Go: A Troubling Situation Step 1
This step should be completed with ease since you aren’t new to the Giovani Pokemon Go game. Just evolve any two Pokemon that you own and then charge them up five times. And boom! You are done with this step.
Reward: 1,000 Stardust and 2,000 XP
Pokemon Go: A Troubling Situation Step 2
For this step, you have to catch two shadow Pokemon which can be achieved by defeating two Grunts from Team Go Rocket. On killing them, they will leave some shadow Pokemon behind which you have to catch. After that, go ahead and defeat the last Grunt to complete this step.
Reward: 2,000 Stardust, 2,000 XP, and 5 Golden Razz Berries
Pokemon Go: A Troubling Situation Step 3
After catching the shadow Pokemon in step 2, you need to catch one more to cleanse or purify the three of them. To do this, just tap on your shadow Pokemon, and then hit the Purify option. You will be charged some thousands of Stardust and a couple of candy for the shadow Pokemon.
Rewards: 2000 Stardust, 5 Silver Pinap Berries, and 1 Rare Candy
Pokemon Go: A Troubling Situation Step 4
For this step, you’ve got nothing to do. All three objectives have been automatically completed for you when you finished the previous step. You only get rewards at this final step.
Rewards: One Fast TM, One Charged TM, and 3 Rare Candies
2. Giovani Special Research Task
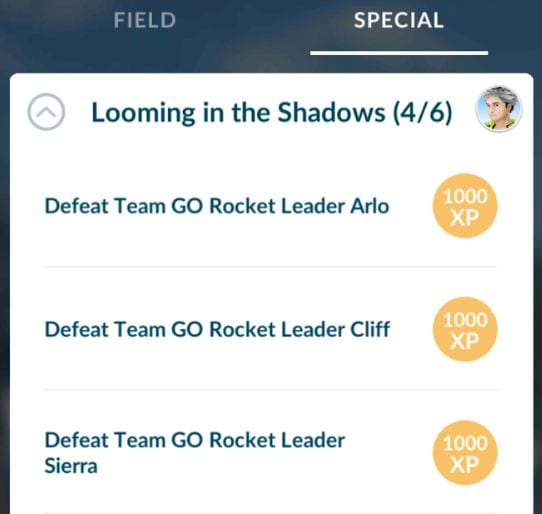
After completing the quest above, Giovani Special Research or Looming in the Shadows is the next and final quest you have to complete to face Giovani. It’s a six-step Special Research that introduces the Team Go Rocket Grunts and Leaders: Cliff, Arlo, and Sierra.

On completing one research step, you will be given a reward called the Super Rocket Radar. Like the Rocket Radar, the Super Rocket Radar can be equipped and unequipped from your Bag. This reward doesn’t only show Giovani’s hideout, it also shows some of his Grunts hideouts.
Part 2. What does the Pokemon Go Giovani Counter Contain?
Giovani remains the toughest beast amongst all the Team Go Rocket Leaders. When you find him in the game, be prepared to face his wrath. To defeat him, you need a powerful team.
The big boss choice of legendary Shadow Pokemon and second party members changes every month- the Pokemon you fought against the previous month will be different from that of the present month and thereafter.
Giovani’s lineup of creatures for October 2022 is shown below:
| Lineup of Creature | Pokemon |
|---|---|
| First | Persian |
| Second | Kangashkan, Nidoking, Garchomp |
| Third | Mewtwo |
For the Pokemon, Persian, and Kangashkan, try to have a Lucario, Conkeldurr, or Machamp in your team and you are good to defeat them.
When you encounter Nidoking or Garchomp, your team has to change. You will need to have a strong ice-type Pokemon on your team. The reason is that this new Lineup of creatures is strong on land and could cause substantial damage to the dragon-type Pokemon in case you wanna choose them.
Picking any of these great ice-type Pokemon, Mamoswine, Glaceon, or Weavile when you face Nidoking or Garchomp is a perfect choice. However, we recommend Mamoswine, because he isn’t just an ice-type Pokemon but also a strong ground-type Pokemon.
Once you defeat Team Go Rocket’s second lineup creatures, you will have to battle against the legendary psychic Pokemon, Mewtwo, who is weak to this set of Pokemon; bug, ghost, and Dark-type Pokemon. So beating this Pokemon Go Giovani grunt shouldn’t be a tedious task as you’ve got a plethora of choices when deciding the Pokemon-type to use. Origin Giratina and Tyranitar are some strong Dark-type Pokemon you can use to defeat Mewtwo.
Now you know the best Giovani Pokemon Go counters to use against each lineup of creatures, leverage it to advance to the next phase of the game where you will face the big bad boss himself, Giovani.
 Forex Robotron Gold Package
Part 3. Tips to Beat Giovani in Pokemon Go

Just as you did against Team Go Rocket Leaders, Arlo, Cliff, and Sierra, you need a Pokemon stronger than two of Giovani’s. With that, you can use the same Pokemon twice, thereby keeping your choice for Legendary Shadow Pokemon safe till you need it to beat Giovani.
Mind you, the big bad boss, Giovani has two Protect Shields at his disposal so you have to be careful while fighting against the monster. We implore you to start your game with a Pokemon that has a Charged move so you can charge as fast as possible.
Getting a strong Pokemon won’t come with ease, however, with the use of Dr.Fone- Virtual Location you can achieve this. The handy software is designed to help you spoof your iOS device location so you can catch any strong Pokemon of your choice remotely.
Key Features
- With just a single click you can spoof your iPhone GPS location
- The application allows you to simulate GPS movement at your comfort
- It saves your location automatically in the database
- Provides full-screen HD map view
- Easily enter your target location name, address, or the exact coordinate on the application with a joystick
Guide to Use Dr.fone Virtual Location to Get Stronger Pokemon in Giovanni Pokemon Go
Step 1: Firstly, you have to download and install a compatible version of Wondershare drfone virtual location on your PC. Wait for the installation to complete, then run the application.
Step 2: The interface above will appear on your screen. With the aid of a lightning cable, connect your iPhone to a PC, then click on the Virtual Location icon. A new interface will pop up as shown in the image below

Click on Get Started to change your location.

Step 3: Your current location will appear on the PC screen. Switch location by entering the name or address of the place in the field at the upper left corner of the application.

Step 4: The interface below will pop up on your screen. Click on the Move Here icon to teleport to your chosen location.
 Power Tools add-on for Google Sheets, 12-month subscription

And now you are good to have one of the strongest Pokemon on your team when fighting against Giovani. Leverage the Dr.Fone- Virtual Location program as it will help you ease the stress of catching stronger Pokemon remotely on your device without jailbreaking it.

How Can I Catch the Regional Pokémon without Traveling On Vivo S18e
The main goal that the designers of Pokémon Go had in mind for the past few years was to create a framework that prompts players to get off their loungers and go into the real world in search of Pokémon. If you are wondering why there are certain types of Pokémon enlisted as ‘blanks’ in your Pokedex and you haven’t yet found them, it’s probably because they are marked as ‘regional’ types. This means that these Pokémon are exclusively locked in select regions around the world. Don’t Panic! You don’t have to spend a boat load of cash in order to catch these special regional Pokémon as there are tricks you can apply to catch them without even stepping out of your kitchen.
Part 1: List of the regional Pokémon that have been announced
Since the game publishers released these special regional Pokémon, they have been locked in their geo-specific locations around the world. There is a set or pair of regional Pokémon for each generation that has been introduced into the game. Regions may not be defined by real-time borders but are divided according to the type of the Pokémon and the place they are more likely to spawn.
These places may be specific to countries (Tauros spawn in the US), specific to a continent (Mr.Mime Spawn in Europe), specific to a region (Corsola spawn in the Tropics), and even certain halves of the planet (Lunastone and Solrock spawn in the Southern half and Northern half of the equator, respectively). These Pokémon are not necessarily rare spawn types. If you are traveling in their region, they may pop up quite frequently. You should take note that regional Pokémon won’t become available in Gyms or in Nests since they will only spawn in the wild. However, you can yet find them through eggs but only in their specific regions.
There are some exceptions among the regionals as well. These exceptions are known to swap their spawn locations or drop out of regional exclusivities like Zangoose and Seviper, or Minun and Plusle. Some regional Pokémon may also turn up in special in-game events like how Farfetch’d spawned during the 2017 Pokémon Go Travel Challenge.
If you are not a frequent traveler or know fellow trainers who are willing to trade their regional Pokémon then you may need to be patient and follow a few extra steps in order to get your hands on these rare types of Pokémon.
List of different Regional Pokémon – Where and How to Catch them All!
As of now, there are over 40 different regional Pokémon divided across generations that can be captured or hatched only in specific expanses of the world. There are of course occasional overlaps of Pokémon slipping out of their region and into other sectors. Let’s get into the list of all the region-specific Pokémon of different generations and where to find them.
Gen 1/ Kanto Pokémon

- Taouros: North America.
- Farfetch’d: Asia.
- Mr. Mime: Europe.
- Kangashkhan: Australia/Pacific.
Gen 2/ Johto Pokémon

- Heracross: South America/ Southern Florida.
- Corsola: Equatorial Latitudes.
Gen 3/ Hoenn Pokémon

- Tropius: The Middle East and Africa.
- Torkoal: Southeast Asia.
- Volbeat: Europe, Australia, and Asia.
- Relicanth: The Cook Islands/New Zealand.
- Solrock: Currently America and Africa. Switches with Lunastone.
- Lunastone: Currently Europe and Asia. Switches with Solrock.
- Illumise: America and Africa.
- Seviper: Currently America and Africa. Switches with Zangoose.
- Zangoose: Currently in Europe, Australia, and Asia. Switches with Seviper.
Gen 4/ Sinnoh Pokémon

- Pachirisu: Canada.
- Chatot: Southern Hemisphere.
- Shellos: Pink Variant – Western Hemisphere. Blue Variant – Eastern Hemisphere.
- Carnivine: Southeastern United States.
- Uxie: Available on select raid periods. Asia and Pacific.
- Azelf: Available on select raid periods. America.
- Mesprit: Available on select raid periods. Middle East, Africa, and India.
Gen 5/ Unova Pokémon

- Pansear: The Middle East, Africa, India, and Europe.
- Pansage: Asia/Pacific.
- Heatmor: Western Hemisphere. Switches with Durant.
- Durant: Eastern Hemisphere. Switches with Heatmor.

Part 2: How to use Dr.Fone - Virtual Location to catch Regional Pokémon
Catching regionally exclusive Pokémon requires you to travel to that location or region where the Pokémon is located, as it was originally intended by the game. Remember that Pokémon Go functions by tracking your location via GPS. Your GPS however, is a virtual means of tracking your IP address which can be faked using the right mock GPS and VPN. You can use a mock virtual location to fake your actual location and make it seem like you’re traveling around the world. The game itself would be tricked, allowing you to travel to regions and get your hands on those geo-exclusive Pokémon.
To get the best out of your mock location and also to avoid the risk of hitting a light ban on your account, Dr.Fone Virtual Location by Wondershare has been reviewed as a Mock GPS you can easily rely on. It offers a number of features that can come in handy while faking your location such as adjusting the speed so that it may seem like you’re actually traveling, you can use a 360-degree virtual joystick for manual control over your movements and you can also select specific routes on the map on which you want your in-game avatar to move on.
### Step-by-Step TutorialYou can follow these easy steps to set up and access your Dr.Fone Virtual Location in an instant and teleport to anywhere in the world.
Step 1: Download the Program
Download Dr.Fone – Virtual Location. Install and launch the program. Click ‘Virtual Location’ to get access to the options window.
Step 2: Connect Device
Get the USB cable and connect your iPhone to the PC. And then click ‘Get Started’ to proceed.
Step 3: Check the Location
When the location map opens, click on ‘Centre On’ to accurately pinpoint the GPS to your location.
 Allavsoft Batch Download Online Videos, Music Offline to MP4, MP3, MOV, etc format

Step 4: Activate teleport mode
Now, click on the icon given in the upper right-hand corner. Enter your desired location on the upper right field and then click ‘Go’.
Step 5: Start Teleporting
Once the location of your choice pops up, click ‘Move here’ in the pop-up box.
Once the location has been changed, you can center your GPS or move the location on your device, it will still be set to the location you have selected.
Part 3: Tips to help catch Regional Pokémon
Catching regional Pokémon is just like catching any regular Pokémon. When they spawn near your location, you catch it by throwing a Poke ball at it. If the Poke ball is seen shaking, it means that the Pokémon is resisting and may just pop out from the ball in which case you may have to throw another one at it. Now, if you are traveling and you have limited time or a number of spawns then here are a few tips you can utilize to enhance your chances of landing a catch.
- Curve Ball: Practice your curveball throws. Throwing a curve ball automatically increases your chances of preventing a Pokémon from slipping through your hands, plus you also get a 17x bonus with each successful curve catch.
- Maximize your Medals: Medals increase your performance in the game without costing you any extra resources like Great balls, Ultra Balls, or Razz Balls. So, try and max out your medals to increase your chances of catching rare Pokémon, especially the exclusive ones.
- Keep Consistent: The algorithm of the game is quite complex but eventually, a pattern emerges. You will notice that if you keep practicing with great or excellent catches with the smaller (low XP) Pokémon, it increases your chances of catching the ones that put up a fight.
- Save your Berries: Feeding a Pokémon with Razz Berries increases your assurances of catching the Pokémon while also giving you a 15x bonus when you land a successful catch. Save your berries for those persistent Pokémon spawns.
- Use Powerful Poke balls: Last but definitely not least, use powerful balls like the Great Ball or Ultra Ball to maximize your chances of catching Pokémon. You should also remember that these are diminishable resources so use them wisely. On catching a Pokémon with a Great ball you will get 15x and with an Ultra ball you would get 2x so utilize them accordingly to catch rare and super rare Pokémon.
Conclusion
The journey to completing your Pokedex may not be a short one as there are hundreds of Pokémon out there, and even hundreds more yet to be introduced into the game. Traveling the world in search of the rarest regional Pokémon is meant to be a fun and exciting experience, yet it may not be viable for some who wish to enjoy the game to the fullest. Utilizing a fake GPS and VPN can bridge the gaps in your Pokedex and keep the game fun for you at the same time. So keep playing and catching Pokémon as there are loads of other exciting installments yet to be introduced by Niantic in the future.
Pokemon Go Error 12 Failed to Detect Location On Vivo S18e?
Pokemon Go is a popular game that has taken the world by storm. It is an augmented reality game that allows players to catch Pokemon in the real world using their smartphones. However, many players have reported encountering the “Failed to detect location (12)” error while playing the game. This error can be frustrating as it prevents players from playing the game properly. In this article, we will discuss what causes the “Failed to detect location (12)” error in Pokemon Go and how you can fix it on your Vivo S18e.
Pokémon Go has been on the nerves of its players and this is all because of the AR notion that it presents. The failed to detect location 12 is one of the most common errors that are faced by the players while playing this game. You might not believe but the GPS signals and the location settings on iPhone or Android are the two main reasons for this error. It can be resolved with ease and this article has been written to get the work done with ease. Applying the methods explained will ensure that you get the best results overall.
Part 1: Why is Location Important in Pokémon Go?
The best part of this game is that it has been compiled keeping in view the location mechanics. The location analytics of the game has made sure that it becomes the overnight sensation. Three main attributes are associated with the location framework of the game. These attributes also show how important the location is for the game. Understanding these attributes will also make sure that the user can overcome the errors such as failed to detect location 12 GPS joystick 2019.
i. Physical World Attribute
The best part of this attribute is that it is the center of the user experience of the game. The second part is the fact that this map has evolved and there are no shortcuts to its success. Ingress was the previous game that was developed by Niantic and the crowdsourcing of this map started with the evolution of this application. This was developed by the same team that is working on the core of Google Earth.
ii. Real World Gestures
The augmented reality is another important aspect that is related to Pokemon Go and this also means that the location services are relied on when it comes to this application. The android and the iOS location services are continuously used by the game to provide the pinpoint locations as well as the game features that are not found in other applications. The use of location through GPS satellites even becomes more important for such gestures. Especially when the player is outdoors it becomes too important to deal with using GPS location.
iii. Place Attribution
The system within the system that has been designed by the game developers makes sure that the location inaccuracies are accounted for. This also means that the 4-meter accuracy of the GPS is further enhanced to deal with the perfect location identification of each player.
Part 2: Ways to Fix Error 12 on Pokémon Go
Several ways can be used to make sure that the subject error is resolved with ease. This section of the article will deal with all such ways that can be used to get the work done with ease and perfection.
 Glarysoft File Recovery Pro Annually - Helps to recover your lost file/data, even permanently deleted data.
Method 1: Enable Mock Locations
As the name suggests it is to set the fake location using the build-in iPhone feature. It will also make sure that the feature of the game continues to work perfectly.
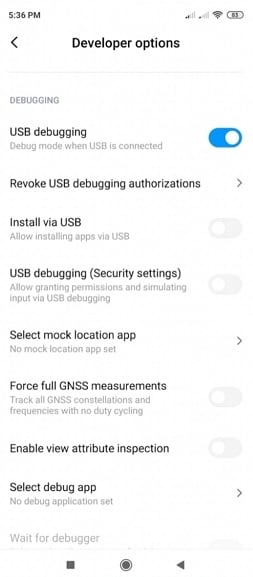
Step 1. Go to the developer options of your device. To get to the developer options simply head over to the settings > About Phone > Software Info > Build number and tap it 7 times to enable the mock locations.
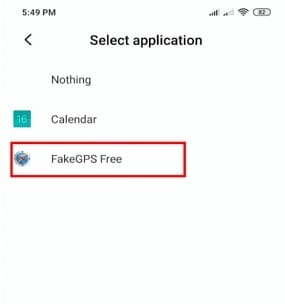
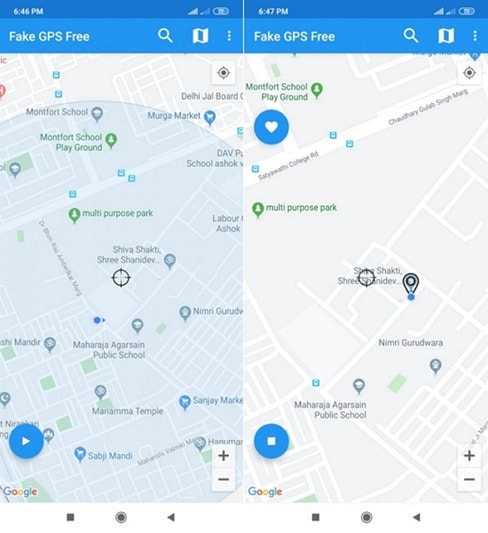
Step 2. Install the Fake GPS that is a free application and can easily be found on the Play Store.

Step 3. Launch the application and you can easily enjoy Pokémon Go without any hassle and trouble and resolve the Pokémon go failed to detect location 12 fake GPS error.
 KoolReport Pro is an advanced solution for creating data reports and dashboards in PHP. Equipped with all extended packages , KoolReport Pro is able to connect to various datasources, perform advanced data analysis, construct stunning charts and graphs and export your beautiful work to PDF, Excel, JPG or other formats. Plus, it includes powerful built-in reports such as pivot report and drill-down report which will save your time in building ones.
 It will help you to write dynamic data reports easily, to construct intuitive dashboards or to build a whole business intelligence cockpit.
KoolReport Pro package goes with Full Source Code, Royal Free, ONE (1) Year Priority Support, ONE (1) Year Free Upgrade and 30-Days Money Back Guarantee.
Developer License allows Single Developer to create Unlimited Reports, deploy on Unlimited Servers and able deliver the work to Unlimited Clients.
Method 2: Location Activation
This is another important and easy way to make sure that the Pokémon failed to detect location 12 error is resolved with ease and perfection. To execute the process the steps are mentioned as follows:
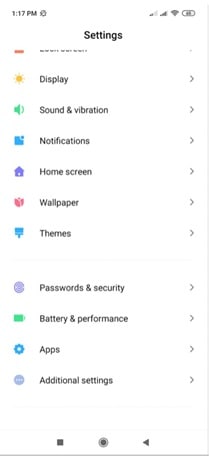
Step 1. Open the settings on your Phone to start with:

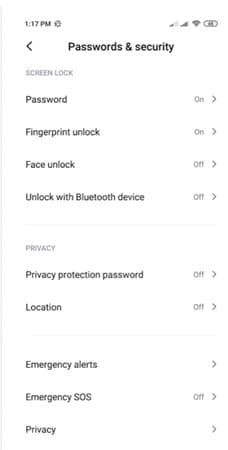
Step 2. Tap on the passwords and security to proceed with the process:
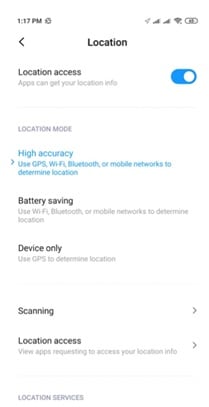
Step 3. Tap to turn on the location to finish the process and eliminate the failed to detect location 12 Pokémon Go errors.

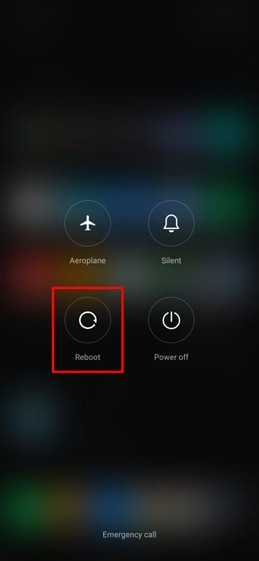
Method 3: Reboot the Vivo S18e device
This might seems weird but this trick has been working to quiet some time now and has been proven to eliminate the failed location 12 Pokémon Go issue. There is a possibility that the server location is not synced with the Vivo S18e device. Restarting the Vivo S18e device will make sure that both the locations are sync and the problem is resolved with ease.
Just long-press the power button and choose the reboot option from the menu that appears to complete the process in full.

Part 3: Best Way to Overcome Location Error 12 on Pokémon Go for iOS Devices
Dr. Fone Virtual location is the best tool to overcome issues such as failure to detect location 12 Pokémon go on iPhone. The program has been designed to make sure that the GPS location is spoofed and you get the perfect outcome in resolving the error under discussion.
The Process
Step 1: Program Installation
To begin the process, download and install the program to get going with the process.
Step 2: Enable Virtual Location
Connect your iPhone and enable virtual location from the options of the program. Hit get started to begin the spoof.
Step 3: Locate yourself
The center on the button on the next screen is to be clicked to get the accurate location.
Step 4: Teleportation
On the upper right corner click the icon on the third to begin teleportation or spoofing to be precise. Enter the name of the place where you want to teleport to.
Step 5: Move to the teleported location
Click on move here and the system will move you to the location that has been entered.
Step 6: Validate and Completion
The location will be locked by the program and your iPhone will also show the same location as on Dr. Fone. This also completes the process in full:

Conclusion
Dr.Fone - Virtual Location is the best and the state-of-the-art program to overcome Pokémon go unable to detect location 12 on iOS devices. It has an intuitive interface and it also allows the users to overcome the issues that traditional spoofing programs present. It is being updated constantly which also means that you will be able to get the best results. There is no program on the internet that can resolve the error that failed to detect location 12 in Pokémon go as easily as this one does.
- Title: In 2024, Preparation to Beat Giovani in Pokemon Go For Vivo S18e | Dr.fone
- Author: Nova
- Created at : 2024-07-19 21:35:23
- Updated at : 2024-07-20 21:35:23
- Link: https://change-location.techidaily.com/in-2024-preparation-to-beat-giovani-in-pokemon-go-for-vivo-s18e-drfone-by-drfone-virtual-android/
- License: This work is licensed under CC BY-NC-SA 4.0.