
How to Use Life360 on Windows PC For Oppo A18? | Dr.fone
How to Use Life360 on Windows PC For Oppo A18?
Life360 is an online platform that utilizes geo-location services to help users share their real-time location with friends and family. The app allows people to create a family group and stay connected to each other through features like chatting, sharing location, sending safety alerts, etc.
As of now, you cannot run Life360 on computer as it is only available for Android and iOS. Why? Because as opposed to a PC, one can easily carry their device everywhere! It means whether your kid is stuck in traffic and needs your help or your parents have lost their way back home, Life360 will instantly send you an alert on your device.
However, that doesn’t mean you cannot use Life360 on a PC. While it may seem a bit odd, there are a couple of methods that’ll allow you to get the Life360 app for Windows. In today’s guide, we are going to share some of these methods that’ll help you run the Life360 app on Windows.
So, without wasting another second, let’s dive straight into the guide.
Part 1: Why people seek to use Life360 on PC?
First things first; why would anyone want to use a family locator app like Life360 on their PC? Well, the truth is everyone has their own reason to get Life360 for PC. For instance, let’s say you are in the middle of an important project and don’t want to be bothered by alerts on your smartphone. However, you still don’t want to compromise with the safety of your family members.
In this situation, you can simply run the Life360 app on PC. This will allow you to directly keep track of the whereabouts of family members on your Windows system and you won’t have to constantly check your phone.
Life360 can also be used on a computer when your phone’s battery has completely drained and there’s no power outlet nearby. In this case, you can simply power-on your laptop, start the Life360 app and send your current whereabouts to family members.
Part 2: Is it possible to use Life360 on Windows PC?
Life360 is an extremely useful app for people who are always concerned about their closed ones. The app is basically designed with a vision to keep family members connected and safe. In addition to location sharing, the app also provides exclusive features like crash detection, place alerts, speed alerts, battery monitoring, etc.
The app also makes it easier for parents to monitor their child’s movement. Using the app, you can always know that your kids have safely reached school and back home. For any parent, knowing whether the kids are safe, is one less thing to worry about.
However, as we mentioned earlier, Life360 hasn’t been released for Windows yet. So, there’s no direct way to install and run the app on a Windows PC. While Life360 may release a dedicated Windows software in the future, as of now, you can only run it using the alternative methods.
These methods include:
Part 3: Use Life360 on Windows PC with Android emulator
The first and the most convenient way to run Life360 on computer is to use an Android Emulator. An emulator is basically a software that creates a virtual Android system on your computer. As a result, you’ll be able to run Android apps on your computer.
While there are dozens of Android emulators, Bluestacks seems to be the most popular and user-friendly option among all. Unlike other emulators, Bluestacks is easy to set up and use.
Here’s how you can run Life360 on a computer using Bluestacks Android emulator./
Step 1: Head over to Bluestacks official website and tap the download button.
Step 2: Open the installer and tap the “download” button. This will initiate the download process on your System.
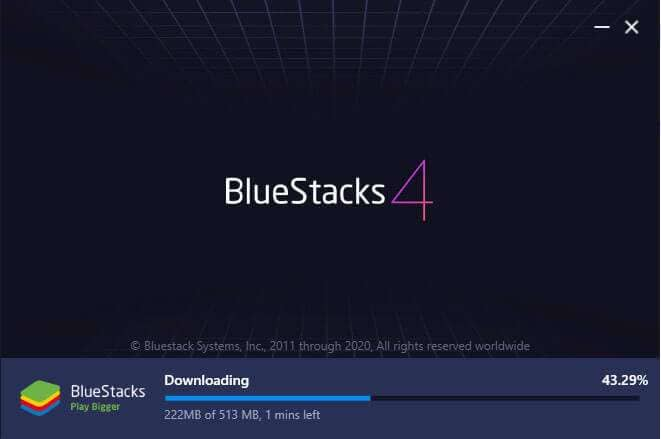
Step 3: Once the installation process completes, Bluestacks will start to boot. Keep in mind that the first boot may take some time, depending on your system configurations.

Step 4: In the home screen, tap the “Google Play Store” icon. You’ll be asked to sign-in with your Google account. Enter the right credentials and log-in to the Google Play Store.

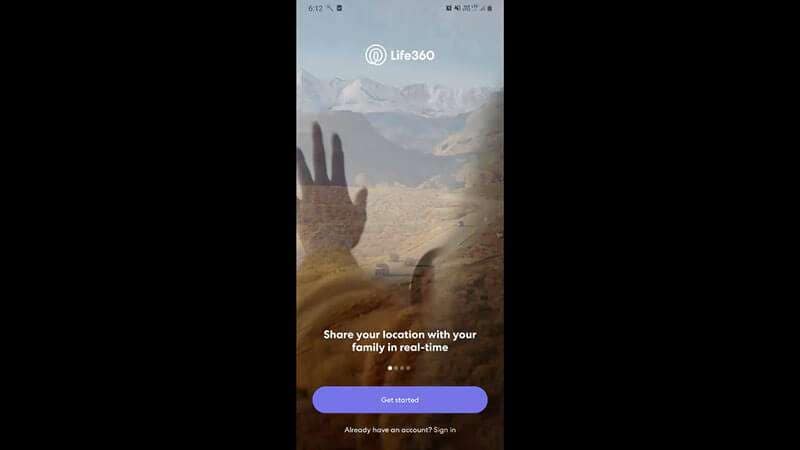
Step 5: In the top search bar, type-in Life360 and tap the “install” button to download the app.

Step 6: Life360 is now installed on your computer. Open the app and enter your login details. You’ll now be able to run Life360 on your PC.

Part 4: Use Life360 by mirroring Android to Windows PC
While running an emulator is a great way to get Life360 on PC, it has its own set of challenges. For instance, running an Android emulator is not easy when you have a low-configuration PC. Emulators like Bluestacks requires high system configuration otherwise they take forever to load.
In this situation, we have another alternative for you to run Life360 on PC. You can simply mirror your Android to your Windows system. Mirroring the Android device will allow you to see its content on the PC itself.
Here’s how you can mirror the Android device on your PC.
Step 1: Make sure that Bluetooth is activated on both devices.
Step 2: On your Windows PC, open “Settings” and select the “Systems” tab.

Step 3: Choose the “Projecting to this PC” option in the left menu-bar and make sure that “Available Everywhere” is selected.

Step 4: If you’re running Android Pie or above on your device, scroll down to open notification drawer and select “Smart View” (or “Cast” in some devices). You’ll see your PC listed here. Tap the button to start Android mirroring.

Step 5: It may take some while for the connection to establish. Once it does, you’ll be able to cast your device screen onto your computer and you’ll be able to run life360 on your system.
Keep in mind that you’ll still require your device to navigate through the content on your computer. Any action that you perform on your device will be replicated on your computer screen as well.
Final Verdict
Life360 is probably among the top family locators for Android users. Apart from its extensive range of features, the app provides a user-friendly interface, which allows it easier for even elders to use the app without any issues. Even though there isn’t a dedicated Life360 software for Windows, you can follow the above-mentioned methods to run the Life360 on PC.
You Might Also Like
Location-based apps
GPS spoof for dating apps
GPS spoof for social apps
Pokemon Go on PC
AR game tricks

Change Phone GPS Location Easily
- ● Teleport GPS location to anywhere
- ● Play AR games without moving
- ● Spoof Location on the popular Apps
Prank Your Friends! Easy Ways to Fake and Share Google Maps Location On Oppo A18
Google Maps is a virtual map for mobile and PC use. With it, you can check routes and street maps with unreal aerial imagery. However, sometimes you might want to fake Google Maps location. Google maps location. For example, you might want to tag your friends or followers with a new fake location. Or, you might want to prevent apps like Google Chrome from accessing your actual location. Whichever the case, this article teaches you how to fake GPS on Google maps without breaking a sweat. Let’s learn!
Part 1: How to Fake or Spoof Your Location in Google Maps?
You may think I should be turning off the location setting and wifi services to show fake locations on google maps. Well, I tried this, but it did not work, unfortunately. Google Maps can still track me. This is because Google Maps can use the signal strength of cell towers around me to guess my location, and believe me, this guess is usually very accurate. Also, the IP of the phone can be used. Here, we provide two effective methods for you to fake and change location in Google Maps at ease.
Method 1: Spoof location in Google Maps with a tool for both iOS and Android
If you want to fake Google maps location on iPhone, then you’ll have to put more effort than an Android device. Just installing an app might not work out to spoof Google Maps location on an iPhone. Nowadays, region-based games and apps are boring, and people need more options to explore. It is possible to share fake Google map locations by using different regions through a few clicks. Dr.Fone - Virtual Location has much more innovative ways to do that.
You need to download this app to use its incredible features. It’s a 1- click location-changing software that can outdo any other software in the market. This is the safest way to change Android and iPhone Locations without Jailbreak. Also, you get to enjoy other useful features of this software such as Phone Transfer, WhatsApp Transfer with the location changing.
Features:
- Allows users to simulate GPS movement along a route as they draw.
- One-click teleportation of GPS location to anywhere system available.
- There is a joystick available to spoof GPS movement comfortably.
- You can use this software with various location-based apps, like Pokemon Go, Snapchat, Instagram, etc.
- It’s compatible with both iOS and Android operating systems.
Here is a video tutorial for you to have a quick view on Google maps location changing.
 safe & secure
Step-by-step Guide to Fake Google Maps Location with Dr. Fone Virtual Location:
Step 1: First, you need to download, install and launch the Dr. Fone Virtual Location software on your computer. From the software’s home page, you need to select the “Virtual Location” option from a bunch of other options.

Step 2: Next, you need to connect your Oppo A18 to the computer by using a cable.

Step 3: On the next window, you’ll find the world map on your screen, and the coordinates and directions are clear on the map. You need to click on the third icon called the “Teleport Mode” from the top right corner of your screen. Then type in the place’s name in the search box where you want to change your location. There is also a way to pinpoint the area if you know it properly.

Step 4: After becoming sure of your new location, click on the “Move Here” button to change your location from the real one to the virtual one you selected.

Method 2: Change location in Google Maps with a VPN
An array of VPN apps come with built-in location spoofing features on top of the usual IP address masking. For example,
1. Nord VPN
NordVPN includes additional features to stay ahead of Hulu’s VPN blocks. It has a Smart DNS tool, to unblock streaming apps on games consoles and Smart TVs, and a functional app for Amazon Fire TV, too, though, it isn’t quite as fast as ExpressVPN, but it’s more than fast enough for HD streaming.
Pros
- Affordable price tag
- Useful Smart DNS feature
- IP and DNS leak protection
Cons
- Speed Slower than ExpressVPN
- Only one Japan server location
- Unable to pay by PayPal
2. ExpressVPN
ExpressVPN can bypasses many streaming blocks, like Hulu’s, and it delivers a fast long-distance speeds connecting to America from overseas compared to other vpns. Also, it provides many Japanese server locations, including the main big cities in Japan, Tokyo and Osaka.
Pros
- Fast speed
- In-built DNS and IPv6 leak protection
- Smart DNS tool
- 14 US cities and 3 Janpanese location severs
Cons
- More expensive than other VPN providers
3. Surfshark
Surfshark is relatively new to the market and only emerged some time back in 2018. It’s available now at a great price compared to current top dogs in the market.
Pros
- Affordable price tag
- Safe & private connection
- Smooth user experience
Cons
- Weak social media connection
- New to industry, unstable for sometime
VPNs change your perceived location by swapping out your real IP address with that of the VPN server. IP addresses are unique sequences of numbers and decimals that identify every device on the internet. An IP address can be used to approximate a device’s location.
Step-by-step guide for faking location in Google Maps with a VPN
No matter what VPNs you are using, the steps are basically as same as the following:
- Open a VPN app on your phone.
- Choose a country IP address that you hope to change to.
- Switch the button to make a connection on VPN.
- Refresh or reopen your Google Map, and then input your desired location on its search section.
- It’s complished when the desired location is found.
Part 2: How to Share Your Location in Google Maps?
For iPhone users, you can share your Google map location through the following steps:
- Start Google Maps on your Oppo A18.

- Click on your profile avatar, and in the menu, click Location sharing. If you are already sharing your location, you will tap New share.
![]()
- Now select the contact you want to share your location with and also how long you will share.

- Click Share.
Or you can directly mark a location you wanna go to first, and tap the “Share” button, then choose the channels you want to share. You can share through WhatsApp, Telegram, Instagram, etc.

Also, follow the steps below if you are using an Android phone:
- On your Oppo A18 or tablet, open the Google Maps app Google Maps.
- Search for a place. Or, find a place on the map, then touch and hold to drop a pin.
- At the bottom, tap the place’s name or address.
- Tap the Share icon. If you don’t see this icon, tap More and then Share.
- Choose the app where you want to share the link to the map.
Part 3: FAQ: All You Wanna Know about Location Changing on Your Oppo A18
1. How can I add my favorite route as favorite?
In the reallocation screen, you’ll be able to find the five-star icon on the proper sidebar and, therefore, the new window after you use the three provided modes. A simple click to feature the route to your favorites. After you boost features, it’ll show you “collection successfully,” and also the five stars icon will display a red icon, and you’ll also enter to test what percentage you have ever strengthened.
2. How to turn off your location on an iPhone device?
You can do that by changing the settings on your device. Settings >> privacy options>> location services, then turn the icon to the left, which will indicate that your location is off.
3. How to turn off your history on an iPhone device?
To turn off the History, stick to the same icon of settings, and from the system services, check your significant locations, and you can delete them as well.
4. How does one give someone your location from your Oppo A18?
Start with opening the “Find My” app on your Oppo A18 and choose the “People” tab. Select share my location and enter the name or number of the person you wish to share your location with. In the end, tap send and share your site with someone you want to share.
Final Words
We’ve discussed the fake Google maps location through different methods in this detailed guide. Android and iOS users can use various apps to fake their location. For iOS users, Dr.Fone - Virtual Location is a perfect choice to spoof Google maps location without doing much work. Sharing fake locations in Google maps is a straightforward thing to do. Whether you want to use it to prank your friends, otherwise, you may have a more serious reason. By following the above steps outlined in this article, you will convince Google that you are anywhere within the world.
How To Use Special Features - Virtual Location On Oppo A18?
Wondershare Dr.Fone - Virtual Location comes with multiple unique features that can be used to enhance the flow of spoofing location. With all these amazing features, you can easily change your iOS location without blinking an eye. Rather than making things complicated, Dr.Fone makes it easy for you to manage operations when you perform actions like changing Android locations.
Part 1: Circle Route (For Multi-Stop Route)
The circle route feature is under the multi-stop route mode. When your starting point is close to the ending point, a pop-up asks if you want to set up a circle route. Click Yes to create a circular path on the map.

Part 2: Realistic Mode (For One-Stop Route and Multi-Stop Route)
This particular feature makes the simulation look realistic with the ability to fluctuate the speed of the simulation. If you wish to turn on realistic mode for the one-stop or multi-stop route, look for the respective checkmark option in the panel on the left.

Part 3: Fluctuation Mode (For Teleport Mode)
Whenever you are teleporting your smartphone device to another location, you can try using the fluctuation mode feature offered against it. As you activate Teleport Mode from the top-right section and search for a location, you will discover the Fluctuation Mode toggle in the confirmation tab. Turn on the toggle to slightly switch the location from the selected point to show realistic motion.

Part 4: Cooldown Timer (For Teleport Mode and Jump Teleport Mode)
While teleporting the location of your smartphone to different places for playing games like Pokemon Go, you are bound to activate a cooldown timer within your location-changing app to show realistic movement. By locating the Cooldown Timer on the right pane of icons, activate it, and this feature will automatically calculate the cooling time by measuring the distance between your destination and the starting point.

It is recommended not to start the movement until the cooldown time is completed to avoid unnecessary bans. Moreover, you can also activate the Auto jump after cooldown in the Jump teleport mode after turning on the Cooldown Timer.
This option will automatically jump you to the next destination once the timer ends. It is helpful for games like Pokemon Go, where the game servers can detect frequent jumps with no cooldown time.
Part 5: Import/Export GPX File
You can also import and export specific navigated locations from Dr.Fone in the form of GPX files. While you can export GPX files for keeping a record of your location, you can also import such files for inserting specific locations to simulate or teleport to. Find out how you can import and export GPX files with this location-changing application:
Step 1Export the GPX File
If you have defined a proper location to simulate at a particular instant using Dr.Fone - Virtual Location, you can have this location exported by clicking the Export icon on the top of the left panel. This will open a window where you can set the location for saving the GPX file.

Step 2Import a GPX File
For importing a GPX file on the platform, click the Import button on the right pane. As this opens a window, select the GPX file you wish to import to the platform.

Step 3Wait for the File to be Read
Wait for a moment until Dr.Fone - Virtual Location recognizes the specific locations within the GPX file and displays them on the map.

Part 6: Historical Records
If you want to use a similar track record on your smartphone again, you can access the historical records saved on the platform for easy access.
Step 1Open Historical Records
Click the Historical Records button on the right pane to access the entire history involving the connected smartphone and the location spoofing platform.

Step 2Access Any Location from the History
Select the Go button adjacent to any particular historical record to re-launch a similar simulation for the Oppo A18 device. You can also click Clear All to delete all historical records.

Part 7: Favorite List
You can also set up favorite locations within the platform to define quick accessibility to your favorite locations. To do that, you have to follow the guidelines shown next:
Step 1Favorite Specific Locations
While setting up locations in Jump Teleport Mode, One-Stop Route, or Multi-Stop Route, you can tap on the Favorite icon adjacent to every marked location or favorite an entire route with the Favorite icon on the top of the left panel.

Step 2Access your Favorite Section
To look for your favorite locations, look for the Favorite icon on the right pane to open a list containing all locations you have marked. You can choose the Move option to automatically move into a particular location in no time.

Also read:
- [New] In 2024, Final 30 Free & Paid Blu-Ray Solutions for PC/Mac Users
- [Updated] Elevating User Engagement with Detailed Video Chapters in YouTube for 2024
- Honor Magic V2 Not Connecting to Wi-Fi? 12 Quick Ways to Fix | Dr.fone
- How to Come up With the Best Pokemon Team On Samsung Galaxy F34 5G? | Dr.fone
- How to Fix Error 495 While Download/Updating Android Apps On Samsung Galaxy A15 4G | Dr.fone
- How to Stop Google Chrome from Tracking Your Location On Xiaomi Redmi K70? | Dr.fone
- How to Stop My Spouse from Spying on My Samsung Galaxy F15 5G | Dr.fone
- How to Unlock iPhone 15 Pro without Passcode or Face ID
- How to use Snapchat Location Spoofer to Protect Your Privacy On OnePlus Open? | Dr.fone
- In 2024, Where Is the Best Place to Catch Dratini On Samsung Galaxy S23+ | Dr.fone
- IPadOS 10.3 - Launch Details Revealed: Dates, Costs & Latest Updates
- No Suitable Graphics Card Found [2020 Fixes]
- Resolving MP4 File Corruption
- Revive Your iPad Access: Steps for Recovering Lost Passcodes and Passwords
- Step-by-Step: Revamping Dell Realtek AUX
- Streamlining Logistics with Advanced Supply Chain Robotics and Optical Character Recognition
- Ultimate guide to get the meltan box pokemon go For Vivo V29e | Dr.fone
- What are Location Permissions Life360 On Honor Play 40C? | Dr.fone
- Will Pokémon Go Ban the Account if You Use PGSharp On Vivo S18e | Dr.fone
- Title: How to Use Life360 on Windows PC For Oppo A18? | Dr.fone
- Author: Nova
- Created at : 2025-01-11 02:10:58
- Updated at : 2025-01-17 06:40:37
- Link: https://change-location.techidaily.com/how-to-use-life360-on-windows-pc-for-oppo-a18-drfone-by-drfone-virtual-android/
- License: This work is licensed under CC BY-NC-SA 4.0.