
How To Teleport Your GPS Location On Xiaomi Civi 3? | Dr.fone
How To Teleport Your GPS Location On Xiaomi Civi 3?
While playing games like Pokemon Go, you are in desperate need of finding more Pokémon. If so, changing your location is a necessity that needs to be figured out. For that, teleporting the GPS location of the Xiaomi Civi 3 device is the optimal solution. To carry this out, Wondershare Dr.Fone - Virtual Location provides a perfect system for fake locations.
Part 1: Teleport to Anywhere in the World (Teleport Mode)
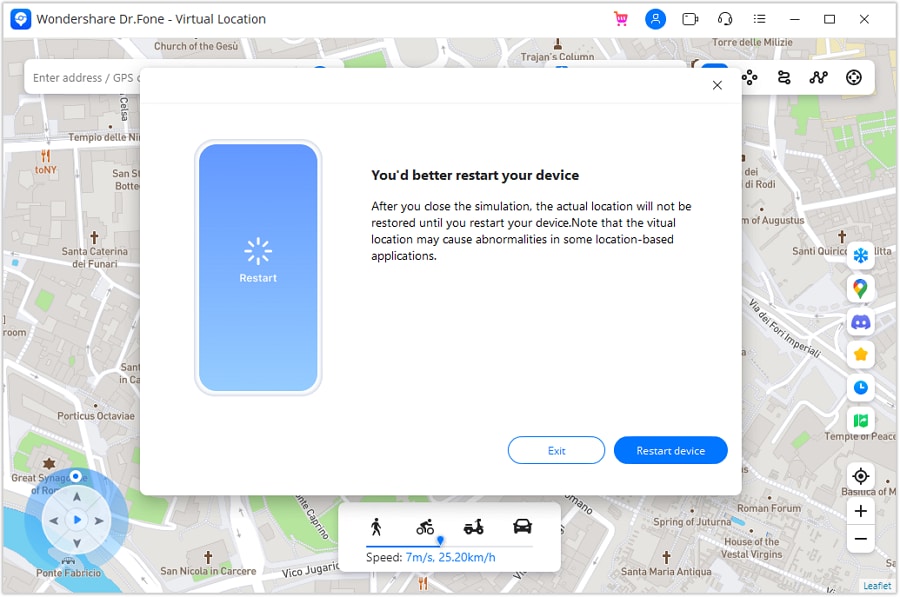
Note: Once you teleport or move to a virtual place, you can restore to the actual location by restarting the Xiaomi Civi 3 device. You will see a prompt that reminds you to restart your device to restore the location of the connected device when you close the Virtual Location. Click Restart Device and close the program.
* Dr.Fone Mac version still has the old interface, but it does not affect the use of Dr.Fone function, we will update it as soon as possible.
The Teleport Mode offered in Virtual Location is a great way to change the location of iOS/Android devices. If you wish to show a different location to someone else, the best way is to use this mode on Virtual Location. This can be done by following the steps described below:
Step 1Activate Teleport Mode
Once you have connected your smartphone, continue to select the Teleport Mode option from the top-right section. The particular icon is represented by the first icon from the left in that section.

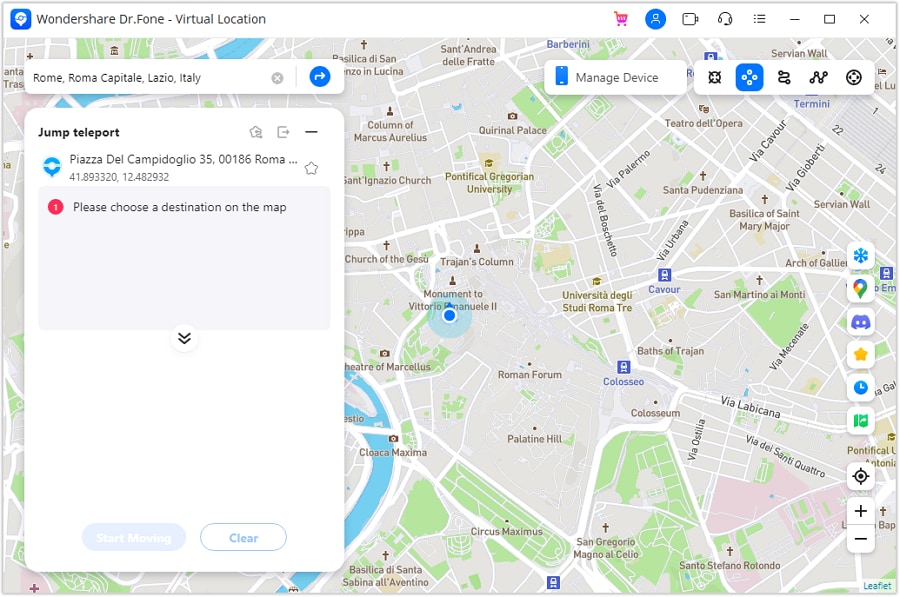
Step 2Add Location To Teleport
After activating Teleport Mode, click the search bar on the top-left to type in the location where you want to shift. After adding the location, hit Enter to proceed.

Note: If you can’t find your current location when searching spots on the map, you can click the Current Virtual Location icon on the right sidebar to show your current virtual location.
Step 3Confirm the Location For Teleporting
You will be directed to the particular, and the map will display it for confirmation. If you are willing to teleport to this specific location, click Move Here.

Step 4Location Successfully Changed On Computer
The location of the smartphone will be instantly changed to the selected location and will be displayed on the map.

Step 5Location Changed On the Smartphone
Open your smartphone and access its maps application. Look into the current location of the Xiaomi Civi 3 device and verify it to be the same as the changed location on the computer.

Part 2: Instantaneous Movement Between Multiple Points (Jump Teleport Mode)
Wondershare Dr.Fone - Virtual Location also allows the movement of the smartphone device between multiple places with the Jump Teleport Mode. If you want to make your location spoofing look realistic, the steps below will be beneficial:
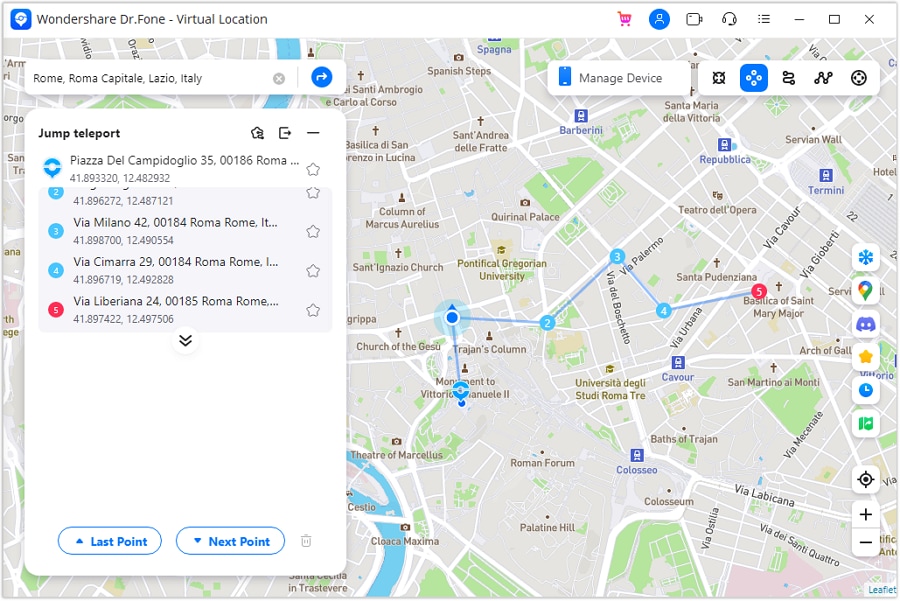
Step 1Activate Jump Teleport Mode
You will have to first access the Jump Teleport Mode option from the second icon from the left in the top-right section. This can be done after teleporting the location of the smartphone device.
Step 2Set Spots to Jump Teleport
Continue to select the spots you want to pass one by one on the map by simply tapping on them with your mouse. After selecting multiple spots, click the Start Moving button at the bottom of the left panel to start the movement.

Step 3Change Location Between Set Spots
As prescribed, you can propagate amongst the set spots with the Jump Teleport Mode. Use the Next Point and Last Point buttons to shift your location.
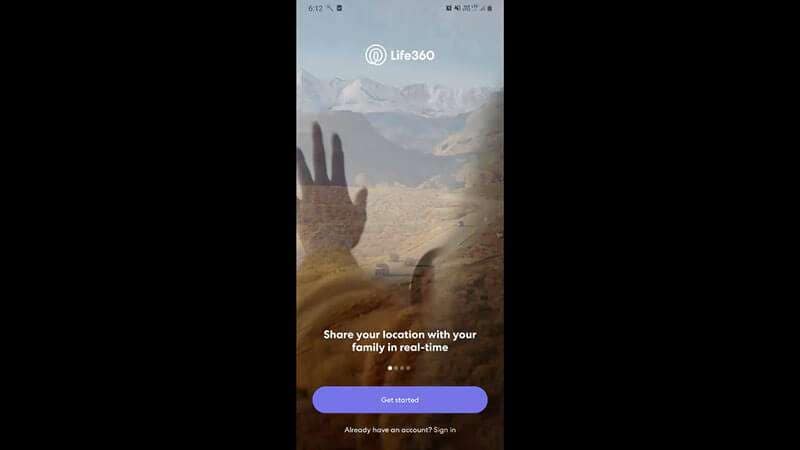
How to Use Life360 on Windows PC For Xiaomi Civi 3?
Life360 is an online platform that utilizes geo-location services to help users share their real-time location with friends and family. The app allows people to create a family group and stay connected to each other through features like chatting, sharing location, sending safety alerts, etc.
As of now, you cannot run Life360 on computer as it is only available for Android and iOS. Why? Because as opposed to a PC, one can easily carry their device everywhere! It means whether your kid is stuck in traffic and needs your help or your parents have lost their way back home, Life360 will instantly send you an alert on your device.
However, that doesn’t mean you cannot use Life360 on a PC. While it may seem a bit odd, there are a couple of methods that’ll allow you to get the Life360 app for Windows. In today’s guide, we are going to share some of these methods that’ll help you run the Life360 app on Windows.
So, without wasting another second, let’s dive straight into the guide.
Part 1: Why people seek to use Life360 on PC?
First things first; why would anyone want to use a family locator app like Life360 on their PC? Well, the truth is everyone has their own reason to get Life360 for PC. For instance, let’s say you are in the middle of an important project and don’t want to be bothered by alerts on your smartphone. However, you still don’t want to compromise with the safety of your family members.
In this situation, you can simply run the Life360 app on PC. This will allow you to directly keep track of the whereabouts of family members on your Windows system and you won’t have to constantly check your phone.
Life360 can also be used on a computer when your phone’s battery has completely drained and there’s no power outlet nearby. In this case, you can simply power-on your laptop, start the Life360 app and send your current whereabouts to family members.
Part 2: Is it possible to use Life360 on Windows PC?
Life360 is an extremely useful app for people who are always concerned about their closed ones. The app is basically designed with a vision to keep family members connected and safe. In addition to location sharing, the app also provides exclusive features like crash detection, place alerts, speed alerts, battery monitoring, etc.
The app also makes it easier for parents to monitor their child’s movement. Using the app, you can always know that your kids have safely reached school and back home. For any parent, knowing whether the kids are safe, is one less thing to worry about.
However, as we mentioned earlier, Life360 hasn’t been released for Windows yet. So, there’s no direct way to install and run the app on a Windows PC. While Life360 may release a dedicated Windows software in the future, as of now, you can only run it using the alternative methods.
These methods include:
Part 3: Use Life360 on Windows PC with Android emulator
The first and the most convenient way to run Life360 on computer is to use an Android Emulator. An emulator is basically a software that creates a virtual Android system on your computer. As a result, you’ll be able to run Android apps on your computer.
While there are dozens of Android emulators, Bluestacks seems to be the most popular and user-friendly option among all. Unlike other emulators, Bluestacks is easy to set up and use.
Here’s how you can run Life360 on a computer using Bluestacks Android emulator./
Step 1: Head over to Bluestacks official website and tap the download button.
Step 2: Open the installer and tap the “download” button. This will initiate the download process on your System.
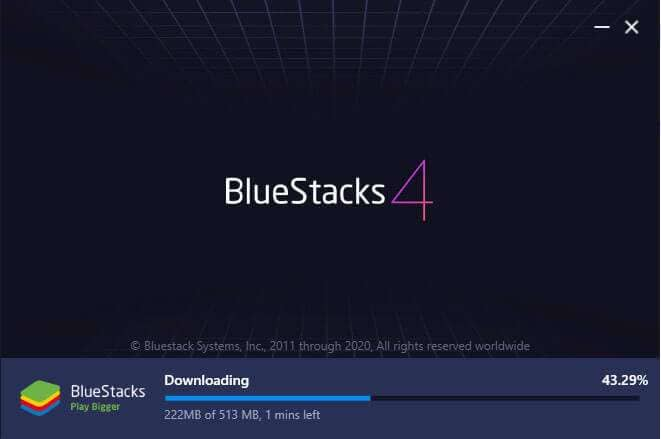
Step 3: Once the installation process completes, Bluestacks will start to boot. Keep in mind that the first boot may take some time, depending on your system configurations.

Step 4: In the home screen, tap the “Google Play Store” icon. You’ll be asked to sign-in with your Google account. Enter the right credentials and log-in to the Google Play Store.

Step 5: In the top search bar, type-in Life360 and tap the “install” button to download the app.

Step 6: Life360 is now installed on your computer. Open the app and enter your login details. You’ll now be able to run Life360 on your PC.

Part 4: Use Life360 by mirroring Android to Windows PC
While running an emulator is a great way to get Life360 on PC, it has its own set of challenges. For instance, running an Android emulator is not easy when you have a low-configuration PC. Emulators like Bluestacks requires high system configuration otherwise they take forever to load.
In this situation, we have another alternative for you to run Life360 on PC. You can simply mirror your Android to your Windows system. Mirroring the Android device will allow you to see its content on the PC itself.
Here’s how you can mirror the Android device on your PC.
Step 1: Make sure that Bluetooth is activated on both devices.
Step 2: On your Windows PC, open “Settings” and select the “Systems” tab.

Step 3: Choose the “Projecting to this PC” option in the left menu-bar and make sure that “Available Everywhere” is selected.

Step 4: If you’re running Android Pie or above on your device, scroll down to open notification drawer and select “Smart View” (or “Cast” in some devices). You’ll see your PC listed here. Tap the button to start Android mirroring.

Step 5: It may take some while for the connection to establish. Once it does, you’ll be able to cast your device screen onto your computer and you’ll be able to run life360 on your system.
Keep in mind that you’ll still require your device to navigate through the content on your computer. Any action that you perform on your device will be replicated on your computer screen as well.
Final Verdict
Life360 is probably among the top family locators for Android users. Apart from its extensive range of features, the app provides a user-friendly interface, which allows it easier for even elders to use the app without any issues. Even though there isn’t a dedicated Life360 software for Windows, you can follow the above-mentioned methods to run the Life360 on PC.
You Might Also Like
Location-based apps
GPS spoof for dating apps
GPS spoof for social apps
Pokemon Go on PC
AR game tricks

Change Phone GPS Location Easily
- ● Teleport GPS location to anywhere
- ● Play AR games without moving
- ● Spoof Location on the popular Apps
How to use Snapchat Location Spoofer to Protect Your Privacy On Xiaomi Civi 3?
People are very happy about Snapchat’s new Snap map feature. It lets you update your location on a map, so that you can know who else (in your friends circle) is in the same concert or attending the same seminar. Whenever you add a post to your stories, your bitmoji appears on the geo-tagged location on the map.

This feature was good news for people who were wondering how to share location on snapchat with their friends. But there is more to this than your eyes are seeing. Even when you don’t upload any posts to the stories, snapchat is still revealing your location to all your friends, whether you want it or not. Everytime you open the app, your location is being compromised. You just need to agree to share your location once, and Snapchat takes it as an invite to share your location every single time you send a snap or simply open the app to look at others’ snaps.
This is very dangerous when you have unknown people on your snap friends list. You must have accidentally accepted requests from people who have similar names to your friends? You don’t really know the identity of the person unless they snap their faces to you. In the worst case scenario, you can also have an obsessed stalker who was just waiting for this chance to track you down. The possibilities are endless. So, how to hide your snapchat location from the others on the internet? Our guide will teach you exactly that!
Part 1: Can we Hide Location on Snapchat?
The first thing that comes to our mind whenever we think about fake gps location snapchat is a VPN. But keeping these virtual network apps and spoofing apps aside, is it possible to hide our location by taking advantage of the existing settings on the app?
Yes, Absolutely!
There are a few tricks that you can use to hide your location from your friends or anyone who you have on your Snap List.
Ghost Mode: The word ‘Ghost’ was never this sweet. The snapchat fake location saves a lot of trouble. However, if there is no location at all, that is a huge advantage too! You can literally disappear off of the map when you activate the Ghost mode on Snapchat. Instead of a snapchat spoof, you are completely removing your traces from the Snapmap. This is how you enable this very useful setting -
Step 1: If you are someone who maintains the snap streak regularly, then it is no problem for you to track down the camera screen. Open the camera screen on your phone.
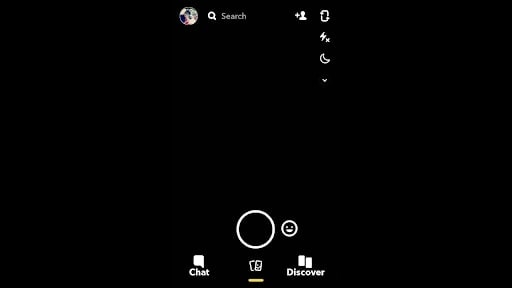
Step 2: On the top-left corner, you will find your bitmoji that will lead you to your Snap profile. Click on your bitmoji.
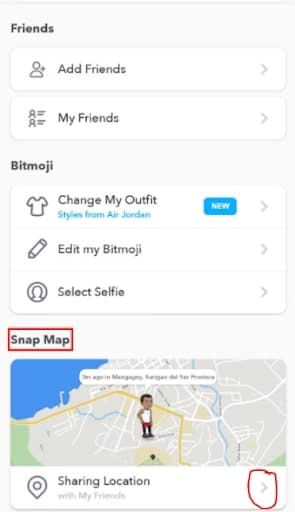
![]()
Step 3: The profile page will appear. Scroll to the bottom and you will find the Snapmap option there. Right below it will be a small arrow pointing to the right. Instead of clicking on the map, tap on thi arrow.
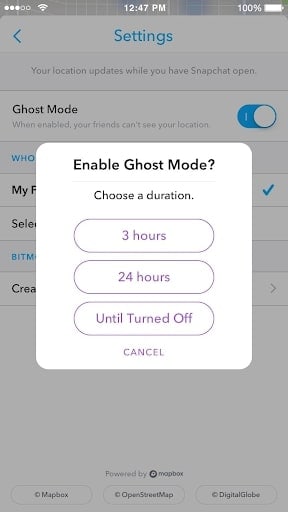
Step 4: The Map and ‘My Location’ settings will open. There you will find the Ghost Mode. Enable the setting and you will see a dialogue box asking you to choose the duration of the Ghost Mode. Depending on what you want, choose your location.
If you still don’t trust this Ghost mode, the next trick will be very useful for you. Not just Snapchat, any app won’t be able to track down your exact location when you follow it.
Turn Off GPS Permissions on your phone
If you completely turn off the GPS Permissions on your phone, then no app can access your location even if you are connected to the internet. This might hinder the performance of a few apps but that is the risk that you must take to safeguard your privacy. The procedure to Turn off the GPS will differ from Android to iPhone. We have listed the most easy ways to turn off the location services on your phones.
Android
The easiest method is to go with the Notification tray that is present on top of the Android device. That is, when you look at your Android screen, you will see the notification tray on the top.
Step 1: Swipe down the notification tray and you will find several options. One of them is the ‘Location’ icon.
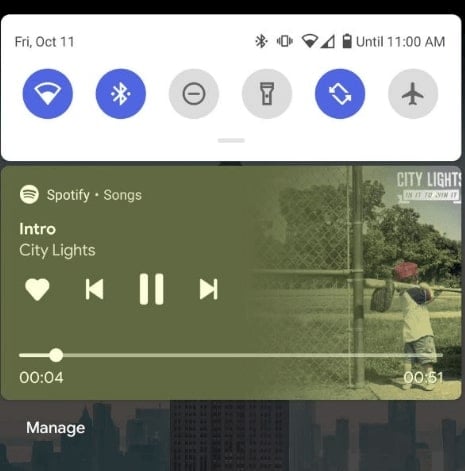
Step 2: The ‘Location’ icon is shaped like a geo-coordinate pin and remains in grey color when switched off and Blue color when turned on. Tap on the icon to on/off.

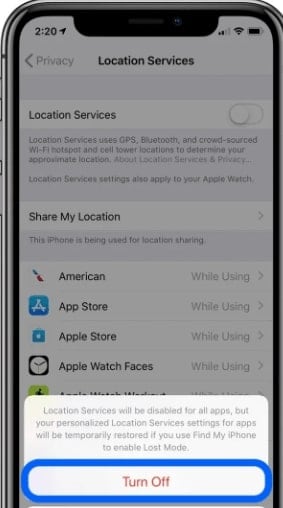
iPhone
To turn off the Location on your iPhone device,
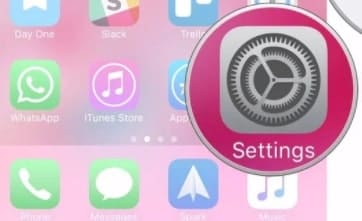
Step 1: Go to the ‘Settings’ option from your iPhone device’s Menu.
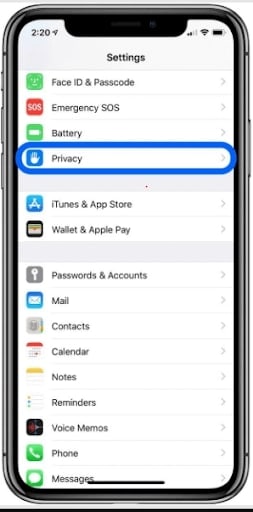
Step 2: Search for the ‘Privacy’ option and tap on it.
Step 3: In the next page that appears, you will find the ‘Location Services’. If we are not wrong, it is usually the first option on the page that opens up.
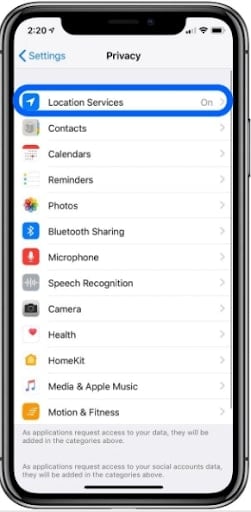
Step 4: Shift the toggle and turn off the Location Services. If you want, you can also disable location services individually for Snapchat only.
These are the simple ways in which you can prevent snapchat from spying on your location. You must be knowing how to send location on snapchat through chats - even this won’t be possible once you completely turn off the GPS of your devices.
Part 2: How to Spoof Location on Snapchat
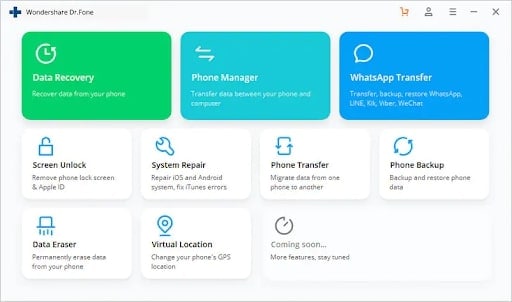
If you are wondering how to fake location on snapchat, then the Snapchat location spoofer is one of the best options. You won’t find a specific software designed exclusively for Snapchat but Wondershare’s Dr. Fone Virtual Location spoofer will help you hide your real location on social media apps. This is how you use the application.
Dr. Fone - Virtual Location (iOS)
Step 1: Download the Dr.Fone Virtual Location Spoofer on your PC and launch it. You will find several options on the page. Go for ‘Virtual Location’.
Step 2: Now connect Your Xiaomi Civi 3 to your PC and go with the ‘Get Started’ option.

Step 3: The world map with your current location will show up on the page. The ‘Teleport mode’ is the third icon on the top-right corner of the page. Click on it and enter your new location in the search box.
Step 4: Once you’ve decided with your final virtual location to fake gps for snapchat, then click on ‘Move Here’. New location will update in your phone and Snapchat will detect it too.
One of the advantages of using a location spoofer is that - your new location will reflect in all social media applications. Even your regular apps will detect the change and note it. So, it becomes hard to know if the change is fake or real.
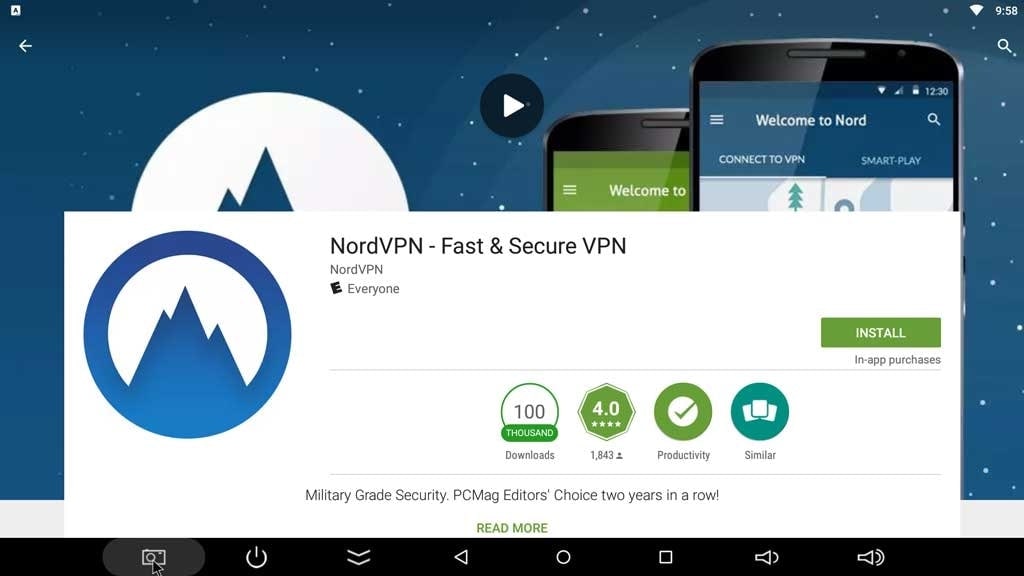
VPN Service - NordVPN
The Virtual private Network services hide your IP, mask your identity and since you will be changing your server, they spoof location on snapchat too. NordVPN is one of the most hailed VPNs and this is how you use it -
Step 1: Download NordVPN either from Google or App store.
Step 2: You need to sign up and the app quickly connects you to a nearby server. This is the Quick connect option.
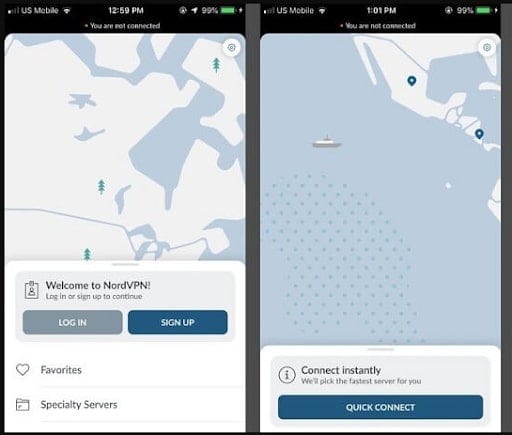
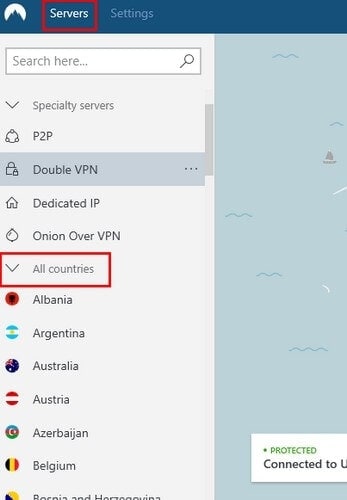
Step 3: However, you can change your location too. Go to the ‘More options’ and then choose Servers. Under this, go for All Countries to view the choices you have. Choose one and that server will be activated.
So, the location of this new server will reflect on your snapchat snapmap too.
Part 3: Frequently Asked Questions
Q1. Can you get someone’s Location from Snapchat?
A - Yes, people can easily know your location through Snapchat. The new Snapmap feature makes it all the more easy. The snapmap shows your bitmoji’s location anywhere in the world, as long as your phone’s GPS is ON and you have the snapchat app open. So, people can zoom in and know your exact coordinates and even your house-no and residential details.
Q2. Is Snapchat Location ever wrong?
A - Snapchat tries to provide the accurate location most of the time. It uses your geo-coordinates that it detects when you Switch ON the GPS on your phone. It tracks the location in which your snap is taken and if you are on snapmap and sharing your location, it can provide the exact details of the place you are in. However, there is no authentic report that says that Snapchat shows 100% accurate location or if it can go wrong sometimes.
Q3. How do you tell if someone is hiding their location from you on snapchat?
A - They will disappear off of the world map. Literally! So, whenever someone is hiding their location from you, it means they’ve either activated the Ghost Mode or they turned off the Location services of their phone. As a result, you will not find their bitmoji on the snapmap even if they are actively using the app. But if they’ve employed a Location spoofer, it is hard to say if the location is real or not.
Part 4: Conclusion
Now that you have learnt how to fake location on snapchat map, understand that these methods have their own hierarchy of success. While the location spoofer stands at the top-spot, using a VPN is the next best thing. If you want to rely on in-built features, know that they aren’t always successful. Make the right choice and keep your location a secret for your own privacy.
Also read:
- [New] Deciphering the Secrets to BG Purging in Figma Layouts
- 1. Understanding .NET Setup Arguments: A Comprehensive Guide
- Driver Easy - Update your drivers in Windows 11,10 and 7.
- Founders Vs. AIB Graphics Processing Power Comparison
- How to Exit Android Factory Mode On Vivo Y78 5G? | Dr.fone
- How to identify missing hardware drivers with Windows Device Manager in Windows 11/10
- How to Stop My Spouse from Spying on My Nubia Z50S Pro | Dr.fone
- In 2024, All You Need To Know About Mega Greninja For Vivo Y100t | Dr.fone
- In 2024, Amplify Visual Impact Mastering the Art of Applying LUTs with OBS Studio
- In 2024, How and Where to Find a Shiny Stone Pokémon For Vivo X100 Pro? | Dr.fone
- In 2024, Preparation to Beat Giovani in Pokemon Go For Samsung Galaxy Z Fold 5 | Dr.fone
- In 2024, Where Is the Best Place to Catch Dratini On Vivo X100 | Dr.fone
- Mac Mastery: Discover How to Retrieve Hidden Password Data with Ease
- Planning to Use a Pokemon Go Joystick on Vivo Y78t? | Dr.fone
- Step-by-Step Solution for Overcoming ‘This OS Is Not Supported’ Error When Setting Up Software
- Troubleshooting: Why FIFA 21 Won't Start – Solutions Inside
- Where Is the Best Place to Catch Dratini On Vivo S17 | Dr.fone
- Title: How To Teleport Your GPS Location On Xiaomi Civi 3? | Dr.fone
- Author: Nova
- Created at : 2025-01-10 23:44:52
- Updated at : 2025-01-17 04:25:23
- Link: https://change-location.techidaily.com/how-to-teleport-your-gps-location-on-xiaomi-civi-3-drfone-by-drfone-virtual-android/
- License: This work is licensed under CC BY-NC-SA 4.0.