
How To Teleport Your GPS Location On Realme 12+ 5G? | Dr.fone
How To Teleport Your GPS Location On Realme 12+ 5G?
While playing games like Pokemon Go, you are in desperate need of finding more Pokémon. If so, changing your location is a necessity that needs to be figured out. For that, teleporting the GPS location of the Realme 12+ 5G device is the optimal solution. To carry this out, Wondershare Dr.Fone - Virtual Location provides a perfect system for fake locations.
Part 1: Teleport to Anywhere in the World (Teleport Mode)
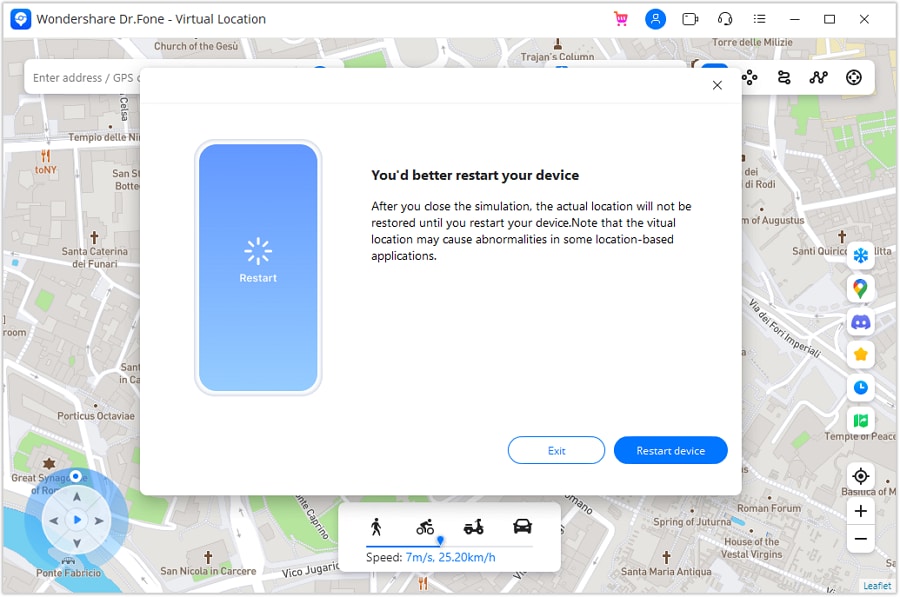
Note: Once you teleport or move to a virtual place, you can restore to the actual location by restarting the Realme 12+ 5G device. You will see a prompt that reminds you to restart your device to restore the location of the connected device when you close the Virtual Location. Click Restart Device and close the program.
* Dr.Fone Mac version still has the old interface, but it does not affect the use of Dr.Fone function, we will update it as soon as possible.
The Teleport Mode offered in Virtual Location is a great way to change the location of iOS/Android devices. If you wish to show a different location to someone else, the best way is to use this mode on Virtual Location. This can be done by following the steps described below:
Step 1Activate Teleport Mode
Once you have connected your smartphone, continue to select the Teleport Mode option from the top-right section. The particular icon is represented by the first icon from the left in that section.

Step 2Add Location To Teleport
After activating Teleport Mode, click the search bar on the top-left to type in the location where you want to shift. After adding the location, hit Enter to proceed.

Note: If you can’t find your current location when searching spots on the map, you can click the Current Virtual Location icon on the right sidebar to show your current virtual location.
Step 3Confirm the Location For Teleporting
You will be directed to the particular, and the map will display it for confirmation. If you are willing to teleport to this specific location, click Move Here.

Step 4Location Successfully Changed On Computer
The location of the smartphone will be instantly changed to the selected location and will be displayed on the map.

Step 5Location Changed On the Smartphone
Open your smartphone and access its maps application. Look into the current location of the Realme 12+ 5G device and verify it to be the same as the changed location on the computer.

Part 2: Instantaneous Movement Between Multiple Points (Jump Teleport Mode)
Wondershare Dr.Fone - Virtual Location also allows the movement of the smartphone device between multiple places with the Jump Teleport Mode. If you want to make your location spoofing look realistic, the steps below will be beneficial:
Step 1Activate Jump Teleport Mode
You will have to first access the Jump Teleport Mode option from the second icon from the left in the top-right section. This can be done after teleporting the location of the smartphone device.
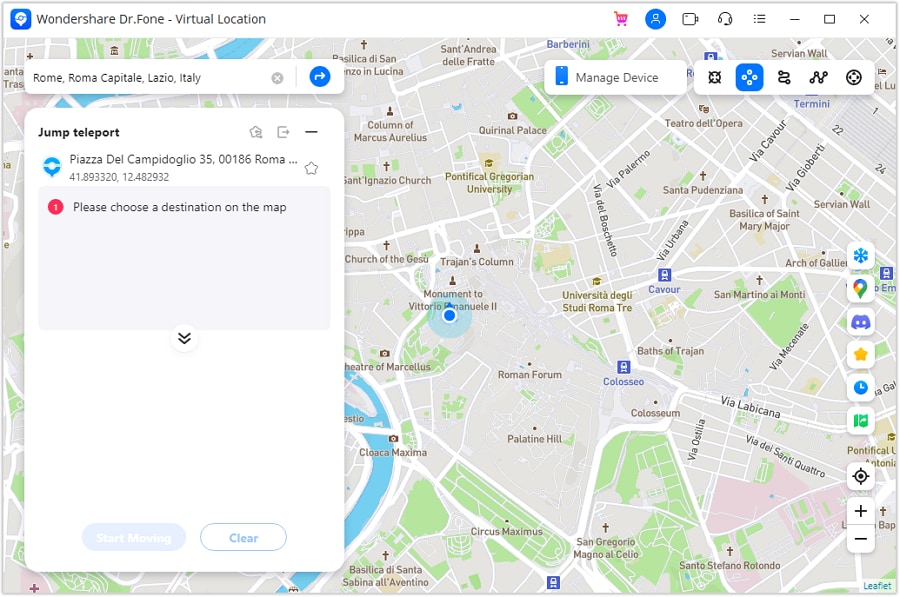
Step 2Set Spots to Jump Teleport
Continue to select the spots you want to pass one by one on the map by simply tapping on them with your mouse. After selecting multiple spots, click the Start Moving button at the bottom of the left panel to start the movement.

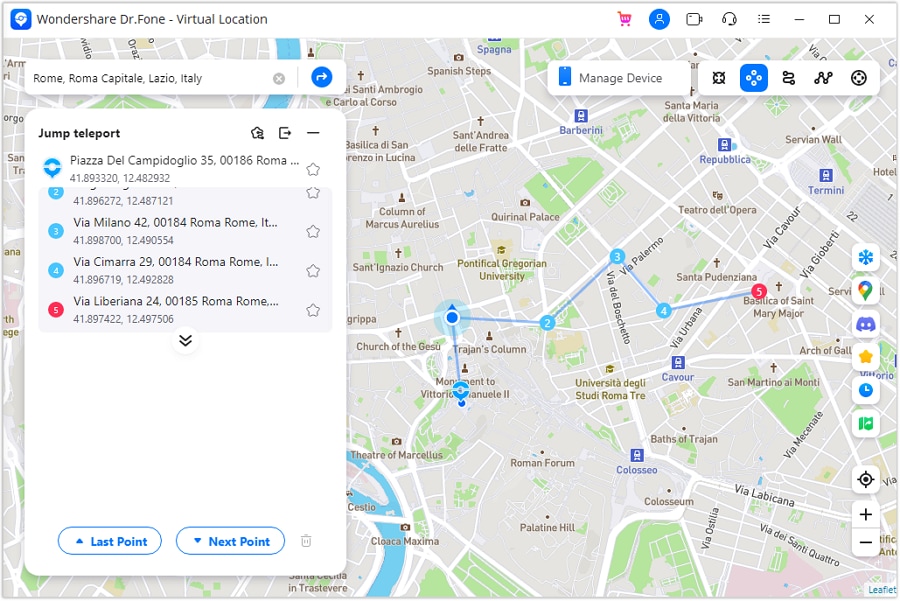
Step 3Change Location Between Set Spots
As prescribed, you can propagate amongst the set spots with the Jump Teleport Mode. Use the Next Point and Last Point buttons to shift your location.
How to Use Life360 on Windows PC For Realme 12+ 5G?
Life360 is an online platform that utilizes geo-location services to help users share their real-time location with friends and family. The app allows people to create a family group and stay connected to each other through features like chatting, sharing location, sending safety alerts, etc.
As of now, you cannot run Life360 on computer as it is only available for Android and iOS. Why? Because as opposed to a PC, one can easily carry their device everywhere! It means whether your kid is stuck in traffic and needs your help or your parents have lost their way back home, Life360 will instantly send you an alert on your device.
However, that doesn’t mean you cannot use Life360 on a PC. While it may seem a bit odd, there are a couple of methods that’ll allow you to get the Life360 app for Windows. In today’s guide, we are going to share some of these methods that’ll help you run the Life360 app on Windows.
So, without wasting another second, let’s dive straight into the guide.
Part 1: Why people seek to use Life360 on PC?
First things first; why would anyone want to use a family locator app like Life360 on their PC? Well, the truth is everyone has their own reason to get Life360 for PC. For instance, let’s say you are in the middle of an important project and don’t want to be bothered by alerts on your smartphone. However, you still don’t want to compromise with the safety of your family members.
In this situation, you can simply run the Life360 app on PC. This will allow you to directly keep track of the whereabouts of family members on your Windows system and you won’t have to constantly check your phone.
Life360 can also be used on a computer when your phone’s battery has completely drained and there’s no power outlet nearby. In this case, you can simply power-on your laptop, start the Life360 app and send your current whereabouts to family members.
Part 2: Is it possible to use Life360 on Windows PC?
Life360 is an extremely useful app for people who are always concerned about their closed ones. The app is basically designed with a vision to keep family members connected and safe. In addition to location sharing, the app also provides exclusive features like crash detection, place alerts, speed alerts, battery monitoring, etc.
The app also makes it easier for parents to monitor their child’s movement. Using the app, you can always know that your kids have safely reached school and back home. For any parent, knowing whether the kids are safe, is one less thing to worry about.
However, as we mentioned earlier, Life360 hasn’t been released for Windows yet. So, there’s no direct way to install and run the app on a Windows PC. While Life360 may release a dedicated Windows software in the future, as of now, you can only run it using the alternative methods.
These methods include:
Part 3: Use Life360 on Windows PC with Android emulator
The first and the most convenient way to run Life360 on computer is to use an Android Emulator. An emulator is basically a software that creates a virtual Android system on your computer. As a result, you’ll be able to run Android apps on your computer.
While there are dozens of Android emulators, Bluestacks seems to be the most popular and user-friendly option among all. Unlike other emulators, Bluestacks is easy to set up and use.
Here’s how you can run Life360 on a computer using Bluestacks Android emulator./
Step 1: Head over to Bluestacks official website and tap the download button.
Step 2: Open the installer and tap the “download” button. This will initiate the download process on your System.
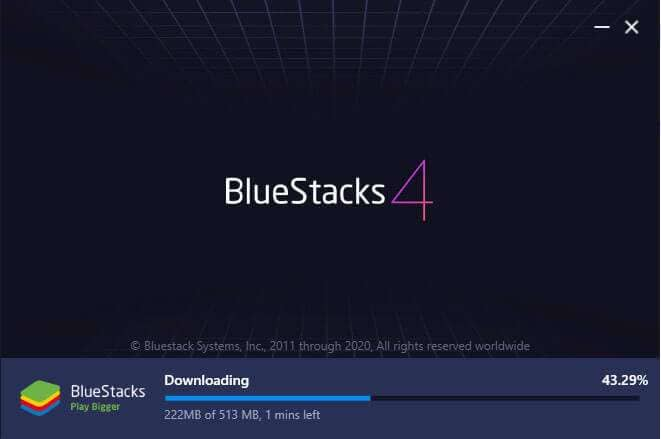
Step 3: Once the installation process completes, Bluestacks will start to boot. Keep in mind that the first boot may take some time, depending on your system configurations.

Step 4: In the home screen, tap the “Google Play Store” icon. You’ll be asked to sign-in with your Google account. Enter the right credentials and log-in to the Google Play Store.

Step 5: In the top search bar, type-in Life360 and tap the “install” button to download the app.

Step 6: Life360 is now installed on your computer. Open the app and enter your login details. You’ll now be able to run Life360 on your PC.

Part 4: Use Life360 by mirroring Android to Windows PC
While running an emulator is a great way to get Life360 on PC, it has its own set of challenges. For instance, running an Android emulator is not easy when you have a low-configuration PC. Emulators like Bluestacks requires high system configuration otherwise they take forever to load.
In this situation, we have another alternative for you to run Life360 on PC. You can simply mirror your Android to your Windows system. Mirroring the Android device will allow you to see its content on the PC itself.
Here’s how you can mirror the Android device on your PC.
Step 1: Make sure that Bluetooth is activated on both devices.
Step 2: On your Windows PC, open “Settings” and select the “Systems” tab.

Step 3: Choose the “Projecting to this PC” option in the left menu-bar and make sure that “Available Everywhere” is selected.

Step 4: If you’re running Android Pie or above on your device, scroll down to open notification drawer and select “Smart View” (or “Cast” in some devices). You’ll see your PC listed here. Tap the button to start Android mirroring.

Step 5: It may take some while for the connection to establish. Once it does, you’ll be able to cast your device screen onto your computer and you’ll be able to run life360 on your system.
Keep in mind that you’ll still require your device to navigate through the content on your computer. Any action that you perform on your device will be replicated on your computer screen as well.
Final Verdict
Life360 is probably among the top family locators for Android users. Apart from its extensive range of features, the app provides a user-friendly interface, which allows it easier for even elders to use the app without any issues. Even though there isn’t a dedicated Life360 software for Windows, you can follow the above-mentioned methods to run the Life360 on PC.
You Might Also Like
Location-based apps
GPS spoof for dating apps
GPS spoof for social apps
Pokemon Go on PC
AR game tricks

Change Phone GPS Location Easily
- ● Teleport GPS location to anywhere
- ● Play AR games without moving
- ● Spoof Location on the popular Apps
How to Find iSpoofer Pro Activation Key On Realme 12+ 5G?
There are specific situations where it is necessary to fake your GPS location. By spoofing locations, you can teleport to anywhere in the world, hide your true location to prevent others from tracking you, have access to content that is restricted in your current location, and so on. Spoofing locations is also conducive in location-based games such as Pokémon GO.
There are specific applications that allow you to spoof the location of your device. However, there are no such apps for iPhones as Apple does not allow GPS spoofing apps in the App store. To change the location of your iPhone, you can connect it to your PC and use a spoofing application there to change its location. We are going to talk about iSpoofer, a professional location spoofing application; 3 ways to get the iSpoofer Pro Plan License Key for free; Wondershare Dr.Fone - Virtual Location (iOS), a better alternative to iSpoofer; and the steps to spoof your iPhone GPS location using Wondershare Dr.Fone - Virtual Location (iOS).
Part 1: Ways to Get the iSpoofer Pro Plane License Key Free 2022
iSpoofer is a professional GPS simulation desktop application that can be used to spoof the GPS location of an iOS device. It runs on Windows and Mac computers. To change the GPS location of your iOS device, you have to install and run this application on your PC, connect your iOS device to your PC, and then spoof its location by using the application on your PC.
iSpoofer has a free version and 2 subscription plans - Pro plan and Volume plan. For unlimited spoofing, you can use the Pro plan of iSpoofer, which is available at $4.95 per month. With this plan, you can change the location of up to 3 iOS devices at once. To activate iSpoofer Pro on your PC, you will have to enter a license key sent to you via email after you pay for its subscription. However, there are a few tricks with which you can get this license key without subscribing and activate iSpoofer Pro and use it for free. Below, we have mentioned 3 ways to get a free iSpoofer Pro Plan License Key.
- Check on Community Days: The game Pokémon GO sometimes offers free iSpoofer Pro PlanLicense Keys on Community Days. Community Day is a worldwide special event in Pokémon GO that occurs every month for a few hours. Various kinds of special bonuses and rewards are offered on Community Days. Among these offers, a free iSpoofer Pro Plan License Key might be available on a particular Community Day. Make assured you do not miss this offer because the key will be available only for a few hours before it gets expired.

- Check out websites: Certain websites throughout the internet occasionally offer free iSpoofer Pro Plan License Keys. Try to check them out from time to time, and someday you might be lucky to get a free iSpoofer Pro Plan License Key. One of such websites is http://www.spoofer.pro/.

- Subscribe to YouTube channels: Another way to get a free iSpoofer Pro PlanLicense Key is to subscribe to YouTube channels that offer giveaways of these license keys. There are specific YouTube channels that offer free iSpoofer Pro Plan License Keys to their lucky subscribers. Make sure you subscribe to such channels and keep checking their videos, especially around giveaway times, to see if you are the lucky subscriber to win the giveaway.

Part 2: The safer way to Spoof on iPhone
A much better and safer way to spoof your iPhone location is to do it using Wondershare Dr.Fone - Virtual Location (iOS). It is a desktop application that can be used to instantly fake the GPS location of your iOS device with just a click of your mouse. It is compatible with both Windows and Mac computers. You can use this fantastic application to safely change your GPS location on several applications, including WhatsApp, Snapchat, Tinder, and Pokémon GO. It allows you to change the location of up to 5 iOS devices at once.
Key features:
- It comes with an integrated joystick feature for controlling GPS movement.
- GPS movement can also be controlled with a keyboard.
- Offers 3 modes - teleport your location, simulate movement between two spots, and simulate movement along a specified route.
- Offers; both automatic and manual GPS movements.
- Compatible with Windows XP and above, and Mac OS X 10.13 and above.
- Requires a minimum RAM of 256 MB and a minimum free hard disk space of 200 MB.
Steps to spoof your iPhone location using Wondershare Dr.Fone - Virtual Location (iOS):
- Download and install Wondershare Dr.Fone - Virtual Location (iOS) on your Windows or Mac PC. Launch the application.
- Once the application is launched, a window will appear with a variety of options. Click “Virtual Location” from those options.

- Connect your iPhone to your PC. via USB cord. Once your device is connected successfully, click on the “Get Started” button.

- A new window will appear where the actual GPS location of your iPhone will be shown. If it is not accurately displayed, click on the “Center On” icon in the lower right part of the window to show the accurate location.
- Click on the “teleport mode” icon in the upper-right part of the window (the 3rd one from the right). This will activate “teleport mode”.
- In the search bar in the upper left part of the window, enter the name of the desired location where you wish to teleport. Then click “Go”.
- A popup box will appear. Click “Move Here”.
- With that, the GPS location of your iPhone has been successfully changed and fixed. You can check it by clicking on the “Center On” icon or checking your iPhone’s location. Also, the location of the location-based app; you are currently using on your iPhone has been successfully changed too.
Conclusion
So, that was all about the article. We have discussed 3 simple tricks to get a free iSpoofer Pro Plan License Key. Then, compared with iSpoofer Pro which allows you to change the location of up to 3 iOS devices at once, Wondershare Dr.Fone - Virtual Location (iOS) allows you to change the location up to 5 iOS devices at once. Compared with iSpoofer Pro, it is safer and easier to use and comes with more features.
Also read:
- [New] Mirth in Monotony Best-Humored Fb Jail Cell Captures for 2024
- [New] Techniques for Transferring Media Between Two iPhones for 2024
- [Updated] Adobe Audition Tutorial Managing Sound Curves
- [Updated] Transforming Shopping Insights Into YouTube Paychecks
- About Vivo G2 FRP Bypass
- Bypassing Steam's Secure Content Lock: A Step-by-nStep Guide
- Economical Gaming Inputs for Console and PC Gamers
- Essential Tips on Enabling Protective Measures in Windows 11
- Home Button Not Working on Realme 12 Pro+ 5G? Here Are Real Fixes | Dr.fone
- Honor Play 8T Bootloop Problem, How to Fix it Without Data Loss | Dr.fone
- How can I get more stardust in pokemon go On Vivo Y100i? | Dr.fone
- How to Exit Android Factory Mode On OnePlus Ace 2V? | Dr.fone
- How To Teleport Your GPS Location On Xiaomi Redmi K70? | Dr.fone
- In 2024, How can I get more stardust in pokemon go On Xiaomi Redmi A2+? | Dr.fone
- In 2024, List of Pokémon Go Joysticks On Xiaomi Redmi A2 | Dr.fone
- Planning to Use a Pokemon Go Joystick on Vivo Y28 5G? | Dr.fone
- The Most Useful Tips for Pokemon Go Ultra League On Vivo V30 Lite 5G | Dr.fone
- Top Asia Dialects: Fast Reorder & Preserve Status
- Ultimate Guide on Vivo V30 Pro FRP Bypass
- Title: How To Teleport Your GPS Location On Realme 12+ 5G? | Dr.fone
- Author: Nova
- Created at : 2025-01-16 02:23:58
- Updated at : 2025-01-16 18:35:20
- Link: https://change-location.techidaily.com/how-to-teleport-your-gps-location-on-realme-12plus-5g-drfone-by-drfone-virtual-android/
- License: This work is licensed under CC BY-NC-SA 4.0.