
How To Teleport Your GPS Location On Motorola Moto G04? | Dr.fone
How To Teleport Your GPS Location On Motorola Moto G04?
While playing games like Pokemon Go, you are in desperate need of finding more Pokémon. If so, changing your location is a necessity that needs to be figured out. For that, teleporting the GPS location of the Motorola Moto G04 device is the optimal solution. To carry this out, Wondershare Dr.Fone - Virtual Location provides a perfect system for fake locations.
Part 1: Teleport to Anywhere in the World (Teleport Mode)
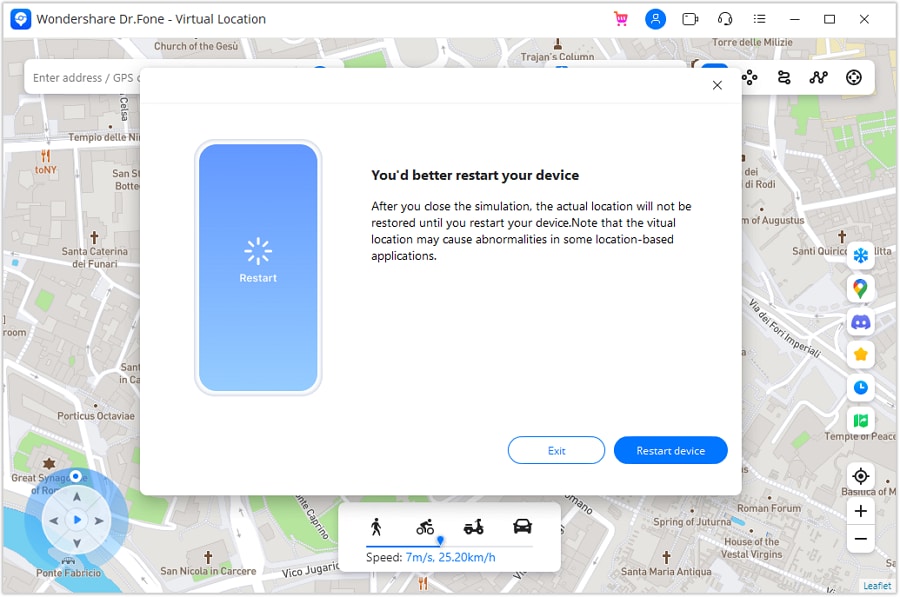
Note: Once you teleport or move to a virtual place, you can restore to the actual location by restarting the Motorola Moto G04 device. You will see a prompt that reminds you to restart your device to restore the location of the connected device when you close the Virtual Location. Click Restart Device and close the program.
* Dr.Fone Mac version still has the old interface, but it does not affect the use of Dr.Fone function, we will update it as soon as possible.
The Teleport Mode offered in Virtual Location is a great way to change the location of iOS/Android devices. If you wish to show a different location to someone else, the best way is to use this mode on Virtual Location. This can be done by following the steps described below:
Step 1Activate Teleport Mode
Once you have connected your smartphone, continue to select the Teleport Mode option from the top-right section. The particular icon is represented by the first icon from the left in that section.

Step 2Add Location To Teleport
After activating Teleport Mode, click the search bar on the top-left to type in the location where you want to shift. After adding the location, hit Enter to proceed.

Note: If you can’t find your current location when searching spots on the map, you can click the Current Virtual Location icon on the right sidebar to show your current virtual location.
Step 3Confirm the Location For Teleporting
You will be directed to the particular, and the map will display it for confirmation. If you are willing to teleport to this specific location, click Move Here.

Step 4Location Successfully Changed On Computer
The location of the smartphone will be instantly changed to the selected location and will be displayed on the map.

Step 5Location Changed On the Smartphone
Open your smartphone and access its maps application. Look into the current location of the Motorola Moto G04 device and verify it to be the same as the changed location on the computer.

Part 2: Instantaneous Movement Between Multiple Points (Jump Teleport Mode)
Wondershare Dr.Fone - Virtual Location also allows the movement of the smartphone device between multiple places with the Jump Teleport Mode. If you want to make your location spoofing look realistic, the steps below will be beneficial:
Step 1Activate Jump Teleport Mode
You will have to first access the Jump Teleport Mode option from the second icon from the left in the top-right section. This can be done after teleporting the location of the smartphone device.
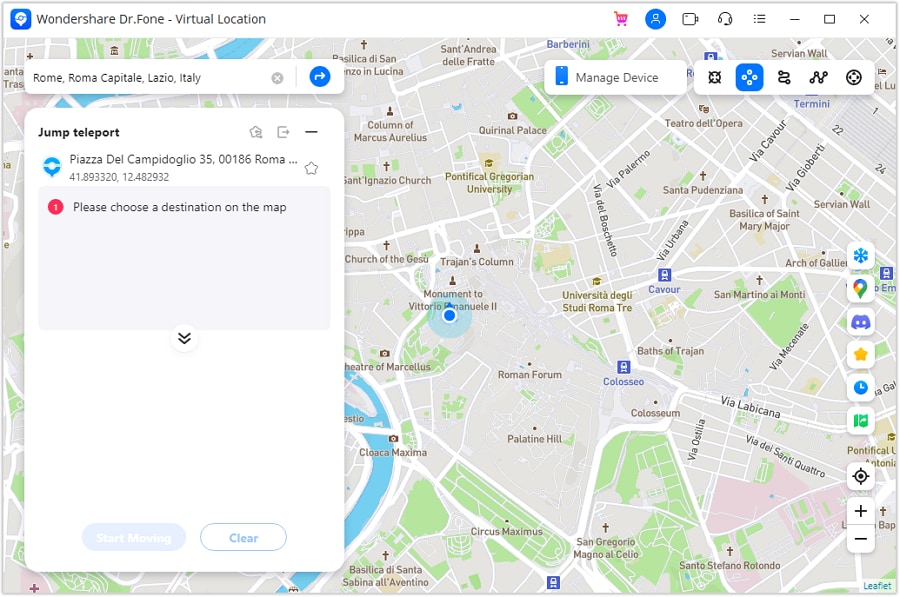
Step 2Set Spots to Jump Teleport
Continue to select the spots you want to pass one by one on the map by simply tapping on them with your mouse. After selecting multiple spots, click the Start Moving button at the bottom of the left panel to start the movement.

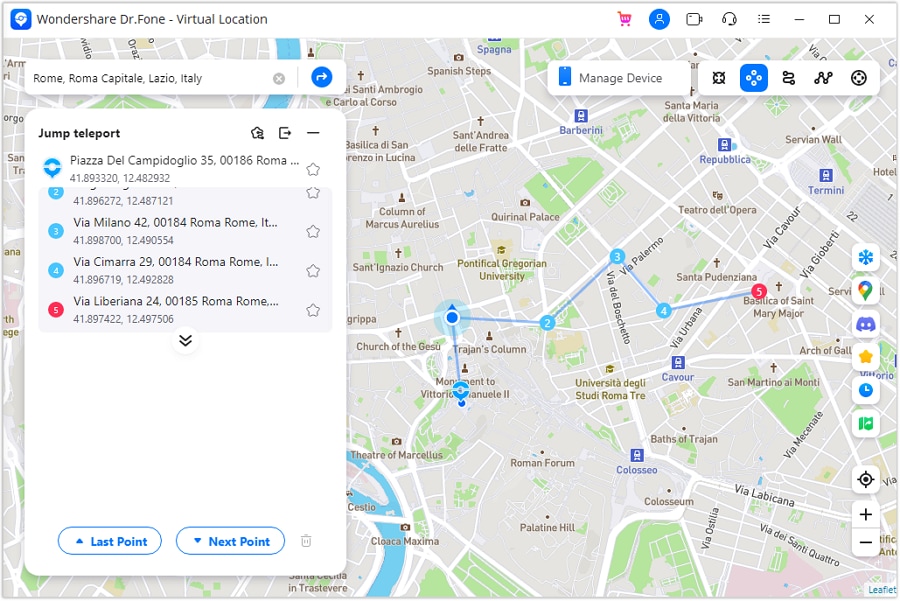
Step 3Change Location Between Set Spots
As prescribed, you can propagate amongst the set spots with the Jump Teleport Mode. Use the Next Point and Last Point buttons to shift your location.
How to Find iSpoofer Pro Activation Key On Motorola Moto G04?
There are specific situations where it is necessary to fake your GPS location. By spoofing locations, you can teleport to anywhere in the world, hide your true location to prevent others from tracking you, have access to content that is restricted in your current location, and so on. Spoofing locations is also conducive in location-based games such as Pokémon GO.
There are specific applications that allow you to spoof the location of your device. However, there are no such apps for iPhones as Apple does not allow GPS spoofing apps in the App store. To change the location of your iPhone, you can connect it to your PC and use a spoofing application there to change its location. We are going to talk about iSpoofer, a professional location spoofing application; 3 ways to get the iSpoofer Pro Plan License Key for free; Wondershare Dr.Fone - Virtual Location (iOS), a better alternative to iSpoofer; and the steps to spoof your iPhone GPS location using Wondershare Dr.Fone - Virtual Location (iOS).
Part 1: Ways to Get the iSpoofer Pro Plane License Key Free 2022
iSpoofer is a professional GPS simulation desktop application that can be used to spoof the GPS location of an iOS device. It runs on Windows and Mac computers. To change the GPS location of your iOS device, you have to install and run this application on your PC, connect your iOS device to your PC, and then spoof its location by using the application on your PC.
iSpoofer has a free version and 2 subscription plans - Pro plan and Volume plan. For unlimited spoofing, you can use the Pro plan of iSpoofer, which is available at $4.95 per month. With this plan, you can change the location of up to 3 iOS devices at once. To activate iSpoofer Pro on your PC, you will have to enter a license key sent to you via email after you pay for its subscription. However, there are a few tricks with which you can get this license key without subscribing and activate iSpoofer Pro and use it for free. Below, we have mentioned 3 ways to get a free iSpoofer Pro Plan License Key.
- Check on Community Days: The game Pokémon GO sometimes offers free iSpoofer Pro PlanLicense Keys on Community Days. Community Day is a worldwide special event in Pokémon GO that occurs every month for a few hours. Various kinds of special bonuses and rewards are offered on Community Days. Among these offers, a free iSpoofer Pro Plan License Key might be available on a particular Community Day. Make assured you do not miss this offer because the key will be available only for a few hours before it gets expired.

- Check out websites: Certain websites throughout the internet occasionally offer free iSpoofer Pro Plan License Keys. Try to check them out from time to time, and someday you might be lucky to get a free iSpoofer Pro Plan License Key. One of such websites is http://www.spoofer.pro/.

- Subscribe to YouTube channels: Another way to get a free iSpoofer Pro PlanLicense Key is to subscribe to YouTube channels that offer giveaways of these license keys. There are specific YouTube channels that offer free iSpoofer Pro Plan License Keys to their lucky subscribers. Make sure you subscribe to such channels and keep checking their videos, especially around giveaway times, to see if you are the lucky subscriber to win the giveaway.

Part 2: The safer way to Spoof on iPhone
A much better and safer way to spoof your iPhone location is to do it using Wondershare Dr.Fone - Virtual Location (iOS). It is a desktop application that can be used to instantly fake the GPS location of your iOS device with just a click of your mouse. It is compatible with both Windows and Mac computers. You can use this fantastic application to safely change your GPS location on several applications, including WhatsApp, Snapchat, Tinder, and Pokémon GO. It allows you to change the location of up to 5 iOS devices at once.
Key features:
- It comes with an integrated joystick feature for controlling GPS movement.
- GPS movement can also be controlled with a keyboard.
- Offers 3 modes - teleport your location, simulate movement between two spots, and simulate movement along a specified route.
- Offers; both automatic and manual GPS movements.
- Compatible with Windows XP and above, and Mac OS X 10.13 and above.
- Requires a minimum RAM of 256 MB and a minimum free hard disk space of 200 MB.
Steps to spoof your iPhone location using Wondershare Dr.Fone - Virtual Location (iOS):
- Download and install Wondershare Dr.Fone - Virtual Location (iOS) on your Windows or Mac PC. Launch the application.
- Once the application is launched, a window will appear with a variety of options. Click “Virtual Location” from those options.

- Connect your iPhone to your PC. via USB cord. Once your device is connected successfully, click on the “Get Started” button.

- A new window will appear where the actual GPS location of your iPhone will be shown. If it is not accurately displayed, click on the “Center On” icon in the lower right part of the window to show the accurate location.
- Click on the “teleport mode” icon in the upper-right part of the window (the 3rd one from the right). This will activate “teleport mode”.
- In the search bar in the upper left part of the window, enter the name of the desired location where you wish to teleport. Then click “Go”.
- A popup box will appear. Click “Move Here”.
- With that, the GPS location of your iPhone has been successfully changed and fixed. You can check it by clicking on the “Center On” icon or checking your iPhone’s location. Also, the location of the location-based app; you are currently using on your iPhone has been successfully changed too.
Conclusion
So, that was all about the article. We have discussed 3 simple tricks to get a free iSpoofer Pro Plan License Key. Then, compared with iSpoofer Pro which allows you to change the location of up to 3 iOS devices at once, Wondershare Dr.Fone - Virtual Location (iOS) allows you to change the location up to 5 iOS devices at once. Compared with iSpoofer Pro, it is safer and easier to use and comes with more features.
How to Fix Motorola Moto G04 Find My Friends No Location Found?

In this time of modern technology, it is hard to be away from your phone or even leave it at home. When any task that we plan to do, usually already have an application released for the sole purpose of doing that task and needing to do it on your phone. When we message our friends, have a video call with our family, or just simply order food to eat at home, you can do all of them on the Motorola Moto G04 device in your palm.
Another advantage of having our phones with us all the time is that you can also see the current location of either your friend or family. For Apple phone users, they have an app that is called “Find My Friends” that will show you the locations of the people that you are tracking. But what if you cannot find the location of the friend? We will find out the causes as to why no location can be found and how you can fix this in just a few simple steps.
Part 1: Why does an Motorola Moto G04 say “no location found”?
When you are searching for your friend’s current location and it shows that “no location found”, there could be numerous reasons as to why that is happening. We have listed down the possible reasons why there is no location found.
Option #1: Your friend has not signed in to the “Find My Friends” application. Make sure that they are registered in the application before tracking their location.
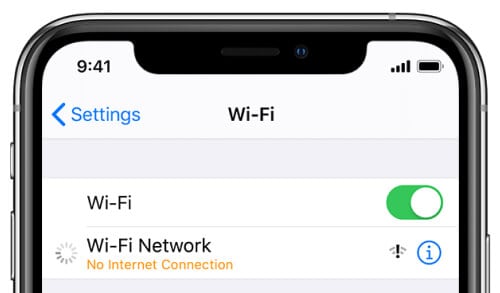
Option #2: The other person’s mobile is not connected to the internet or their phone is off. This could also be another common reason why you cannot see their location.
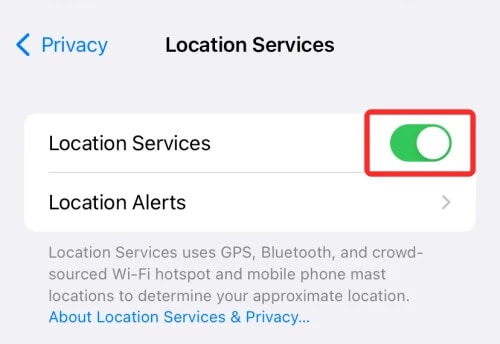
Option #3: Make sure that their “Location Services” is turned on. Some users would turn this feature off which hinders the application from checking their current location.
Option #4: The other user must have set up the wrong date and time. If the date and time do not correspond to the global time, then it will cause problems and difficulty with tracking that user.
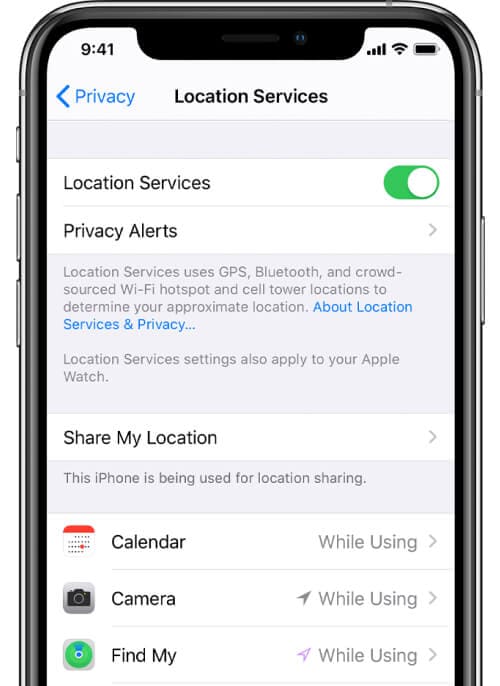
Option #5: The application might not have been enabled under “Location Services”. Make sure that the application has the permission to track your current location and you can do this by following the steps below.
- Step 1: Go to “Settings” and then “Privacy”.
- Step 2: You can then go to “Location Services” and make sure that the application “Find My Friends” is enabled to track your location.
Part 2: Tips To Fix “No Location Found” Available
If you encounter an issue that says “No Location Found”, there are numerous ways you can fix the “No Location Found” message on “Find My Friends” and we will share them with you.
Option #1: Adjust your phone’s date and time. You can reset your time by following the steps.
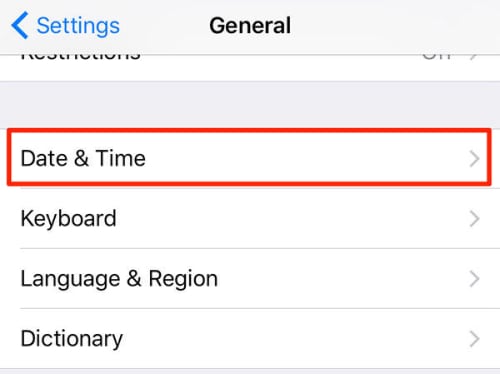
- Step 1: Go to “Settings” and choose “General”.
- Step 2: Then click on “Date & Time” and you can manually or automatically set the time.
Option #2: Make sure that you or the other user is connected to the internet. Double-check if your phone is connected to the internet.
Option #3: Turn off and turn on your “Location Services”. Usually, this simple troubleshooting can fix this issue, you can try this out and check if you can see their location now. They can turn it on by following the steps below.
- Step 1: Go to “Settings” and choose “Privacy”.
- Step 2: After, you can look for “Location Services” and enable it.
Option #4: Enable “Location Services” for the “Find My Friends” application. There could be instances where your “Location Services” is not enabled for the application.
Part 3: How to Share Your Location with Find My Friends App?
If you want to share your location in the “Find My Friends” application, you can do that by following the steps below.
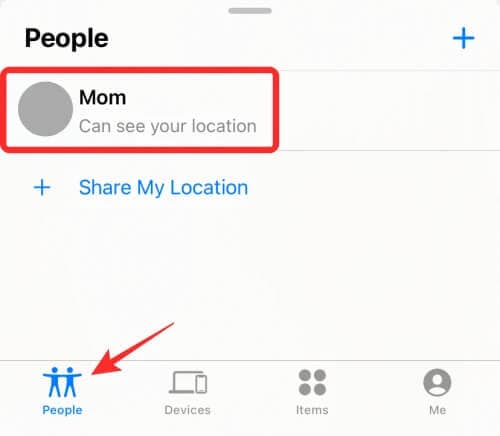
- Step 1: Open the “Find My Friends” application and select “People”.
- Step 2: Then you can tap on “Share My Location” and from there, you can type the phone number of the person you want to share your location too. You can also specify the amount of time you will share your location.
Part 4: How to Share a Fake Location to Others in Find App?
Sometimes we want our location to be kept secret and send a fake one to our friends and family. You can do that in our app, “Dr. Fone - Virtual Location “ which allows you to share a fake location with your friends.
Dr.Fone - Virtual Location
1-Click Location Changer for both iOS and Android
- Teleport from one location to another across the world from the comfort of your home.
- With just a few selections on your computer, you can make members of your circle believe you’re anywhere you want.
- Stimulate and imitate movement and set the speed and stops you take along the way.
- Compatible with both iOS and Android systems.
- Work with location-based apps, like Pokemon Go , Snapchat , Instagram , Facebook , etc.
3981454 people have downloaded it
You can use this application by following the steps below.
Step 1: Download the “Dr. Fone - Virtual Location” software on your laptop. Open and choose “Virtual Location”.
Step 2: You can then connect your phone to your computer and click on “Get Started”.
Step 3: You will then be redirected to your current location on the new page.
Step 4: If you want to change your location, you will need to turn on the “Teleportation” mode by clicking on the first icon, typing the location you want, and then clicking on the “Go” icon.
Step 5: Click on “Move Here” and your current location will show up as the location that you typed on Your Motorola Moto G04.
Conclusion
We hope the tips we shared helped fix the “No Location Found” issue on your phone. Sometimes basic troubleshooting such as restarting your phone or turning off and on your GPS. You can also use our tip to use a fake location that you can send to your friends if you want to play a prank on them.
Also read:
- [New] 10 Must-Know iPhone Photography Tips Today for 2024
- [New] 2024 Approved The Essentials 2023'S Highest-Ranked Twitter Content
- [New] Elite Workplace Cloud Data Haven for 2024
- [New] Frame-by-Frame Focus Analyzing Recorder Quality
- [New] The Ultimate Guide to Efficient Mac Screenshotting via Keyboard
- Foray Into Video Fidelity An Initialist's Perspective
- Here Are Some Reliable Ways to Get Pokemon Go Friend Codes For Vivo S17 | Dr.fone
- How to Change GPS Location on Samsung Galaxy M34 Easily & Safely | Dr.fone
- In 2024, Best Pokemons for PVP Matches in Pokemon Go For Vivo Y200e 5G | Dr.fone
- In 2024, How to Get and Use Pokemon Go Promo Codes On Vivo V27e | Dr.fone
- Latest way to get Shiny Meltan Box in Pokémon Go Mystery Box On Vivo X100 | Dr.fone
- Latest way to get Shiny Meltan Box in Pokémon Go Mystery Box On Xiaomi Redmi Note 12 Pro 5G | Dr.fone
- Start Saving with Reddit Today - 13 Easy & Effective Strategies (No Experience)
- Transform Your Footage with the Ideal Dimension Proportion
- Why does the pokemon go battle league not available On Vivo S18 Pro | Dr.fone
- Title: How To Teleport Your GPS Location On Motorola Moto G04? | Dr.fone
- Author: Nova
- Created at : 2025-01-20 01:17:11
- Updated at : 2025-01-23 09:32:12
- Link: https://change-location.techidaily.com/how-to-teleport-your-gps-location-on-motorola-moto-g04-drfone-by-drfone-virtual-android/
- License: This work is licensed under CC BY-NC-SA 4.0.