
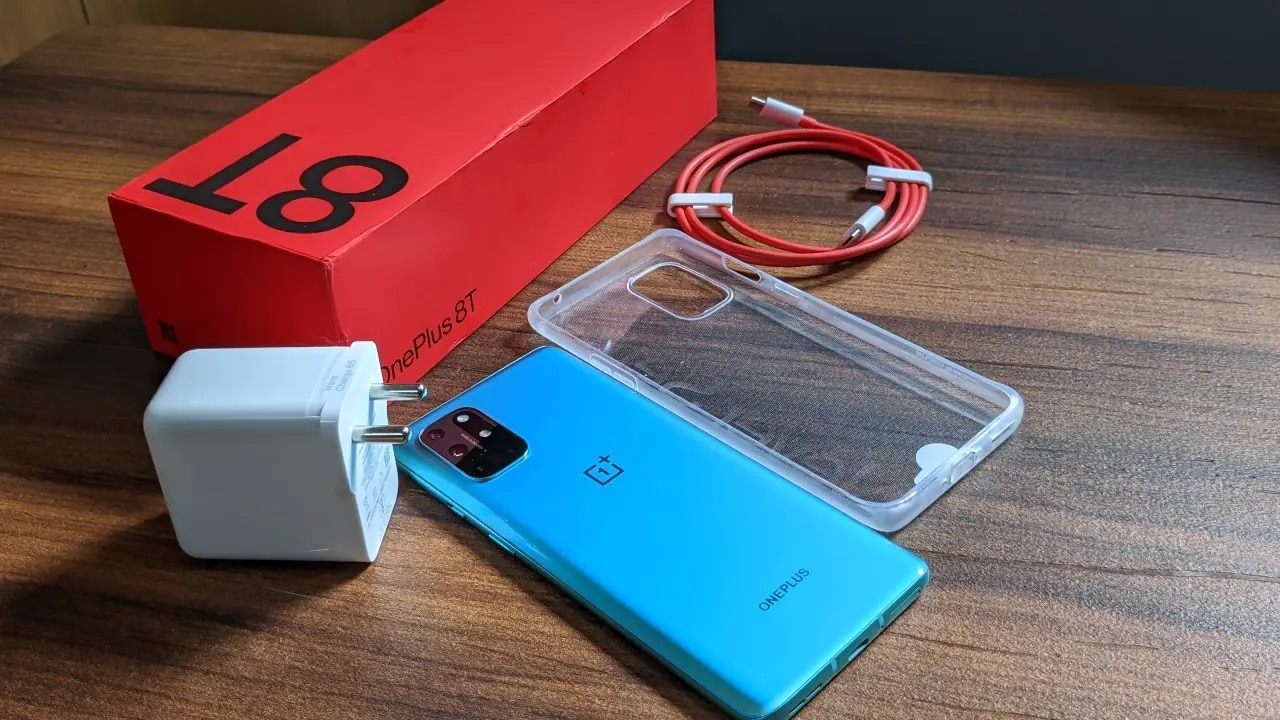
How to Fix Error 495 While Download/Updating Android Apps On Honor X50i | Dr.fone
How to Fix Error 495 While Download/Updating Android Apps On Honor X50i
Error 495 is a common error that occurs while downloading or updating apps from Google Play Store. This error is usually caused by a problem with the Google Play Store, and it can be fixed by clearing the cache and data of the Google Play Store app. If you are experiencing this error, follow the steps below to fix it.
In this article, you will learn why the Android error 495 pops up, possible solutions to bypass, as well as a dedicated repair tool to radically fix error 495.
We always like to explore every new feature or the features that already exist on our devices. We have a tendency to be the master of our device and want to know every bit of the handset. Unexpected errors ruin that experience and it is just frustrating to experience these errors. And the worst part is that we have no idea where we are wrong or what we did that led to the error. Same is the case with the error 495 which occurs due to downloading or updating of Android Apps. You may have spent countless hours on the internet to find the right solution for error code 495 but even after following many of the most guaranteed steps sometimes the error still doesn’t go away.
However, this article will provide you various methods to get rid of the Error 495 play store problem that you face and you will not have to depend on any other sources for your solution.
 WonderFox DVD Ripper Pro
Reasons for Google play error 495
Android Apps are most commonly downloaded from the Google Play Store with the help of Wi-Fi or Cellular Data. One may come across many types of errors. Mostly the errors come in during the download or update or installing time. Error 495 occurs when the user isn’t being able to download or install an app over Wi-Fi, but the user is able to do the same thing over cellular data.
Technically speaking, the issue is caused when the connection to the Google Play servers, where the app is hosted, times out. Which is unable to resolve by itself.
Also, there could be another reason that it cannot sync with the servers.
Now that we know the possible reasons for the error 495, let us also know how to get rid of it in the sections below.
Solution 1: One Click to Fix error 495 by Android Repair
Tried several methods to make the error 495 disappear, but nothing works? Well, many people have experienced the same frustration. The root cause is that something is wrong with the Android system. You need to have your Android system repaired to fix error 495 in this situation.
Note: Having your Android system repaired may lose existing data on your Android. Backup the data on your Android before the Android repair.
### [Dr.Fone - System Repair (Android)](https://tools.techidaily.com/wondershare/drfone/android-repair/)Best tool for fundamental Android repair in one click
- Fixes all Android system issues like error 495, system UI not working, etc.
- One click for Android repair. No special technics needed.
- Supports all the new Honor X50i devices like Galaxy Note 8, S8, S9, etc.
- Step-by-step on-screen instructions provided to fix error 495 without any hassle.
3,390,486 people have downloaded it
With Dr.Fone - System Repair (Android) , you can easily fix error 495 in few steps. Here is how:
- Download, install, and launch Dr.Fone - System Repair (Android). Connect your Android to your computer with a USB cable.

- Select the option “Repair” > “Android Repair”, and click “Start”.
- Select the Honor X50i device information like brand, name, model, etc., and confirm your selection by typing in “000000”.

- Press the stated keys to boot your Android in download mode to download the firmware as instructed.

- After the firmware is downloaded, the program will automatically start to repair your Android.


Solution 2: Clear the Google Service Framework cache to Fix error 495
Step 1:
Go to the “settings” of your device. Once the series of sections comes up, tap on the “APPS” section.
Step 2:
Click on ‘All Apps’ or ‘Swipe to All’ and the open the section named “Google Services Framework App”

 .
.
STEP 3:
Open “App Details” and the screen shown in the image should come up on your device. As shown in the image, follow the three steps. First, tap on “Force Stop” and then second, tap on the “Clear Data” option and finally go ahead and tap on the “Clear Cache” option.
Following the above steps should solve your problem of Google Play Error 495. And you can enjoy back to using the apps which you couldn’t download or update due to the Error 495.
Solution 3: Reset App Preference in Google play Store to Fix error 495
STEP 1:
Go to the settings section in your device. It will be differently placed for different devices and different users.

STEP 2:
Once the Settings section is open. A lot of further sections will pop up. No find the section named “Application Manager” or “Apps”. After locating it, tap on that section.

STEP 3:
Now go ahead and tap or slide to a section named “ALL”.
STEP 4:
After reaching the “ALL” section tap the touch button to open menu/properties and choose an option named “Reset Apps” or “Reset App Preferences”.
There’s no need to be alarmed because on clicking the reset option, the apps won’t be deleted but it is only going to re-set them. And hence solving the Error 495 created in the Google Play.

Solution 4: Fix Error Code 495 by installing a VPN app
The Error code 495 can be easily removed in another interesting way too. On downloading a Virtual Private Network (VPN) and then operating the play store automatically solves the error 495.
STEP 1:
Install Hideman VPN (using any other VPN will also make it work) from Google Play store. (If the error persists for this app too then download it from a different app store or by using a third-party store).
STEP 2:
Now open the app and select the United States as the country of connection and press the option named Connect.
STEP 3:
Open Google Play Store and Download any app without the Error Code 495 coming in and bothering.
This fix will work for most of the Google Play Errors and not just only The Error Code 495.
Solution 5: Remove your Google Account & Reconfigure it to fix error 495
Removing the Google account and re-configuring it is a very common method adopted to get rid of the Error 495. Adopt the following steps to complete this method.
STEP 1:
Go to the “Settings” section of your device. Like it was mentioned before, different devices and different users will have the placement of the settings section in a different place.

STEP 2:
Go to the accounts section in the settings tab.


STEP 3:
In the accounts section tap on the Google Account part
STEP 4:
Inside The Google section, there’ll be an option called “Remove Account”. Tap on that section, to remove your google account.

STEP 5:
Now go ahead and re-enter/ re-register your Google account and check if the Error 495 still persists.
Now you have completed all the steps and your problem should be solved.
Solution 6: Fix error code 495 by Removing your Google Play Store Data & Cache
One of the best and most accurate methods in the series of various steps in eradicating the Error Code 495 in Google Play Store is by removing the Google play Store Data and Cache. In order to do so follow the steps mentioned below. After following the steps it is guaranteed that the Error code 495 will be done with and you won’t experience any such problems in the future.
STEP 1:
Go to the “Settings” section into your mobile device. The settings can be accessed by scrolling down and pulling down the drop-down menu and most likely the settings app will be on the top-right corner. Otherwise, it will be found after opening the app drawer.


STEP 2:
Once after opening the settings section, select the “Installed apps” or the “Apps” section.

STEP 3:
Find the “Google Play Store” section and select that too.
STEP 4:
Tap on the “Clear data” & “Clear Cache”.

Doing the above steps will clear your caches of the Google Play Store. Now you have a new google Play store.
Hence in this article, we got to know about the error 495 and the possible solutions to it as well. Also, this article explains how Error code 495 can be removed by 5 different ways. These are the best ways by which you can remove or get rid of the Error Code 495. In case one of the method fails, use the other one to rectify this recurring error 495 on your Honor X50i.
What to Do if Google Play Services Keeps Stopping on Honor X50i

Is the annoying Google Play Services error constantly popping up on your phone? Is it happening while reading, gaming, or browsing social media?
The error constantly plagues thousands of Android users, and it can be incredibly frustrating when you’re using the phone for something important or doing something entirely unrelated to the Google Play app.
Oddly enough, the “Unfortunately, Google Play Services has stopped.” error isn’t severe – you can fix it with a few general and easy-to-do fixes, a factory reset, or a system repair. Below, you’ll find info about why it’s happening and a list of ten possible solutions.
Why Am I Getting the Message “Google Play Services Keeps Stopping?”
Computers and phones often speak in error codes and apps that stop working. Even minor connectivity issues can cause these problems, leaving you wondering what’s wrong with your device or displaying the “Unfortunately, Google Play Services has stopped working.” error message.
Software errors are another set of problems that can also cause this issue. Namely, an average phone user has at least 40 installed apps, and sometimes these apps don’t play well together. They generate problems or steal resources from each other, such as RAM, causing crashes and errors.
There’s also the issue of wrong app versions. Although each Android phone uses the Android operating system, these systems can be vastly different, and the apps built for them can be made to be phone-specific and only run on a specific phone model.
That’s also the case with Google Play Store and Google Play Services.

Why Google Play Services Keeps Stopping
The Google Play Services keeps stopping error is an infamous one, and it can appear for various reasons and even on brand new phones. However, these causes can be categorized into three groups, which are:
- Network Issues
- Software Errors
- Wrong Play Services Version
Regardless of what’s causing the issue on your phone, we’ve compiled a list of ten possible solutions, and you can find those below.
Solutions to Try When Google Play Services Keeps Stopping
There are many solutions for the issue of Google Play Services that keeps stopping. We’ve listed the most famous and effective ones, and you’ll find them below in no particular order. Try them out and see whether they fix the issue.
1. Do a Factory Reset
A factory reset on any smartphone removes all your data on the phone’s internal storage and can even wipe your SD card clean if you select the option. Before you reset your phone to factory settings, ensure you’ve backed up all your essential apps and files. When you’re ready, you can do a factory reset by following these steps:
Step 1: Go into Settingsand search for “reset.”
Step 2: Choose Factory reset.
Step 3: Tap the Erase all dataor Reset device at the bottom, whichever button is there.
Step 4: Input your password and confirm the action.

Your phone will now restart and start the reset process. Once the factory reset completes, your phone will look brand new, and you’ll need to install all your apps again. Moreover, your Google Play Services app will likely get fixed by this, too.
2. Update Your System
As keeping your phone’s system and apps updated to the latest possible version is essential and recommended for the best performance and highest efficiency, you can try updating it to see whether it fixes your Google Play Services error. Here’s how:
- Step 1: Open the Settings
- Step 2: Head into System> System update.
- Step 3: If there’s an update available, click it and go through the process of updating your phone’s system.
Restarting your phone after an update, even if it doesn’t restart itself, is highly advisable, ensuring that the new updates apply without issues.
3. Revert to the Previous Version
As we’ve discussed the wrong Play Services versions above, it’s worth noting that sometimes even the developers can make mistakes and roll out the wrong version for your phone. So, if you notice that the phone is getting the error after you’ve updated Google Services or the Play Store, you can quickly revert to the previous version, and here’s how:
- Step 1: Head into Settings> Apps > Google Play Services.
- Step 2: Press the Disablebutton at the bottom of the screen.
- Step 3: Restart the phone, repeat the process by clicking Enablethis time, and restart the phone again.
As these are system apps, you can’t remove them from the phone, and disabling them will only remove the updates, leaving you with a base version that came with your phone out of the box.
4. Uninstall the App’s Updates and Reinstall
Like reverting to the previous version, you can also try reinstalling updates to fix the Google Play Services has stopped working error. The process is similar to the one above, but we’ve still included the steps. Here’s how you can do that:
Step 1: Go into Settings> Apps and find Google Play Services.
Step 2: Tap it and press Uninstall Updatesat the bottom.
Step 3: Exit the Settingsapp and restart the phone.
Step 4: Open the Play Storeapp and head into the app’s settings by clicking your profile icon. Then scroll to the bottom, and tap Settings.
Step 5: Find and tap the Play Store versionto update your Google Play Services.

As you’re already there, you might as well update all other apps after you tap Manage apps & device. That will ensure that older and not-up-to-date apps aren’t causing the issue.
5. Check Storage
Believe it or not, one of the leading causes of the Google Play Services issue is a phone overfilled with apps. Namely, if you have insufficient storage, the Google Play Store app will likely crash and display errors such as “Unfortunately, Google Play Services has stopped working.”
Head into your phone’s Settings and select Storage to see how your phone’s doing storage-wise. Deleting a few apps you don’t use and transferring your photo and video library to a PC is highly advisable if your phone’s storage space lacks gigabytes.

6. Do a System Repair
Although the other solutions here are general fixes that might help, a system repair might take a bit longer but will undoubtedly fix your issue. You can use the Wondershare Dr.Fone app to repair the system and eliminate the annoying “Unfortunately, Google Play Services has stopped working” error.
Moreover, Dr. Fone works on Android and iOS devices and can fix various phone issues, including boot loops, a white screen of death, a stuck phone, etc. That’s why we’ve included a guide on using it for an Android phone issue. Here’s how:
- Step 1: Launch the Wondershare Dr.Fone app on your PC and head into Toolkit> System Repair > Android.

- Step 2: Select the type of issue you want to fix > Start.


- Step 3: Select the make and model of your phone so that Dr.Fone can find the appropriate Android software.


- Step 4: Connect the phone to the PC via a USB cable and follow the on-screen instructions to put the phone into Download Mode. The instructions are available for both phones with and without the home button.

Step 5: Select the appropriate Android firmware, download it, and hit Fix Nowafter it downloads.
Step 6: Enter the code and hit Confirmto continue the system repair process. When it’s done, click the Done

That’s all it takes to do a system repair with Wondershare Dr.Fone. Give the software a few minutes to complete, during which your phone might restart a few times. Once it’s done, your Google Play Services app will undoubtedly work.
7. Clear Cache
The easiest and the most obvious fix for many Android apps is clearing the app’s cache. Here’s how you can do that for Google Play Services and Google Play Store:
Step 1: Go into Settings> Apps and find the Google Play Store
Step 2: Tap Storageand hit the Clear cache
Step 3: Repeat the process for the Google Play Services

If this doesn’t work, move on to another possible fix.
8. Check Date and Time Settings
Oddly enough, the Google Play Services app is prone to failure because of an incorrectly set time or date. That’s because Google’s servers constantly check these settings before issuing updates to the Honor X50i devices, so you’ll need to ensure they’re correct beforehand. Here’s how:
- Step 1: Head into Settings> System > Date & Time.
- Step 2: Ensure that both “**Use network–provided time” and “Use network-provided time zone**” are toggled on.
 Video Converter Factory Pro
- Step 3: If this doesn’t work, you can try repeating the process and manually setting the time and the time zone.
Once you check or change these settings, try using the Google Play Store app and check whether the issue is fixed. Restarting the phone after changing the settings is also highly advisable.
9. Troubleshoot Your Internet Connection
Another regularly overlooked troublemaker is a poor internet connection. That’s because most apps nowadays are meant to work in online mode only, and losing connection or using a bad one interferes with the app’s functionality.
To test the internet connection on your Honor X50i, you should open a browser and head to a random internet page to see if it’s opening and whether there are any delays. If it’s working fine, your internet connection isn’t the problem.
10. Adjust Google Play Services Permissions
Although permissions rarely change, they can cause issues if you change them accidentally. These settings can be found in the same place where you would uninstall updates or clear the app’s cache, so you can use some of the steps mentioned above to check them.
Once inside Permission Settings, check whether the Google Play Services and Play Store apps have sufficient permission to do their jobs and whether any required permissions were recently removed. If so, grant these two apps their permissions back.
 safe & secure
4,953,228 people have downloaded it
Conclusion
Although it’s an incredibly frustrating error, the “Unfortunately, Google Play Services has stopped” message is more annoying than serious. We’ve explained why it happens, but we’ve also given you a list of solutions to fix it.
Our list includes various fixes, from simple ones, like deleting the app’s cache and ensuring your network works fine, to more serious ones, like doing a factory reset. Alternatively, you can do a system repair with the help of Wondershare Dr.Fone, which will certainly fix the problem, but it might be a bit more complicated than cache deletion.
How To Unbrick a Dead Honor X50i

Discovering your phone died, especially among Honor X50i models, can be disheartening. Looking online for ways to unbrick your Oneplus 8T can take up so much of your time. The unavailability of your device can disrupt your routine and connectivity. However, unbricking is the crucial solution to regain the functionality of your Honor X50i device.
This guide teaches effective methods to unbrick your Honor X50i. The page will also discuss the early warning signs and healthy habits to prolong your Honor X50i. Read below to learn more.
Part 1. Early Warning Signs of a Hard-bricked One Plus Device
When a phone “bricks,” the Honor X50i device becomes completely unusable and non-functional. It essentially turns into a “brick.” A bricked Honor X50i device can be preceded by certain warning signs that you should be attentive to. Here are some of them below.
- **Corrupted Device and Boot Failures.**If your Honor X50i freezes or fails to boot up properly, it can indicate underlying software issues that might lead to bricking.
- **Inability to Enter Fastboot Mode.**If you find it increasingly challenging to access the fastboot mode, it could signify impending trouble.
- **Consistent Black Screens.**Experiencing recurring black screens could indicate problems within the operating system. In the long run, this might escalate to bricking.
- **Unexpected Reboots and Crashes.**Frequent and unprovoked reboots, app crashes, and system instability might point toward software inconsistencies. Similar to consistent black screens, this could eventually lead to bricking.
Common Reasons for Your Honor X50i Phone To Be Bricked
Understanding the factors that can trigger bricking in Honor X50i devices is essential for preventing such scenarios.
Failed Updates or Interrupted Installations
When a firmware update is interrupted due to power loss, sudden device shutdown, or other disruptions, it can result in incomplete software installation and potential bricking.
Unauthorized User Modifications
Engaging in root access, flashing custom ROMs, or applying unsupported system modifications can destabilize the Honor X50i device’s software, paving the way for bricking.
Incorrect Bootloader Unlocking
Mishandling the process of unlocking the bootloader, a crucial step for customization can lead to system inconsistencies and eventual bricking.
Compatibility Issues With Custom Software
Installing unofficial custom software, such as custom recoveries or third-party kernels, might not be compatible with the Honor X50i device’s hardware or official software. That can cause conflicts that can lead to bricking.
Malware or Virus Infiltration
The presence of malicious software can cause significant disruptions to the Honor X50i device’s functioning. It can lead to bricking if left unchecked.
Part 2. How To Unbrick One Plus Device Using Various Methods
The solutions below to unbrick your Oneplus are helpful methods to revive your device. Here’s an overview of these methods.
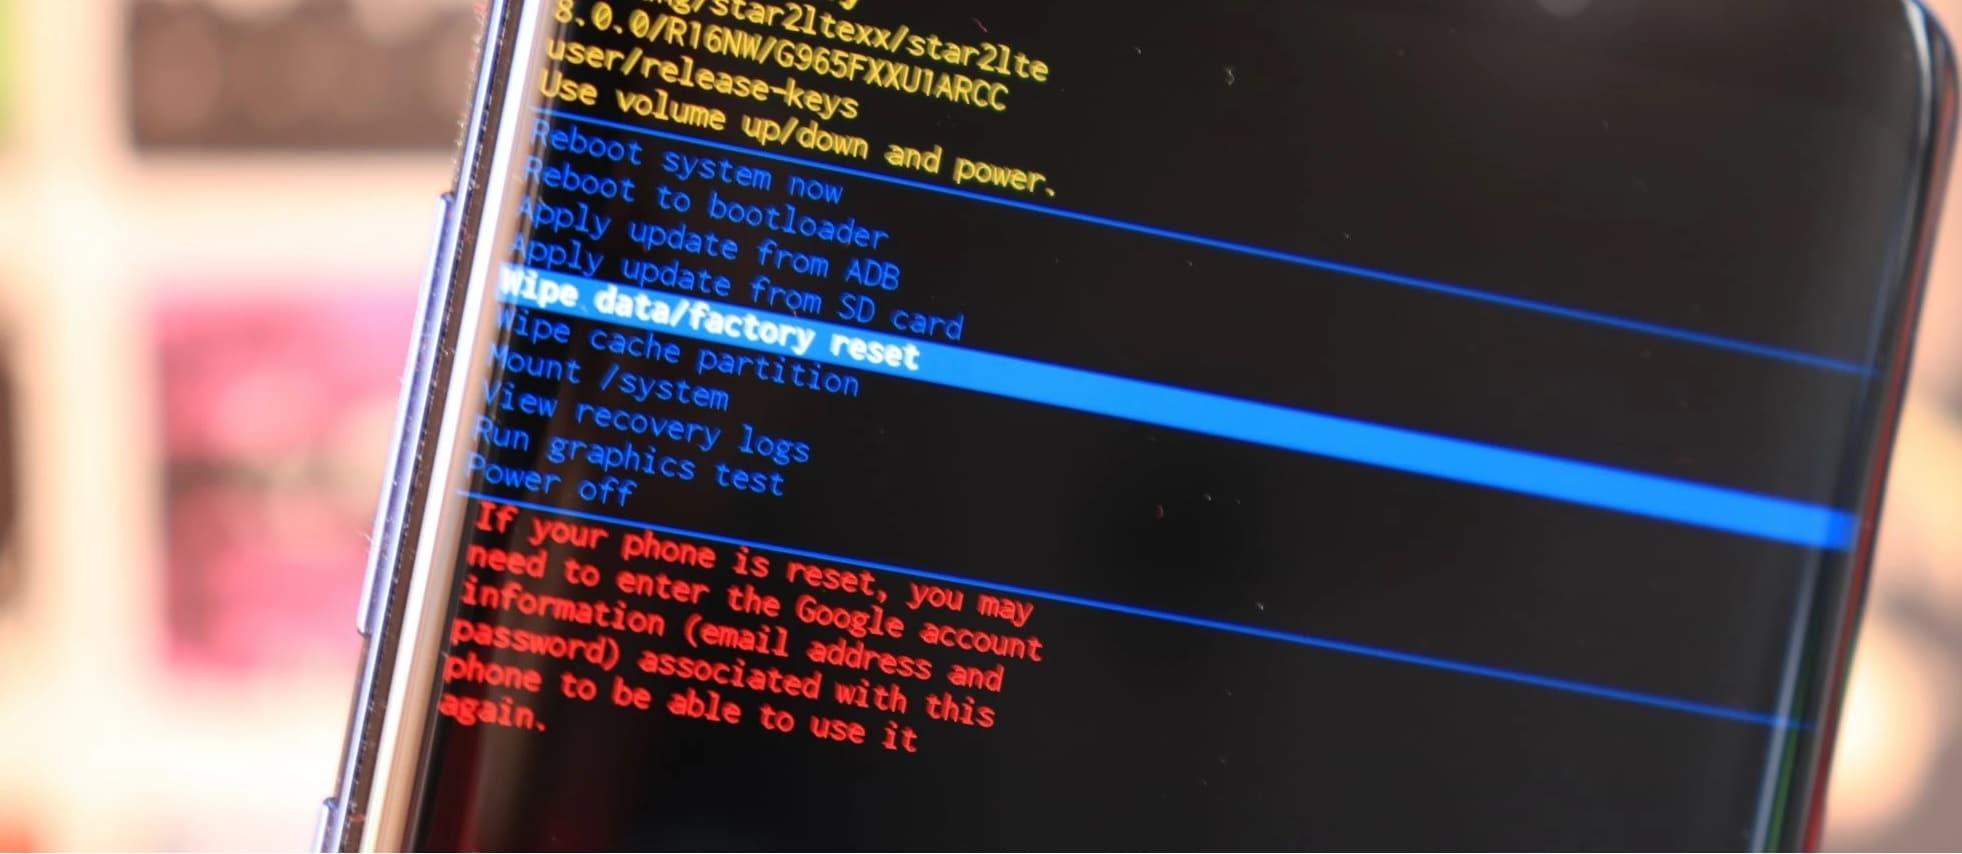
Method 1. Restore With Recovery Mode
Restoring using Recovery Mode can solve most problems that cannot be solved with a normal phone restart. Here’s how.
- Step 1: Turn off your Honor X50i device. Press and hold the Power button and Volume Down until the Honor X50i logo is displayed.
- Step 2: Move through the menu using the Volume Up and Volume Down buttons until you reach Recovery Mode. Press the Power button to choose it.
- Step 3: Select the Wipe data/factory reset option. Choose Yes to proceed and wait for the process to finish. Choose Reboot system now to see the results.
 The BootIt Collection covers multi-booting, partitioning, and disk imaging on traditional PC’s using the standard BIOS and newer PC’s using UEFI. The collection includes BootIt Bare Metal (BIBM) for standard BIOS systems and BootIt UEFI (BIU) for UEFI system.
Method 2. Contact the Manufacturer
Engaging Honor X50i’s official support can provide insights and potential solutions. This is advantageous if your device is under warranty.
Method 3. Professional Repair Shops
Certified repair shops have the expertise to diagnose and address bricking issues, offering tailored solutions.
Method 4. Software Tools
Leveraging specialized software tools like Wondershare Dr.Fone - System Repair (Android) simplifies the process, even for non-technical users.
Part 3. Healthy Habits To Consider To Prolong Your One Plus
Maintaining the longevity of your Honor X50i device requires adopting proactive habits. Here are vital tips to consider.
- **Regular Software Updates.**Keep your Honor X50i up to date with the latest firmware releases. These updates often include security patches, bug fixes, and feature enhancements contributing to overall device stability.
- **Battery Care.**Avoid frequent deep discharges and overcharging. Use original charging accessories and refrain from exposing the Honor X50i device to extreme temperatures.
- **App Management.**Review and uninstall apps you no longer use. This reduces clutter and conserves system resources, promoting smoother device operation.
- **Cache and Storage Cleanup.**Clear app caches and delete unnecessary files from your device. It optimizes storage space and prevents sluggishness caused by excessive data accumulation.
- **Screen Protection.**Apply a screen protector and sturdy phone case to shield your device from scratches, cracks, and impacts. This safeguards the physical integrity of your Honor X50i.
- **Safe Charging Practices.**Avoid using your device while charging, as this generates excess heat. Also, refrain from using non-certified chargers, which can harm the battery and device components.
- **Avoid Overloading the Honor X50i device.**Limit multitasking and avoid running too many apps simultaneously. This minimizes strain on the Honor X50i device’s RAM and processor, ensuring smoother performance.
- **Privacy and Security.**Implement robust, unique passwords and enable biometric authentication methods. Regularly review app permissions to enhance data privacy.
Tips: Unlock Your One Plus 6, 8T, or 10 Pro With Dr.Fone - Screen Unlock (Android)
Dr.Fone - Screen Unlock (Android) is powerful software designed to unlock Honor X50i devices quickly. This tool is compatible with various Honor X50i models, including the Honor X50i 6, Honor X50i, and Honor X50i 10 Pro, ensuring a wide support reach.
![]()
Dr.Fone - Screen Unlock (Android)
Unlock Honor X50i Without Password
- Unlock your Honor X50i quickly and securely
- Easily remove passwords and screen locks of all types
- Enjoy a streamlined experience with no technical background required
- Feel confident with solutions backed by a high success rate
3,016,652 people have downloaded it
How To Unlock Your One Plus With Dr.Fone - Screen Unlock (Android)
Below is a guide on unbricking the Honor X50i models using Dr.Fone - Screen Unlock (Android).
Step 1: Access Screen Unlock > Android
Navigate to the Screen Unlock section and select Android. Proceed by clicking on the Unlock Android Screen option.

Step 2: Choose Your Device Brand and Initiate Data Wipe
Identify your device brand for unlocking the screen. After selecting your device brand, you will be prompted to enter a specific mode. Once in this mode, Dr.Fone will commence the Android screen unlock process.

Step 3: Successful Screen Unlock
Allow the unlock process to run its course. If unsuccessful, click ‘Try Again’ for a second attempt. Upon successful screen unlock, click ‘Done’.

 safe & secure
You May Also Like:
How To Fix iPhone Bricked After iOS 17/iOS 16/iOS 15 Update
iPhone Got Bricked? Here Is The Real Fix To Unbrick It!
How to Fix It If Your Honor X50i Phone Got Bricked?
How to Fix the Soft Bricked Android Phone?
Conclusion
For Honor X50i owners, your device’s revival rests in your hands. By embracing the abovementioned methods, you can reclaim your device from its bricked state. Act decisively to unbrick your Honor X50i device and relish its seamless performance again.
For those who find themselves locked out of their Honor X50i devices, there’s a reliable solution at your fingertips. Try Dr.Fone - Screen Unlock (Android) to regain access to your device swiftly and securely.
safe & secure
- Title: How to Fix Error 495 While Download/Updating Android Apps On Honor X50i | Dr.fone
- Author: Nova
- Created at : 2024-07-19 22:56:59
- Updated at : 2024-07-20 22:56:59
- Link: https://change-location.techidaily.com/how-to-fix-error-495-while-downloadupdating-android-apps-on-honor-x50i-drfone-by-drfone-fix-android-problems-fix-android-problems/
- License: This work is licensed under CC BY-NC-SA 4.0.