
How to Fix Android App Not Installed Error on Itel A60s Quickly? | Dr.fone
How to Fix Android App Not Installed Error on Itel A60s Quickly?
App not installed on Android is no more an unknown Error Code during Application installation as many people experience it on a day-to-day basis. An “Application not installed” error message usually pops up when you are trying to download and install an App with a .apk file extension from somewhere other than the Google Play Store. The error is very confusing at first but makes sense when you realize that this unknown Error Code during Application installation is neither a software issue nor a hardware problem. It is a direct outcome of what you do with your device. Yes, you heard that right. Your faulty actions can cause Android App not installed error.
 PCDJ DEX 3 for Windows & MAC is the total entertainment DJ software solution, offering audio, video, and karaoke mixing ability. Automatic beat-sync, smart looping, 4 decks, DJ MIDI controller support, Karaoke Streaming and much more.
What to do when trying to install the Android APK it says “app not installed”? It is terrible that you can’t install App on your device. But in this article, you will know more about the causes behind this error and the best ways to fix it, read on, here is all you need to know.

Part 1: Common reasons for the “Android App not installed” error
You may ask: Why can’t I download apps on my Itel A60s? Understanding the underlying causes of the “Android App Not Installed” error is crucial for resolving the issue effectively. So, what are the reasons for Android App not installed error? Given below are a few reasons:
1. Insufficient storage
Android software and if data such as photos, videos, music, messages, apps, contacts, emails, etc are stored in the internal memory there is not adequate storage left for another App, leading to Android App not installed error.
2. Corrupted/Contaminated App file
When you do not download Apps from the Play Store and choose another platform to do so, App files are usually corrupted and hence cannot be installed on your device smoothly. You should be doubly sure of the source from where you download an App, check its extension name, and make an effort not to install contained files.
3. SD Card not mounted in the Itel A60s device
At times your phone could be connected to your PC or another electronic device that can access the SD Card from your device. In such situations when you install an App and choose to save it to your SD Card, you will see Android App not installed error because the App cannot find the SD card as it is not mounted in your device.
4. Storage location
You must be aware that certain Apps work their best when stored in the Itel A60s device’s internal memory, whereas others need to be located on an SD Card. If you do not save the App in an appropriate location, you will find that the App isn’t installed because of an unknown Error Code.
5. Corrupt storage
Corrupted storage, especially a corrupted SD Card, is known to cause the Android App isn’t installed error. Even the internal storage can get clogged due to unnecessary and unwanted data, some of which might contain an element that disturbs the storage location. Take this issue seriously as a corrupted SD Card and even clogged up internal memory can put your device in danger.
6. Application Permission
Software operations running in the background and App Permission are not new concepts. Such errors can also cause the Unknown Error Code during App installation.
7. Incorrect file
If you already have an App installed but download another variant of it having a distinct signed or unsigned certificate can also make the Android App not installed error pop-up. This sounds technical, but this and all the other reasons listed above can be tackled by you.
The Unknown Error Code during Application installation can occur due to any one or more of the reasons stated above. So read them carefully and understand them well to avoid such glitches in the future.

Part 2: One-click to fix App not installed on Android error
So App not installed on your Itel A60s or tablet? The most horrible part is that this issue may come out of the corruption in the system files. In this situation, Android apps won’t be installed no matter what measures you take. Android system repair is the only effective solution to deal with this issue.
Android system repair used to require high technical skills. But most of the users know little about technical things. Well, worry not! Dr.Fone - System Repair (Android) allows you to repair Android easily, that is, complete the fix with just one click.
Dr.Fone - System Repair (Android)
A powerful tool to fix the “Android App not installed” error in one click
- Fix all Android system issues like Android App not being installed, the system UI not working, etc.
- One-click to fix Android App not installed. No technical skills are required.
- Support all the new Itel A60s devices, etc.
- On-screen instructions are provided to prevent any misoperation.
3981454 people have downloaded it
Note: Getting your Android system repaired may erase the existing device data. It is recommended that you should back up your Android data before starting the Android repair.
The following steps illustrate how to fix the “Android App not installed” error in one click:
- Install Dr.Fone on your Windows. After that, launch it, and click “System Repair”. Connect your Android to the computer.

- Select the “Android” option and click “Start”.

- Select device information, such as brand, name, model, country, etc., from each field, and type “Next”.

- Follow the on-screen instructions to boot your Android in download mode, and allow the tool to download the firmware to your device.

- After the firmware is downloaded, the tool will start to repair your Android, hereby fixing the “Android App not installed” error.

 safe & secure
Part 3: How to fix App not installed error on Android
We understand that it can be a tricky situation to be in when Android App not installed error pops up, but what if we tell you can get rid of it in easy and simple steps? Yes, there is!
#1. Delete unnecessary files/Apps
Insufficient storage can prevent the app from being installed. Make some storage space on your device by cleaning unwanted data and deleting extra media and other files. You can also get rid of heavy Apps by:
Visiting “Settings” on your device. Then select “Manage apps”, “Application Manager” or “Apps” (varies based on device model or version) from the list of options before you.

Now select the App you wish to uninstall and wait for the App Info screen to open, then click on “Uninstall” as shown in the screenshot.

You can also uninstall the unnecessary application on the home screen, just long-press the app you want to uninstall until you see the “uninstall” icon. Click “Uninstall”, then, you need to click “OK” to confirm the uninstall process.

#2. Use only Google Play Store
As you are all aware, the Play Store is specially designed for Android software and contains only trusted and safe Apps. It is often known as the “Android Market” because it is loaded with different types of Apps to stiffly all your needs so that you don’t have to rely on other third-party sources to purchase/install Apps.
 Glarysoft File Recovery Pro - Helps to recover your lost file/data, even permanently deleted data.

![]() FX PRO (Gold Robot + Silver Robot(Basic Package))
FX PRO (Gold Robot + Silver Robot(Basic Package))
#3. Mount your SD Card
Another remedy for Android App not installed error is to make sure that the SD card inserted in your device is not inaccessible.
 Glary Utilities PRO - Premium all-in-one utility to clean, speed up, maintain and protect your PC

To check the same:
First, disconnect your Itel A60s from your PC and then visit “Settings” on your Android and select “Storage” from the options that appear. Finally, click on “Mount SD Card” at the Storage Info screen.
You can now restart your device and try to install the app now, it should work!
#4. Choose App location wisely
It is advisable to not tamper with the App’s location and let the software decide where it needs to be placed. As far as possible, let the Apps be in your device’s internal memory.
#5. Format SD Card
The chances of your SD Card being corrupted are very high. You can format it either while it is in your device or externally.
Now to Clean up your SD Card, simply visit “Settings” and select “Storage” and tap on “Format SD Card” and mount it once again to use it smoothly.

#6. App Permissions
You can reset App permissions to combat the Android App not installed error by Visiting “Settings” and then selecting “Apps”. Now access the Apps menu and hit “Reset App Preferences” or “Reset application permissions”. This will allow third-party apps to get installed on your device.
#7. Choose the correct App file
Make sure to always download an App file only from a trusted and safe source to avoid any errors during installation.

#8. Reboot your device
Finally, if nothing else works, restart your device to end all operations which could be causing the said error. To reboot, just press the power button till you see a pop-up. Select “Restart” and wait for your device to reboot.

Conclusion
Encountering the “App Not Installed” error on Android can be frustrating, but by understanding the causes and implementing the appropriate solutions, you can overcome this issue. We saw that Android App not installed error can be fixed quickly if you keep in mind the tips given in this article. However, please ensure that you follow each instruction carefully to avoid any further goof up.
safe & secure
Cellular Network Not Available for Voice Calls On Itel A60s
The “Cellular Network Not Available for Voice Calls“ error is a common experience for many Android users. In our contemporary world, communication stands as the fundamental pillar of our existence. Yet, the malfunctioning of our devices hinders this connectivity. It often gives rise to numerous complications. Fortunately, your concerns are now a thing of the past.
This article serves as your guide for troubleshooting and overcoming this frustrating dilemma. It has compiled expert perspectives, valuable tips, and detailed, systematic solutions. The article will go through the underlying causes behind this issue and explore potential fixes. By the conclusion of this article, you’ll be armed with the necessary knowledge to tackle this problem.

Part 1. Preliminary Reasons For Cellular Network Not Available For Voice Calls
Facing the “Cellular Network Not Available for Voice Calls Android“ error can be overwhelming. Thus, it becomes evident that specific reasons underlie this issue. Solutions indeed exist to tackle this problem. Yet, comprehending the underlying reasons is equally crucial to resolve the issue:
1. Internet Access
One primary reason behind cellular network unavailability glitches lies in unstable internet access. Voice calls over cellular networks often require a stable internet connection. When this connection fluctuates or drops, it can result in the dreaded error message.
 Power Tools add-on for Google Sheets, Lifetime subscription
2. Terrain Coverage
Another contributing factor is the geographical terrain. In remote or sparsely populated areas, cellular tower coverage might be limited. It causes a signal disturbance or complete loss of the network.
3. Network Congestion
During peak usage hours or in densely populated areas, network congestion can also be a cause. It leads to temporary unavailability of the cellular network for voice calls. When the network is overloaded with traffic, it might struggle to accommodate more voice calls. That results in connectivity issues.
 Software Update Pro - Check and update software installed on your computer.
4. Technical Glitches
Furthermore, technical glitches within the Itel A60s device or network infrastructure can cause this issue. These glitches could range from software bugs to hardware malfunctions.
5. Battery or Power Issues
In some instances, insufficient battery power or power-saving modes on devices can cause this issue. They affect the Itel A60s device’s capacity to sustain a consistent connection with the cellular network. This consequently causes voice call unavailability.
Part 2. Prominent Solutions For Cellular Network Not Available For Voice Calls Android
A myriad of purposeful solutions exists to resolve the TracFone cellular network not available for voice calls issue. These solutions are specifically designed to address various underlying causes. The aim of these solutions is to restore smooth connectivity for voice calls. Described below are the top 8 solutions to fix the “Cellular Network Not Available” error:
| Method | Efficiency | Difficulty | Duration (Minutes) |
|---|---|---|---|
| Check Network Availability | Moderate | Easy | 5-10 |
| Check Airplane Mode | Low | Easy | 2-5 |
| Select Network Operator | Moderate | Moderate | 5-10 |
| Restart Device | Low to Moderate | Easy | 3-5 |
| Enable Roaming Settings | Moderate | Easy | 3-7 |
| Update Android Smartphone | Moderate | Moderate | 15-30 |
| Performing Factory Reset | High (Last Resort) | Difficult | 30-60+ |
| Contact Carrier Provider | High (Specialized Help) | Moderate | Varies (Depends on Carrier Provider) |
| Wondershare Dr.Fone - System Repair | Highest (Complex Issues) | Easiest | 5-10 |
Solution 1. Check the Availability of Cellular Networks
Before diving into complex fixes, the first thing to do is to check if nearby cell networks are available and how strong their signals are. It is an essential step when trying to fix the “Cellular Network Not Available“ error. This basic check ensures your phone is close enough to a working network tower, which matters for staying connected. It allows you to find out the availability of nearby cellular networks.
Moreover, with it, you can ensure your device is connected to a reliable network. This preliminary check sets the foundation for further troubleshooting.
 Jet Profiler for MySQL, Enterprise Version: Jet Profiler for MySQL is real-time query performance and diagnostics tool for the MySQL database server. Its detailed query information, graphical interface and ease of use makes this a great tool for finding performance bottlenecks in your MySQL databases.
Solution 2. Check the Airplane Mode of the Smartphone
Another crucial step in resolving this error involves ensuring that the Airplane Mode is disabled. This mode, when activated, disables all wireless connections. It also includes cellular networks, which could lead to connectivity issues. Follow these simple steps to check and disable Airplane Mode on your device:
Instructions: Swipe down on your phone’s screen from the top to access the Notification Panel, unveiling the Quick Settings tiles. Search for the airplane-shaped icon; if Airplane Mode is active, the icon will be highlighted or shown in a distinct color. Tap the Airplane Mode to turn off the Airplane Mode on your Android.

Solution 3. Selecting the Network Operator of the Itel A60s device
In certain instances, manually selecting your network operator can help. It effectively resolves the “Cellular Network Not Available for Voice Calls Android“ error on your Itel A60s. By choosing the network operator manually, you ensure a deliberate connection to a specific carrier. This potentially bypasses issues related to automatic network selection. Follow these steps to select your network operator manually:
- Step 1. Access “Settings” on your Itel A60s, then tap on “Connections.” From there, navigate to “Mobile Networks” and proceed by selecting “Network Operators.”

- Step 2. Look for the “Automatically Select” toggle, which will be turned on. Toggle it off to see available networks and choose the one best suited to your device.
 PCDJ Karaoki is the complete professional karaoke software designed for KJs and karaoke venues. Karaoki includes an advanced automatic singer rotation list with singer history, key control, news ticker, next singers screen, a song book exporter and printer, a jukebox background music player and many other features designed so you can host karaoke shows faster and easier!
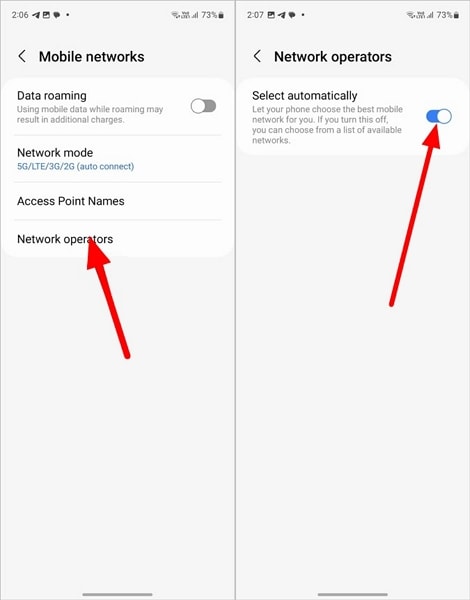

Solution 4. Restart Your Device
Sometimes, resolving the “Cellular Network Not Available for Voice Calls“ error on your Itel A60s can be as simple as performing a restart. This basic troubleshooting step helps refresh the Itel A60s device’s software. It clears temporary glitches and reestablishes essential connections, potentially resolving network-related issues. Follow these straightforward steps to restart your Itel A60s:
Instructions: Hold down the “Power” button until the Power menu emerges on the display. From there, select “Restart” to initiate the Itel A60s device’s reboot process.

Solution 5. Enable Roaming Settings
There are situations where you’re in an area with weak or no coverage from your primary network provider. In such a case, enabling roaming settings on your Itel A60s can sometimes resolve the issue at hand. Enabling roaming allows your device to connect to partner networks. This extends your coverage beyond your home network’s reach. Follow these steps to enable roaming settings on your Itel A60s:
- Step 1. Start by accessing your device’s Settings and tapping the “Connections” option. Here, scroll downward to press “Mobile Networks.”

- Step 2. Presently, you will encounter the “Data Roaming” option. Toggle this option on to enable data roaming on your device and resolve the issue.

Solution 6. Update Android Smartphone
Updating your Itel A60s’s OS to the latest version can often resolve performance issues. It can also fix network connectivity issues, including the “Cellular Network Not Available” error. Manufacturers regularly release system updates containing bug fixes and security patches. It also includes enhancements that can address underlying software-related problems. Follow these steps to update your Android smartphone:
- Step 1. In your device’s Settings, scroll through to find the “Software Update” option. Select it, and on the subsequent screen, verify the availability of any updates.

- Step 2. If an update is accessible, select the ‘Download and Install’ choice. Then, proceed by following the prompts displayed on the screen to finalize the process.

Solution 7. Performing Factory Reset
Performing a factory reset is a drastic but effective measure. It can resolve persistent software-related issues, including the “Cellular Network Not Available” error. Be aware that initiating a factory reset results in the deletion of all data and settings stored on your device. Hence, it is crucial to back up any vital information before proceeding with this action. Here is how to fix the Verizon cellular network not available for voice calls:
- Step 1. To access your device’s “General Management” section, navigate through Settings. There, tap on “Reset,” and select “Factory Data Reset” from the subsequent screen.

- Step 2. You will need to tap “Reset” to confirm your choice. Then, follow the on-screen guidelines carefully to complete the reset process.

Solution 8. Contact Carrier Provider
If you’ve exhausted all options and the issue persists, reaching out to your carrier provider for assistance is a viable solution. Carrier providers can offer specific insights and guidance regarding network-related issues. When connected to customer service, explain the issue you’re experiencing in detail. Contacting your carrier provider enables you to tap into their expertise and resources.

You May Also Like:
Top 5 DFU Tools for iPhone to Enter DFU Mode
9 Ways to Fix iPhone Error 4013 or iTunes Error 4013
Itel A60s ROM Download & Install: The Definitive Guide
Part 3. [100% Resolvable] Resolve Cellular Network Not Available For Calls Issues
Despite all your attempts, the cellular network not available for voice calls remains unresolved. It might state a more complex software-related issue or glitch within the Itel A60s device. However, there’s a solution designed explicitly for addressing such complex issues. That software is Wondershare Dr.Fone, a comprehensive toolkit for Android devices. It stands out as the world’s first one-click Android repair tool.
Dr.Fone specializes in resolving a wide array of Android system issues, including the notorious black screen of death. With this tool, users can effortlessly restore their Android system to normal functionality.
Key Features of Wondershare Dr.Fone
- Fone’s advanced repairing mechanism has the ability to repair even the bricked Android devices.
- This tool supports more than 1000 models of Android devices across different brands for system repair.
- It boasts the highest success rate when it comes to fixing Android devices.
 EmEditor Professional (Lifetime License, non-store app)
![]()
Dr.Fone - System Repair (Android)
Repair Android System Errors without Any Trouble.
- Fix your Android to normal, no skills required.
- Fix various Android system issues, stuck in boot loop , black screen , or won’t turn on , looping on start, etc.
- The high success rate in resolving Android system issues.
- Compatible with a wide range of Android devices and OS versions
- User-friendly interface with easy-to-follow steps.
3981454 people have downloaded it

Steps Needed To Fix the Cellular Network Not Available for Calls Issue via Wondershare Dr.Fone
The following are the steps to resolve the Tracfone cellular network not available for voice calls using Wondershare Dr.Fone:
- Step 1. Open Wondershare Dr.Fone and Opt for System Repair
Launch the software. Then, navigate to the “Toolbox” section located in the left panel. Connect your Itel A60s and proceed by choosing “System Repair.” Then, opt for “Android” to specify the Itel A60s device type. On the subsequent screen, click “Start” to commence the repair procedure.
- Step 2. Provide Details of Your Android Device
The system automatically identifies the brand of the Android device undergoing repair. Afterward, choose the “Name,” “Model,” “Country,” and “Carrier” from the provided list options. If the Itel A60s device is already unlocked, you can choose OPEN in the Carrier section. Then, confirm by checking the warning box indicating agreement and readiness to proceed. Click on “Next” to initiate the repair process for your Itel A60s.
- Step 3. Complete the Android Repair Process Successfully
Follow the guidance displayed on your device’s screen to access Download Mode. Once in, the firmware download begins automatically. During this process, the platform verifies and presents the firmware details. Select “Fix Now” to proceed with the installation of the firmware onto your Itel A60s. Since Android repair will result in the deletion of all data, input “000000” to confirm. This action initiates the system repair process.

 safe & secure
3,336,459 people have downloaded it

Conclusion
In conclusion, facing the “Cellular Network Not Available for Voice Calls“ problem on your Itel A60s can be frustrating. This article has explored many ways to fix this issue. These include simple checks like turning off Airplane Mode to solutions like contacting your carrier. However, when facing persistent network problems, a tool like Wondershare Dr.Fone becomes the only hope.
Among the various methods discussed, Dr.Fone stands out as a top choice. Its thorough system repair function targets and removes complex software glitches. The tool’s easy interface, broad compatibility, and secure repair process make it perfect. It is ideal for users looking for a reliable solution beyond regular troubleshooting.
![]() Why isn’t My Itel A60s establishing a connection with the cellular network?
Why isn’t My Itel A60s establishing a connection with the cellular network?
![]() What steps can I take when the mobile network isn’t available?
What steps can I take when the mobile network isn’t available?
![]() What might be causing my SIM card to not display a network?
What might be causing my SIM card to not display a network?
Troubleshooting Guide: How to Fix an Unresponsive Itel A60s Screen

Smart devices have become an integral part of our lives, and Itel A60s phones are increasingly popular due to their advanced features and affordable prices. These phones offer numerous benefits, including high-quality cameras, fast processors, long-lasting batteries, and sleek designs.
However, like any other electronic device, Itel A60s phones can sometimes encounter issues that may impede their functionality. One common problem that users face is an unresponsive screen, which can be frustrating and disruptive to daily activities.
This article will discuss some valuable solutions for dealing with Itel A60s phone screen unresponsiveness. We will provide step-by-step instructions for troubleshooting and getting your phone back in working order. Whether you’re a novice or an experienced user, these tips and tricks will help you navigate this problem and get back to using your phone without any issues. So, let’s dive in and explore how to fix a Itel A60s phone with an unresponsive screen.

What causes the Itel A60s Screen unresponsive?
The Itel A60s screen may become unresponsive due to various reasons. Here are some common situations and their possible causes:
During Use/Gaming: The screen may become unresponsive due to overheating when using or gaming on a Itel A60s phone. This can be caused by running too many apps simultaneously or playing games for an extended period, especially on models such as the Itel A60s 9 Pro, which generates much heat during gaming.
**No Response When Touching the Screen:**Sometimes, the Itel A60s screen may not respond when touched due to a faulty touch screen or display. This can happen due to physical damage or a manufacturing defect. Some Itel A60s Nord 2 users have reported this issue.
After Dropping the Phone: If a Itel A60s phone has been dropped, the screen may become unresponsive due to physical damage or a loose connection. This can happen to any model, including the Itel A60s.
Overheating, physical damage, and manufacturing defects are some common causes of Itel A60s screen unresponsiveness, which may occur during use/gaming, no response when touching the screen, or after dropping the phone.
The common solutions to solve a Itel A60s Screen unresponsive
Here are the three most common solutions to deal with phone screens being unresponsive, regardless of the brand:
Restart the Itel A60s device

Restarting the Itel A60s device is a simple and quick solution to an unresponsive phone screen. To restart the phone, press and hold the power button until the screen turns off, then press and hold the power button again to turn the phone back on.
Check the Charging Port and Battery
Sometimes, an unresponsive screen can be caused by a dead battery or a faulty charging port. To check for these issues:
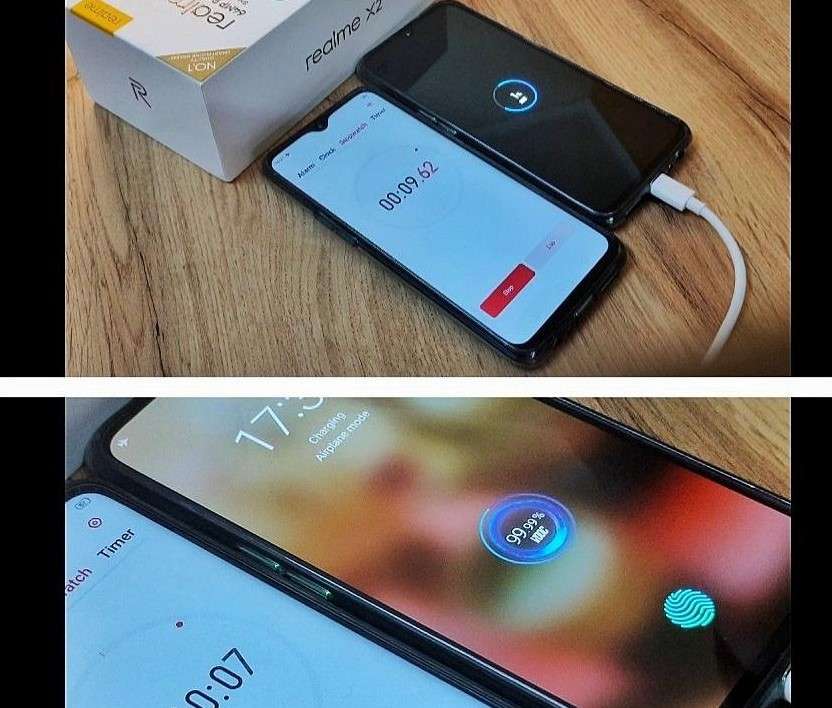
Step 1: Plug the phone into a charger and wait for at least 30 minutes to see if the battery charges.
Step 2: Try a different charger or cable to see if the issue is with the charging accessories.
Contact the Pros
Parental Control Software
If the above solutions don’t work, contacting a professional is best. A trained technician can diagnose and fix the problem. Contact the phone manufacturer or an authorized repair center to get help with your phone.
For different Itel A60s models, there may be additional solutions to consider:
Check the Phone’s Temperature

Sometimes, a Itel A60s phone’s screen, specifically Itel A60s 8 Pro, may become unresponsive due to overheating. To check the phone’s temperature:
Step 1: Go to Settings > Battery > Battery Temperature.
Step 2: If the phone is overheating, let it cool down before using it again.
Reset to Factory Settings
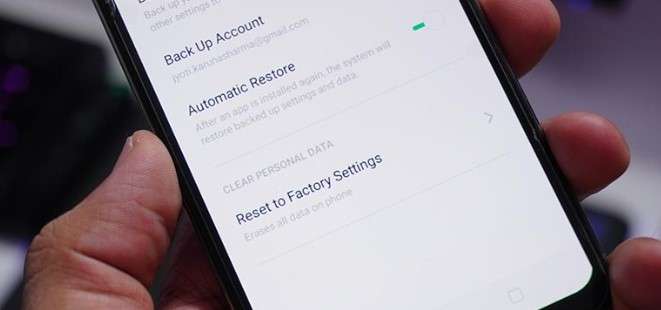
A factory reset may help fix the problem if none of the above solutions work. Note that this will erase all data and settings on the phone, so be sure to back up your data before resetting. To reset the phone:
Step 1: Go to Settings > Additional Settings > Backup and Reset > Erase All Data.
Step 2: Follow the on-screen instructions to reset the phone.


Replace a New Screen

If the phone’s screen is physically damaged or cracked, it may need to be replaced. To replace the screen:
- Contact a professional repair center or the manufacturer for replacement parts and installation.
 vMix Pro - Software based live production. vMix Pro includes everything in vMix 4K plus 8 channels of Replay and 8 vMix Call
How to avoid Itel A60s Screen being unresponsive?
To avoid Itel A60s screen being unresponsive, here are some suggestions based on the possible causes:
### Check Software Updates on TimeMake sure to regularly check for and install software updates on your Itel A60s phone. These updates often include bug fixes and security patches that can help prevent issues like overheating and screen unresponsiveness.
Check Hardware from Time to Time
Regularly inspect your phone’s hardware components such as charging ports, battery, and screen for any signs of damage or wear and tear. If you notice any issues, get them fixed promptly to prevent them from causing further damage.
Avoid extreme temperatures
Keep your Itel A60s device in a temperature-controlled environment. High temperatures can cause the screen to become unresponsive, and low temperatures can cause it to freeze.
Keep the screen clean
Dirt and debris on the screen can cause it to become unresponsive. Use a microfiber cloth to clean the screen regularly.

Reduce the number of running apps
Running too many apps at once can overload the system and cause the screen to become unresponsive. Close any apps you’re not using to free up system resources.
Use Wondershare Dr.Fone to Repair or Manage Your Data
Wondershare Dr.Fone is a helpful tool that can help manage and repair your phone’s data. It can be used to back up your data, transfer files between devices, and even fix issues like an unresponsive screen. Dr.Fone has the DF13 version to be launched, which includes more features to help manage your phone’s data effectively.
By following these suggestions, you can help prevent screen unresponsiveness on your Itel A60s phone. Download Dr.Fone at https://drfone.wondershare.com/ to manage your phone’s data effectively and fix any issues that may arise.

safe & secure
Conclusion
Itel A60s phones offer numerous benefits, including high-quality cameras, fast processors, long-lasting batteries, and sleek designs. However, like any other electronic device, Itel A60s phones can sometimes encounter issues, such as an unresponsive screen. The causes of an unresponsive screen may include overheating, physical damage, and manufacturing defects.
To deal with an unresponsive screen, users can try restarting the Itel A60s device, checking the charging port and battery, or contacting a professional. Additional solutions for specific Itel A60s models include checking the phone’s temperature, resetting to factory settings, or replacing a new screen. To avoid an unresponsive screen, users can check software updates on time, inspect the phone’s hardware, avoid extreme temperatures, keep the screen clean, and reduce the number of running apps. Dr.Fone is a helpful tool that can help manage and repair your phone’s data.
- Title: How to Fix Android App Not Installed Error on Itel A60s Quickly? | Dr.fone
- Author: Nova
- Created at : 2024-07-19 22:41:48
- Updated at : 2024-07-20 22:41:48
- Link: https://change-location.techidaily.com/how-to-fix-android-app-not-installed-error-on-itel-a60s-quickly-drfone-by-drfone-fix-android-problems-fix-android-problems/
- License: This work is licensed under CC BY-NC-SA 4.0.