
Honor X50i+ Camera Not Working Unexpected Error? Fix It Now | Dr.fone
Honor X50i+ Camera Not Working Unexpected Error? Fix It Now
For all its glory and goodness, the Android OS often has its users pulling their hair in frustration at just how buggy the OS can be at times. So, if you’re having one of those days today, we are here to help. Camera app is one of the most used apps on smartphones today. People only launch the app when they want to take a photo, for everything else there’s a dedicated photo gallery app. What happens when you launch the camera app only to realize it threw an error and you missed your photo moment? Don’t throw the phone, not yet. Let us help you out.


Part I: Why Is Android Camera Not Working?
There are a few reasons why the camera app is not working on your Honor X50i+.
Low Memory
Camera app does rely heavily on system resources, so in case you have too many apps open and for some reason the OS is not able to manage the resources appropriately for the camera app to function as it should, you will get a camera error.
Low Storage
The camera app needs storage space to save the photos it takes. So, in case your phone is running low on storage space, the camera app would likely malfunction as it would have no way to store the photos it would be taking.
General Bugs And Glitches
OS bugs and general glitches within the OS and the camera app can cause camera not working issue anytime during everyday operation. This is part and parcel of any technology.
Hardware Issues
In the rarest cases, there might have developed an actual hardware issue with the camera system on your Honor X50i+. The likely culprit is misuse and abuse, such as a dropped phone or maybe the phone was too hot for extended periods of time, causing hardware issues.
Part II: How To Fix Android Camera Not Working Issue?
So, how to get the Android camera not working problem solved? There are a few ways you can try fixing the camera not working issue on your Honor X50i+ right where you are, without needing to take the Honor X50i+ device to the manufacturer’s service center.
II.I: Restart The Handset
One of the first things to do any time an app or your phone or tablet does not work like it should, restarting the Honor X50i+ device refreshes everything just enough to resolve most commonly occurring issues.

Use the power button on your smartphone to restart your Android handset and see if this resolves the issue.
II.II: Close And Relaunch The Camera App
If the camera app (or any app for that matter) has been in the background for a while and then it is brought to the foreground, there are always chances of it crashing for any reason, or not working as expected. So, closing the app completely and relaunching it is recommended.
Step 1: Launch the app switcher on your specific Android device the way your device manufacturer suggests you to. Usually, it is a swipe up and hold gesture to get into the app switcher.

Step 2: Next, you can choose to close just the camera app or, better yet, close all apps by tapping the Close All button. Flicking any app upwards (quick upward swipe) is how you close an app. If there is no Close All button anywhere, repeat the gesture for all open apps.
II.III: Check App Permissions
These days, thanks to strides in the privacy initiatives, apps need permissions before they can function the way they do. Most of the times, apps such as camera do have the necessary permissions, but sometimes it is possible that the permissions are set incorrectly. To check if the camera app has the requisite permissions, do the following:
Step 1: Go to Settings > Apps > Camera > Permissions.

Step 2: Tap Camera.
 SwifDoo PDF Perpetual (1 PC) Free upgrade. No monthly fees ever.

Step 3: See if the selected option is Allow Only While Using This App. If not, select it.
II.IV: Clear The Camera App Cache
Clearing the camera app cache is sometimes helpful. To do that:
Step 1: Go to Settings > Apps > Camera and tap Storage Usage.

Step 2: Tap Clear Cache.

II.V: Clear The Photo Gallery App Cache
The camera app is closely tied to the photo gallery app that comes baked in into Android OS. That is because photos that the camera app takes are stored in the photo gallery app. Consequently, if there were any issues in the photo gallery app, that could lead to the camera app not working on Android problem. Here’s how to clear the photo gallery app cache:
Step 1: Go to Settings > Apps > Photos > Storage Usage.
.png) Kanto Player Professional
Kanto Player Professional
Step 2: Tap Clear Cache.
II.VI: Check For App Updates
This does not happen always, but sometimes, with known bugs and issues, there may be an update released that fixes those bugs and issues that prevent some users from using a given app reliably. Checking for updates is a good step to make sure that your camera app is updated to the latest version possible.
Step 1: Go to Play Store and tap your profile picture on the right.

Step 2: Tap Manage Apps and Device.

Step 3: If there are updates available, Tap Update All to update all apps.
II.VII: Cool The Phone Down
We do not realize the immense power that is packed into the thin smartphone form factor these days. If you have been using the phone to video chat for a while now, you might not realize that the phone has become hot, especially if you are using a desk stand. Same for shooting high-resolution videos; the phone does get quite hot shooting high-resolution videos.
If this is the case, close all apps and let the phone cool down. You might even want to shut the phone off to help cool it faster.
 DEX 3 RE is Easy-To-Use DJ Mixing Software for MAC and Windows Designed for Today’s Versatile DJ.
Mix from your own library of music, iTunes or use the Pulselocker subsciprtion service for in-app access to over 44 million songs. Use with over 85 supported DJ controllers or mix with a keyboard and mouse.
DEX 3 RE is everything you need without the clutter - the perfect 2-deck mixing software solution for mobile DJs or hard-core hobbiests.
PCDJ DEX 3 RE (DJ Software for Win & MAC - Product Activation For 3 Machines)
II.VIII: Nudge The Camera System
You may want to tap your camera system (the lenses and surrounding area) gently to see if that gets the camera working. In case it did, this is indicative of a hardware issue, and you should get it checked at the service center at your earliest convenience.
II.IX: Fix Android Camera Not Working Issue In One Click (With Dr.Fone)
Now, if the above fixes have not worked, you might want to repair your Android OS once before you make that appointment with the service centre. And, we have just the app to help you fix your camera not working on Android problem quickly.
Wondershare Dr.Fone is a multi-module app that works on both Windows and macOS and is the only app you will ever need to resolve nearly all of your smartphone and tablet issues that you are likely to encounter. Need to take backups? Dr.Fone Phone Backup has you covered with the ability to take and restore even selective backups, and to any location such as your computer or an external disk as well. Want to transfer WhatsApp chats to a new phone? Use WhatsApp Transfer to do just that! Bought a new phone? Use Phone Transfer to transfer contents from old phone to new, and then use Dr.Fone Data Eraser to securely wipe your old phone before giving it away!
Today, we will use Dr.Fone’s System Repair (Android) module to fix Android camera not working issue quickly.
Download Dr.Fone here.
 safe & secure
Step 1: Launch Dr.Fone app on your PC or Mac.

Step 2: Click System Repair module and then Android.
 KoolReport Pro is an advanced solution for creating data reports and dashboards in PHP. Equipped with all extended packages , KoolReport Pro is able to connect to various datasources, perform advanced data analysis, construct stunning charts and graphs and export your beautiful work to PDF, Excel, JPG or other formats. Plus, it includes powerful built-in reports such as pivot report and drill-down report which will save your time in building ones.
 It will help you to write dynamic data reports easily, to construct intuitive dashboards or to build a whole business intelligence cockpit.
KoolReport Pro package goes with Full Source Code, Royal Free, ONE (1) Year Priority Support, ONE (1) Year Free Upgrade and 30-Days Money Back Guarantee.
Developer License allows Single Developer to create Unlimited Reports, deploy on Unlimited Servers and able deliver the work to Unlimited Clients.

Step 3: For now, don’t bother with the scenarios given and click Start to go to the next screen.

Step 4: Your Android device will be detected by Dr.Fone. If anything seems incorrect, use the dropdown options to change it, and click Next.

Step 5: Your phone needs to be put into Download mode before it can be repaired. Follow the instructions shown onscreen and click Next.


Step 6: Dr.Fone automatically downloads the most recent firmware for your device and when it is ready, waits for your input. Click Fix Now to start the repair process.

Step 7: You will need to enter a 6-digit code (digit zero, six times – 000000) to confirm and begin the repair process.
 vMix 4K - Software based live production. vMix 4K includes everything in vMix HD plus 4K support, PTZ control, External/Fullscreen output, 4 Virtual Outputs, 1 Replay, 4 vMix Call, and 2 Recorders.
When the repair is complete, Dr.Fone shows the final screen as below:

safe & secure
Conclusion
The camera app on your smartphone is one of the most important apps you use. This is not a game; this is an app that makes previous memories possible for you. So, when you get any of those incorrigible errors that are impossible to make sense of, what do you do? This guide gives you 9 fixes to fix Android camera not working error quickly and easily.
Proven Ways to Fix There Was A Problem Parsing the Package on Honor X50i+
Unable to install your favorite Apps from Google Play Store because there was a problem parsing the package?
The Parse Error or there was a problem parsing the package error is very common with Android devices. Android is a versatile platform and, therefore, a very popular OS. It is an open software and allows users to download and use various types of apps from the Play store. Android is also a cheaper alternative as compared to other Operating Software.
Since many of us are well versed with most of the Android devices, parse error, or there is a problem parsing the package is an error is not something new and uncommon.
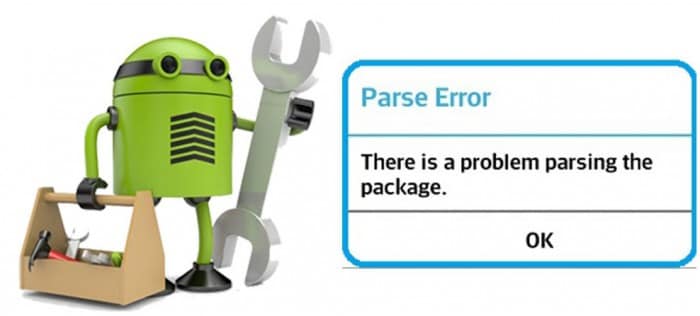
The error message usually pops up on the Honor X50i+ device screen when we try to download and install an App, for example, “There is a problem parsing the package Pokémon Go ”.
The error message which appears reads as follows:
“Parse error: There is a problem parsing the package”.
Android users who have experienced this would know that the parse error leaves us with only one option, i.e., “OK” as shown in the image below.
There was a problem parsing the package may occur due to several reasons, most of which are listed and explained below. Furthermore, there is a list of solutions to choose from to eliminate the “there is a problem parsing the package” error.
Read on to find out more.
Part 1: Reasons for the parsing error
Parse Error, better known as “there was a problem parsing the package” error is very common and normally surfaces when we try to download and install new Apps onto our Android devices from Google Play Store.
The reason for the error message to pop-up are many but none of them can be blamed singularly for the “there is a problem parsing the package” error. Given below is a list of the most probable reasons for Parse Error to stop an App from installing. Examine them carefully before moving on to the solutions to fix the “there was a problem parsing the package” error.
• Updating the OS may cause some disturbances in the manifest files of different Apps leading to Parse Error.
• Sometimes, the APK File, i.e., Android Application Package, gets infected due to improper or incomplete App installation causing “there is a problem parking the package” error.
• When Apps are downloaded and installed from unknown sources, due permission is needed. In the absence of such permission, the chances of the Parse Error to occur increase.
• Certain Apps are not compatible or supported by the latest and updated Android versions.
• Anti-virus and other cleaning Apps are also a major reason for the “there was a problem parsing the package” error.
The causes listed above are not App specific. The Parse Error may occur due to any one or more of these reasons, but what is more important is to try to get rid of the problem.
Let us move on to learn ways to fix the there was a problem parsing the package error.
Part 2: 8 Solutions to fix the parsing error
“There is problem parking the package” error can be dealt with easily if only we do not panic and deliberately follows the steps explained in this segment. Here are 7 of the most reliable and trustworthy methods to fix the Parse Error.
They are easy, user-friendly, and do not take much of your time. So don not waste any more of your time and try them now.
2.1 One Click to Fix ‘There is a Problem Parsing the Package
If you’re still encountering the Parsing error, there may be a problem with the Honor X50i+ device data on your device, which means you’ll need to repair it. Luckily, there’s a simple, one-click solution you can follow called Dr.Fone - System Repair .
Dr.Fone - System Repair (Android)
Android repair tool to fix all android system issues in one click
- Simple, clean, and user-friendly interface
- No technical knowledge required
- Easy one-click repair to fix ‘there is a problem parsing the package’ error
- Should repair most parsing problems with apps, like ‘there is a problem parsing the package Pokemon Go’ error
- Supports most Honor X50i+ devices and all the latest models like Galaxy S9/S8/Note 8
3981454 people have downloaded it
If this sounds like the solution you’re looking for, here’s a step by guide on how to use it yourself;
Note: Please note that this repair process can erase all data on your phone, including your personal information. This is why it’s so important to back up your Honor X50i+ before proceeding.
Step #1 Head over to the Dr.Fone website and download the software. Install the downloaded software and open it. From the main menu, select the System Repair option.
Input your device and firmware information to confirm you’re installing the right version of the operating system.
Step #2 Follow the onscreen instructions on how to get into Download Mode to start the Repair process.

Once complete, the firmware will start downloading.
 Software Update Pro - Check and update software installed on your computer.

Step #3 Once the firmware has downloaded, it will automatically install it to your device.
When this is completed, you’ll be free to disconnect your Honor X50i+ and use it how you please without the ‘there is a problem with the parsing package’ error.
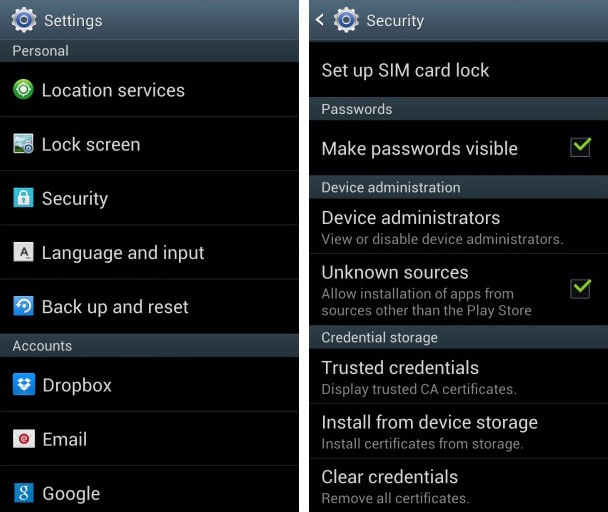
2.2 Allow installation from unknown sources
When we install Apps from other sources and not Google Play Store, there might be a glitch in using such Apps. To overcome this problem, turn on “Allow App installation from other sources”. Follow the steps given below for better understanding:
• Visit “Settings” and select “Applications”.
• Now tick mark on the option saying allow App installation from unknown sources.
2.3 Enable USB debugging
USB debugging is not considered necessary by many users but these methods give you an edge over others while using an Android device as it lets you access things on your phone, etc which you could not earlier.
To enable USB Debugging to fix “There is a problem parsing the package” error, follow these steps:
• Visit “Settings” and select “About Device”.
• Now click on “Build Number” not once but continuously for seven times.

• Once you see a pop-up saying “You are now a developer”, go back to “Settings”.

• In this step, select “Developer Options” and turn on “USB Debugging”.

This should solve the problem. If not, move on to the other techniques.
2.4 Check APK File
An incomplete and irregular App installation may cause the .apk file to get corrupted. Make sure you download the file completely. If need be, delete the existing App or its .apk file and reinstall it from Google Play Store for it to be compatible with your device’s software and to use the App smoothly.
2.5 Check App Manifest File
Manifested App files are nothing but .apk files which are improvised by you. Such changes may cause the Parse Error to occur more frequently. Modifications in the App file can be made by changing its name, App settings, or more advanced customizations. Make sure you roll back all changes and restore the App file to its original state to prevent it from getting corrupted.
2.6 Disable Antivirus and other cleaner Apps
Antivirus software and other cleaning Apps are very helpful in blocking unwanted and harmful Apps from damaging your device. However, sometimes such Apps also prevent you from using other safe Apps.
We do not suggest that you delete the Antivirus App permanently. Temporary uninstallation will be useful here. To do so:
• Visit “Settings” and then select “Apps”.
• Select the antivirus App to click on “Uninstall” and then tap “OK”.
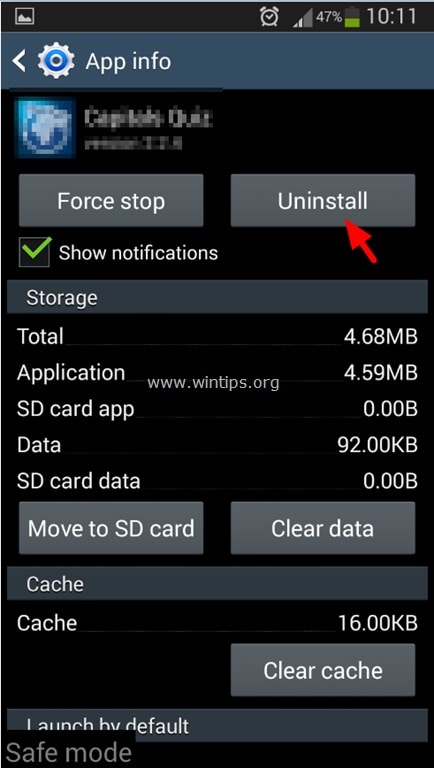
Now download and install the desired App again. Once this is done, do not forget to install the Antivirus App again.
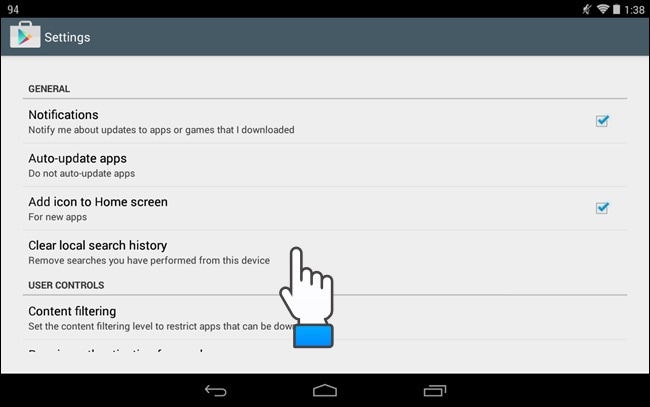
2.7 Clear Cache cookies of Play Store
Clearing Play Store Cache cleans the Android Market platform by deleting all clogged up unwanted data. Follow the steps given below to delete Play Store cache:
• Tap on Google Play Store App.
• Now visit Play Store’s “Settings”.

• Select “General Settings” to “Clear local search history”.
2.8 Factory Reset Android
Factory Resetting your device to fix the Parse Error should be the last thing you try. Make sure you take a back-up of all your data on your Google Account or a Pen Drive because this technique erases all media, contents, data, and other files, including your device settings.
Follow the steps given below to factory reset your device:
• Visit “Settings”.
• Now select “Backup and Reset”.

• In this step, select “Factory data reset” and then “Reset Device” to confirm Factory Reset.
The whole process of factory resetting your Honor X50i+ might sound tedious, risky, and cumbersome but it helps to fix the Android SystemUI has stopped error 9 out of 10 times. So, think carefully before using this remedy.
Parse Error: There was a problem parsing the package is an error message that has troubled many Android users. The good part is that the above-stated fixes not only solve the problem but also prevent it from occurring in the future. So, keep them in mind the next time you or anyone you know faces such an issue.
How to Quickly Fix Bluetooth Not Working on Honor X50i+
One of the key features of an Android device these days is the Bluetooth technology. This is such an important part of the phone that many of us take for granted, but as soon as the feature stops working, it can cause all kinds of problems.
Fortunately, despite there being many reasons why a problem could occur to your Bluetooth feature, there are also plenty of fixes. Today, we’re going to share with you the complete guide that details everything you need to know to get your Bluetooth up and running once again as quickly as possible.
Let’s get straight into it!
 LYRX is an easy-to-use karaoke software with the professional features karaoke hosts need to perform with precision. LYRX is karaoke show hosting software that supports all standard karaoke file types as well as HD video formats, and it’s truly fun to use.
Part 1. About Bluetooth Not Working on Android
Of course, the most common problem to occur with Bluetooth technology in your Honor X50i+ is when it doesn’t connect to the Honor X50i+ device you’re trying to link it to. This could be anything from a Bluetooth headset or headphones, to a portable speaker or even an in-car audio system.
However, the problems don’t stop there. You may have problems with turning your Bluetooth settings on through your actual device. Perhaps the software simply isn’t loading, or maybe the Bluetooth feature keeps turning itself off randomly.
Due to the complicated nature of Bluetooth technology, there could be many reasons as to why your Bluetooth feature is playing up in this way, but that doesn’t mean it can’t be fixed. For the rest of this guide, we’re going to explore the nine need-to-know ways you can fix the Bluetooth problems not working on your Honor X50i+ as quickly as possible.
Part 2. 9 fixes for Bluetooth not working on Android
2.1 One click to fix Android Bluetooth issues due to Android system
Since Bluetooth is an internal technology, this indicates there’s a problem with the software or firmware of your Honor X50i+. If something’s broken, this means you need to fix it. Fortunately, there’s a quick and easy way to do this using software known as Dr.Fone - System Repair (Android).
Dr.Fone - System Repair (Android) is a powerful Android repair tool which is hailed as many as being on the best software applications in the industry. With all the tools you need to repair your phone not just for Bluetooth errors, but basically any internal firmware problems, this is a one-shot-tool that gets the job done.
Dr.Fone - System Repair (Android)
Android repair tool to fix Bluetooth issues in one click
- Can fix most internal software and firmware issues
- Trusted by over 50+ million people around the world
- Supports over 1,000+ unique Android brands, manufacturers, and devices
- Incredibly user-friendly and easy-to-use
- Compatible with all Windows computers
3981454 people have downloaded it
To ensure you have the best experience while using the Dr.Fone - System Repair (Android) software, here’s a complete step-by-step guide on how it works when fixing your Android’s Bluetooth problems.
Step One Make your way over to the Wondershare website and download the Dr.Fone - System Repair (Android) software to either your Mac or Windows computer. Install the downloaded file by following the on-screen instructions. Once installed, open the software, so you’re on the Main Menu.
Step Two Connect your Honor X50i+ to your computer using the USB cable, wait a couple of seconds, and then click the System Repair option. On the Menu on the left, click Android Repair, and then press Start.
Step Three Next, use the drop-down menus to make sure all the information about your specific device is correct, including your device, operating system number, and carrier information. Click Next to confirm your selections.
Step Four When prompted, put your phone into Download Mode needed for repairs. You can do this by following the on-screen instructions which will depend on which device you have and the available buttons.

Step Five The software will now begin the repair process. This will happen automatically, and all you’ll need to do is make sure your device doesn’t disconnect during this process, and your computer doesn’t turn off.

When the repair process has been completed, you’ll receive the screen below, which means you can try again if the process didn’t work, or you can disconnect your Honor X50i+ and start using it and your Bluetooth features.
2.2 Restart Android and turn on Bluetooth again

One of the most common solutions in technology is simply to turn it on and off again, which is the case to happen here. By restarting your device, you can clear out any problems you may be suffering from to help it get up and running again. Here’s how;
- Turn your Honor X50i+ off by holding down the Power button
- Wait for several minutes and then turn your phone on again
- Wait for your phone to completely power up, so you’re on the Main Menu
- Navigate Settings > Bluetooth and then enable the setting
- Try to connect your Bluetooth device to what you were trying to do before
2.3 Clear the Bluetooth cache
 HD Video Converter Factory Pro

Every service on your Honor X50i+ using a feature called a cache. This is where information is stored to help the feature run properly and give you the best experience. However, over time this can get messy and can cause problems with your Bluetooth feature.
By clearing the cache, you can restart the service and hopefully clear up any issues or problems you may be experiencing.
- On your phone, navigate Settings > Application Manager, and you’ll see all the apps and services on your phone. Locate and select the Bluetooth service.
- Select the Storage option
- Tap the Clear Cache option
- Go back of the Menu and restart your phone
- Now turn your Bluetooth feature on and turn connecting it to your preferred device
2.4 Remove paired devices

Sometimes, you may have a problem with the Honor X50i+ device you’re trying to connect to via Bluetooth, especially if this is a device you’ve updated. To counter and repair this, you’re going to need to remove the paired devices saved with your device and then reconnect them.
Here’s how;
- From the Main Menu of your Honor X50i+, head to Settings > Bluetooth > Connected Devices.
- Turn Bluetooth on, and you’ll see all the connections your Honor X50i+ is paired with
- Go through these settings and remove/delete/forget every connection on your device
- Now when you go to connect to a device using Bluetooth, repair the Honor X50i+ device, enter the passcode, and use a fresh paired connection.

2.5 Use Bluetooth in safe mode

If you’re having problems with your connection and paired devices, sometimes you may have conflicting software faults in your device that are causing the problems. If this is the case, you’ll need to boot your Honor X50i+ in Safe Mode.
This is an operating state in which your phone will run the bare minimum services it needs to perform. If your Bluetooth works in Safe Mode, you know you have an app or a service that’s causing the problem.
Here’s how to find out;
- Hold the power button down, so the Android power menu turns on
- Long-press the power button again and the restart in Safe Mode option will come up
- The phone will automatically boot into Safe Mode
- Wait a minute on the Main Menu
- Now turn on your Bluetooth and connect it to your preferred device
2.6 Turn on the discoverable feature

To ensure your Bluetooth can connect to other devices, it’s important to make sure you’re making your device discoverable to other Bluetooth devices. If it’s hidden, other devices won’t be able to find it, and sometimes it can bug and prevent connections.
Here’s how to turn on your Bluetooth discoverable feature;
- From the home screen of your Android, navigate to the Menu> Settings > Bluetooth
- Toggle the Bluetooth switch, so it’s on
- Under the available settings, tick the box that allows your Bluetooth device to be discoverable
- Turn your Bluetooth feature on and connect to the Honor X50i+ device you’re trying to connect too
2.7 Exclude Bluetooth issues of the other device


Sometimes, you might not even have a problem with your Honor X50i+, but rather the Bluetooth device you’re trying to connect to, whether that’s a Bluetooth speaker, an in-car entertainment system, or any other kind of Bluetooth device.
By testing out another Bluetooth device to see if it will work with your preferred device, you can rule this out from being the issue.
- Disconnect your Honor X50i+ from the Bluetooth device and turn your Bluetooth off
- Now take another Bluetooth device and connect this to the Honor X50i+ device you’re trying to connect too. This could be another Android device, or even a computer or iOS device
- If the new device doesn’t connect to your Bluetooth device, you’ll know there’s a problem with your Bluetooth device, not your Honor X50i+
- If the Honor X50i+ devices connect, you’ll know there’s a problem with your Honor X50i+
2.8 Place both devices within close proximity

One of the common misconceptions of Bluetooth is just how far the wireless range is of the service. You need to make sure your devices are well and truly close to each other to make sure a stable connection can be formed.
The further away the Honor X50i+ devices are from each other, the less likely the connection will remain secure. As a rule of thumb, Bluetooth can work up to 100 meters, but to play it safe, always try and keep your devices under 50m apart.
2.9 Avoid interference of other Bluetooth sources
 vMix Basic HD - Software based live production. vMix Basic HD includes 4 inputs, 3 cameras, streaming, recording, playlist.
The final consideration you’ll want to think about is that Bluetooth radio waves, or wireless waves, can interfere with each other. This means they can bounce off each other or get muddled up and make things confusing from your devices.
With this in mind, you’ll want to make sure you’re limiting the amount of Bluetooth activity in the area where you’re trying to use a device. While uncommon, this could be the problem.
To fix this issue, turn off all the Bluetooth connections in the area. This includes computers, laptops, mobile phones, tablets, and any other Bluetooth devices you may have. Then, try connecting your Honor X50i+ to the Honor X50i+ device you were trying to use. If it works, you know you were experiencing Bluetooth interference.
- Title: Honor X50i+ Camera Not Working Unexpected Error? Fix It Now | Dr.fone
- Author: Nova
- Created at : 2024-07-19 22:23:36
- Updated at : 2024-07-20 22:23:36
- Link: https://change-location.techidaily.com/honor-x50iplus-camera-not-working-unexpected-error-fix-it-now-drfone-by-drfone-fix-android-problems-fix-android-problems/
- License: This work is licensed under CC BY-NC-SA 4.0.