
Home Button Not Working on Poco X6? Here Are Real Fixes | Dr.fone
Home Button Not Working on Poco X6? Here Are Real Fixes
There is no doubt that it is quite frustrating when your device buttons, such as home and back don’t work properly. The reasons can be software as well as hardware issues. If you are wondering whether there is any solution to fix this problem, then you’ve come to the right place. Firstly, yes some methods can probably help you to come out of this issue. Here, in this guide, we have covered various solutions you can try to resolve the “home button not working Android” problem no matter whether it is due to software or hardware reason.
Part 1: 4 Common Measures to Fix Home Button Not Working Android
Here, we are going to mention four common methods that you can try to resolve the home button problem on your Poco X6 with ease.
 SwifDoo PDF 2-Year Plan
1.1 One click to fix Android Home Button Not Working
[Try It Free](https://download.wondershare.com/drfone_repair_full3371.exe)When it comes to the home button not working Poco X6 problem, the most common reason is the unknown system issues. In such a scenario, the best solution is using Dr.Fone - System Repair (Android) software to repair your Android system to normal in one click. This tool is powerful enough to resolve various Android issues within a few minutes.
Dr.Fone - System Repair (Android)
Android repair tool to fix home button not working on Android
- The tool can help you to fix the Android operating system in a wide range of scenarios.
- It is compatible with all Poco X6 devices.
- There is no need for technical skills to use the software.
- The software comes with a high success rate for fixing the Android system.
- It provides easy steps to resolve Android issues.
3981454 people have downloaded it
To learn how to fix home button not working problem, download and install the Dr.Fone - System Repair (Android) software on your computer, follow the below step-by-step guide:
Step 1: To begin with the process, launch the software on your computer and select the “System Repair” option from the software main window.

Step 2: Thereafter, connect your Poco X6 to the computer using a USB cable and select the “Android Repair” tab from the left menu.


Step 3: Next, you will navigate to a device information page where you have to provide your device information.

Step 4: After that, the software will download the appropriate firmware to repair your Android system.

Step 5: After downloading the firmware, the software will start the repair process. Wait for a few seconds, the problem should get fixed and your phone will get back to its normal state.

1.2 Force Restart your Android
Whenever you encounter with Android virtual soft keys, not working problem, the first thing you should try is to force restart your phone . If the problem is due to a software issue, then it can be probably fixed by simply force restarting your Android.
Here are simple steps on how to force restart on Android:
Step 1: To begin with, press and hold the power button and either volume up or down button at the same time until your device screen goes off.
Step 2: Next, press the power button for a few moments to force restart your device.

 SwifDoo PDF Perpetual (2-PC) Free upgrade. No monthly fees ever.
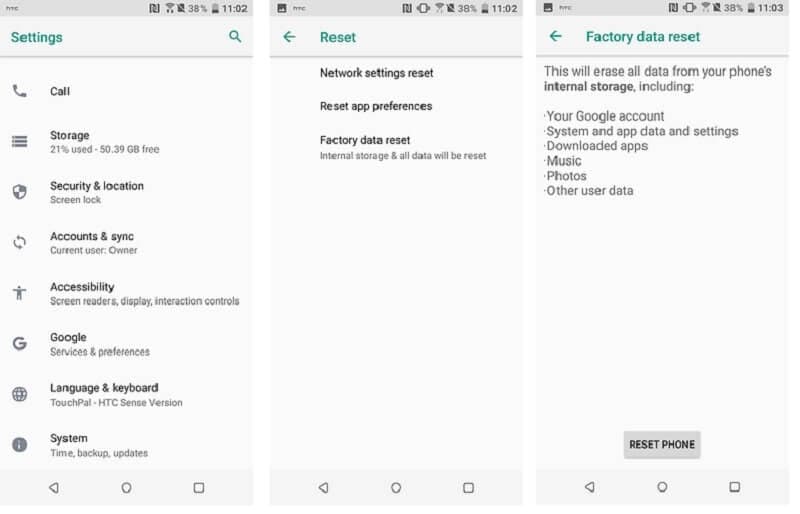
1.3 Restore Factory Settings
If force restarting won’t help you to fix the problem you are facing, it’s time to reset your Poco X6 to factory settings. The factory reset on an Android device will erase all of your phone settings, third-party apps, user data, and other app data to restore your device to its original manufacturer condition or settings. It means that this can bring back your device to its normal state.
To learn how to restore factory settings, follow the below steps:
Step 1: Go to your ‘Settings” and then, go to “System”>” Advanced”>” Reset options”.
Step 2: Next, tap on “Erase all data”>” Reset phone” to factory reset on your phone. Here, you may need to enter the password or pin or pattern.
Once you are done with the above steps, restart your phone and restore your data and this might be fixed the problem for you. If not, then try the next solution.
1.4 Update Android Firmware
It might be the case that your Android firmware is not updated and that’s why you are experiencing the home button not working Android problem. Sometimes, not updating your Android firmware can cause various issues and problems while using your device. So, you should update it, and here are steps on how to do it:
Step 1: Open the Settings and then, go to “About device”. Next, click “System updates”.
Step 2: After that, click “Check for updates” and if updates are available, then download and install it to update your Android version.

Part 2: What if the Home Button fails due to hardware reasons?
When your Android home and back button not working because of hardware reasons, you can’t get the problem resolved by simply rebooting your device. In such cases, you have to use alternative apps to replace the home button.
2.1 Simple Control app
The Simple Control app is the first and foremost solution to fix the Android home button not working issue. With the help of this app, you can fix many soft keys of your device. It is specially designed for Android users facing trouble using home, volume, back, and camera buttons. Plus, the app utilizes Accessibility service, but it doesn’t get access to your sensitive and personal information.
Pros:
- It can easily replace broken and failed buttons.
- The app is quite easy to use.
Cons:
- It is not as much efficient as other similar apps available out there.
URL: https://play.google.com/store/apps/details?id=ace.jun.simplecontrol&hl=en_US
2.2 Button Savior app
Button Savior app is one of the ultimate apps that can help you to fix the Android home button not working problem with ease. For this app, root and no root versions are available on the Google Play store. To fix the Home button not working issue, no root version is the right one. But, if you want to fix the Back button or other buttons, then you need to go for the root version.
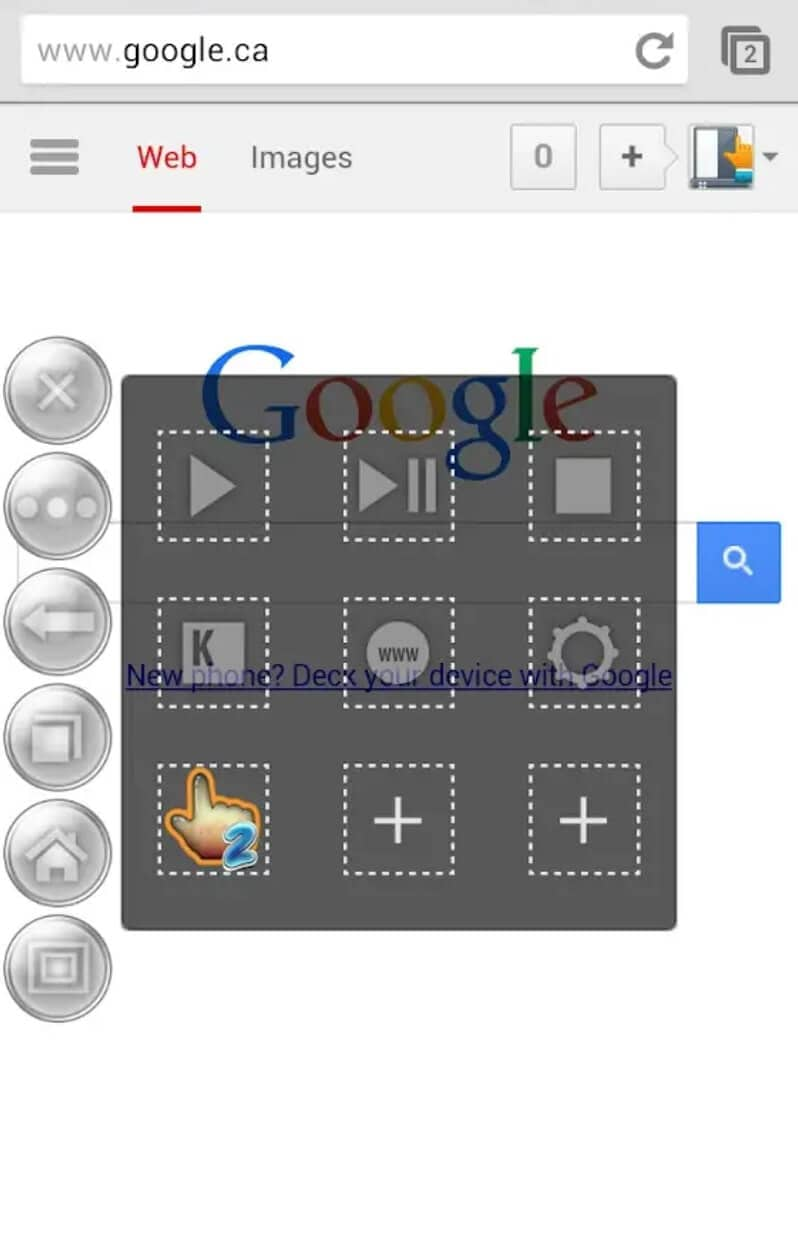
Pros:
- It comes with a root as well as no root version.
- The app is powerful enough to fix a wide range of buttons.
- It shows information regarding the date and time and battery.
Cons:
- The root version of the app can cause data loss.
URL: https://play.google.com/store/apps/details?id=com.smart.swkey" target="_blank” rel=”nofollow
2.3 Navigation Bar (Back, Home, Recent Button) app
Navigation Bar app is another great solution to fix the home button not responding problem. It can replace broken and failed button for users who are facing difficulty using navigation bar panel or buttons not working properly. The app offers numerous features, and it is easy to use.
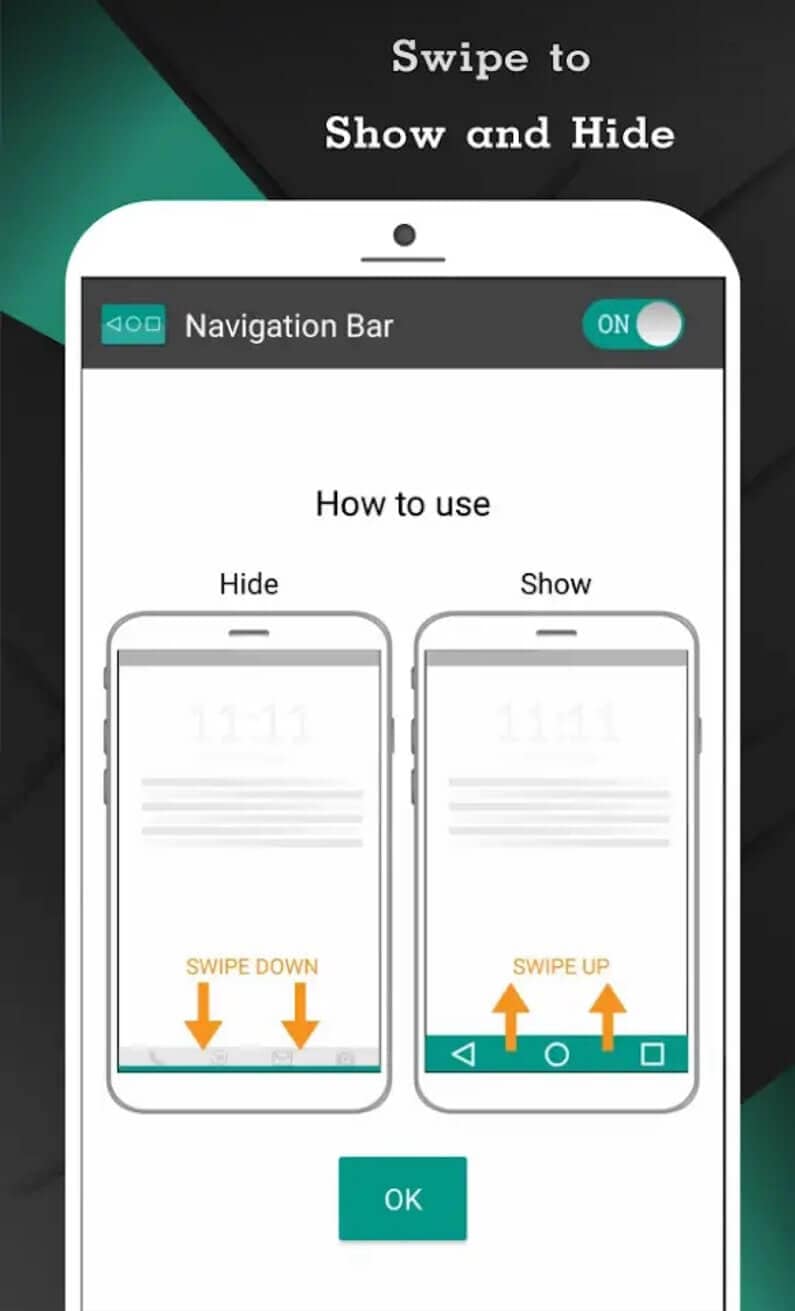
Pros:
- It offers many colors to make an incredible navigation bar.
- The app provides 15 themes for customization.
- It comes with the ability to change the size of the navigation bar.
Cons:
- Sometimes, the navigation bar stopped working.
- It comes with ads.
URL: https://play.google.com/store/apps/details?id=nu.nav.bar
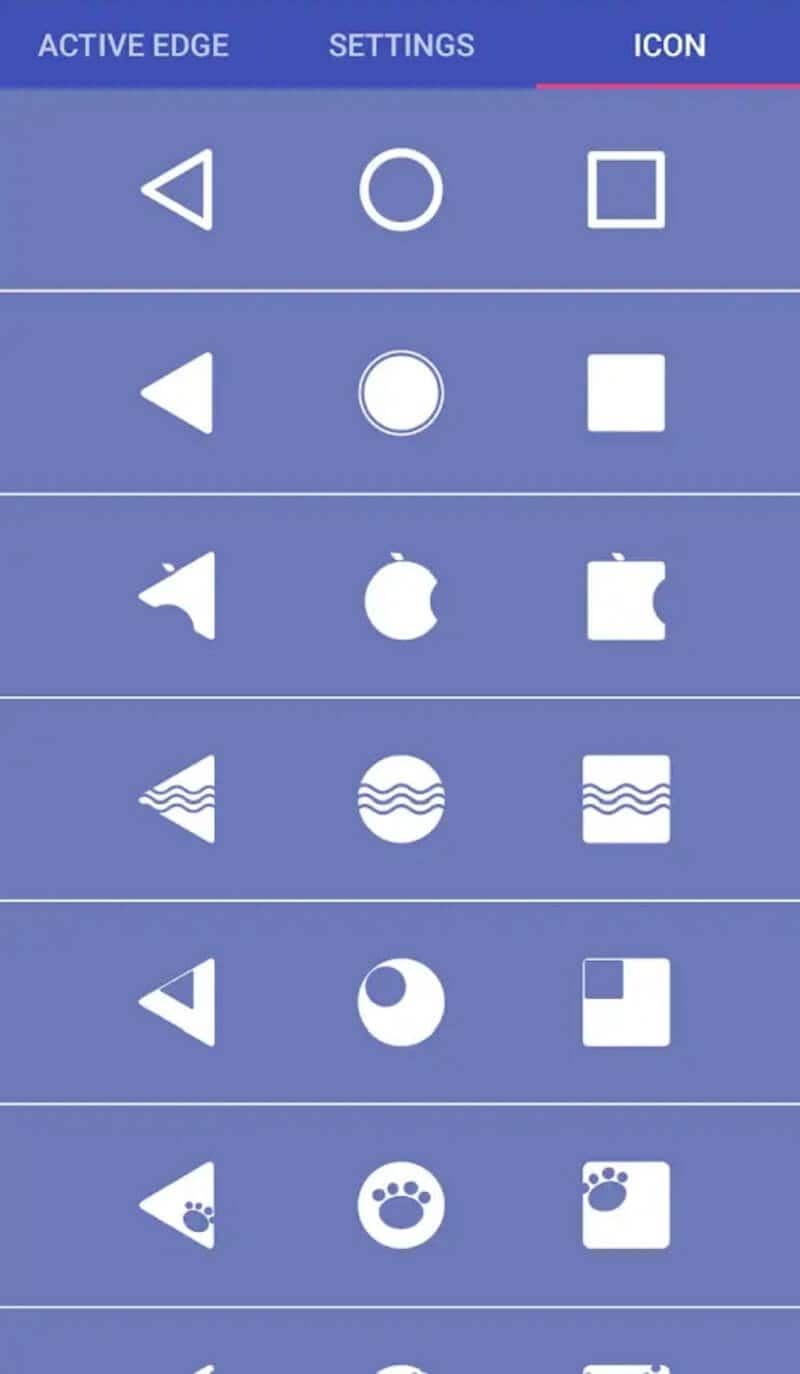
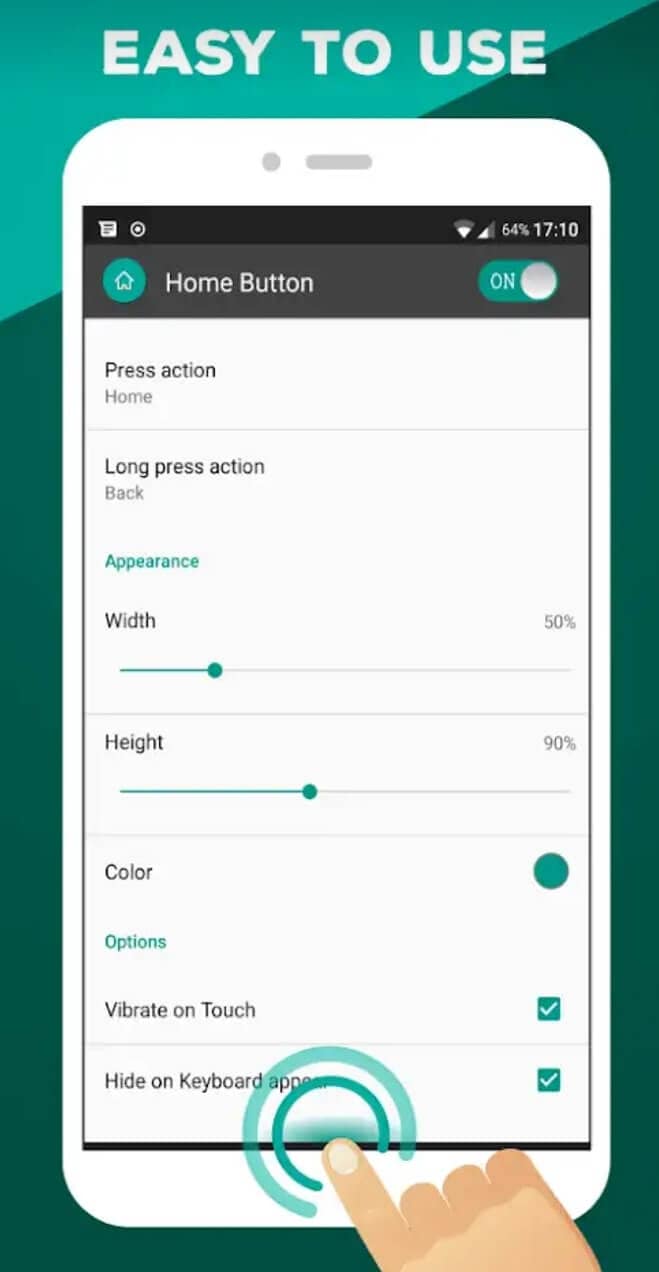
2.4 Home Button app
Home button app is another remarkable solution to replace broken and failed home buttons for users having trouble while using buttons. With this app, it is quite easy to press or even long press on the home button as assistive touch.
Pros:
- You can change the button of color using the app.
- With the help of it, you can set a vibrate setting on touch.
- It provides support for many press actions, such as home, back, power menu, etc.
Cons:
- It doesn’t come with a lot of features, unlike other apps.
- Sometimes, it shuts down automatically.
URL: https://play.google.com/store/apps/details?id=nu.home.button
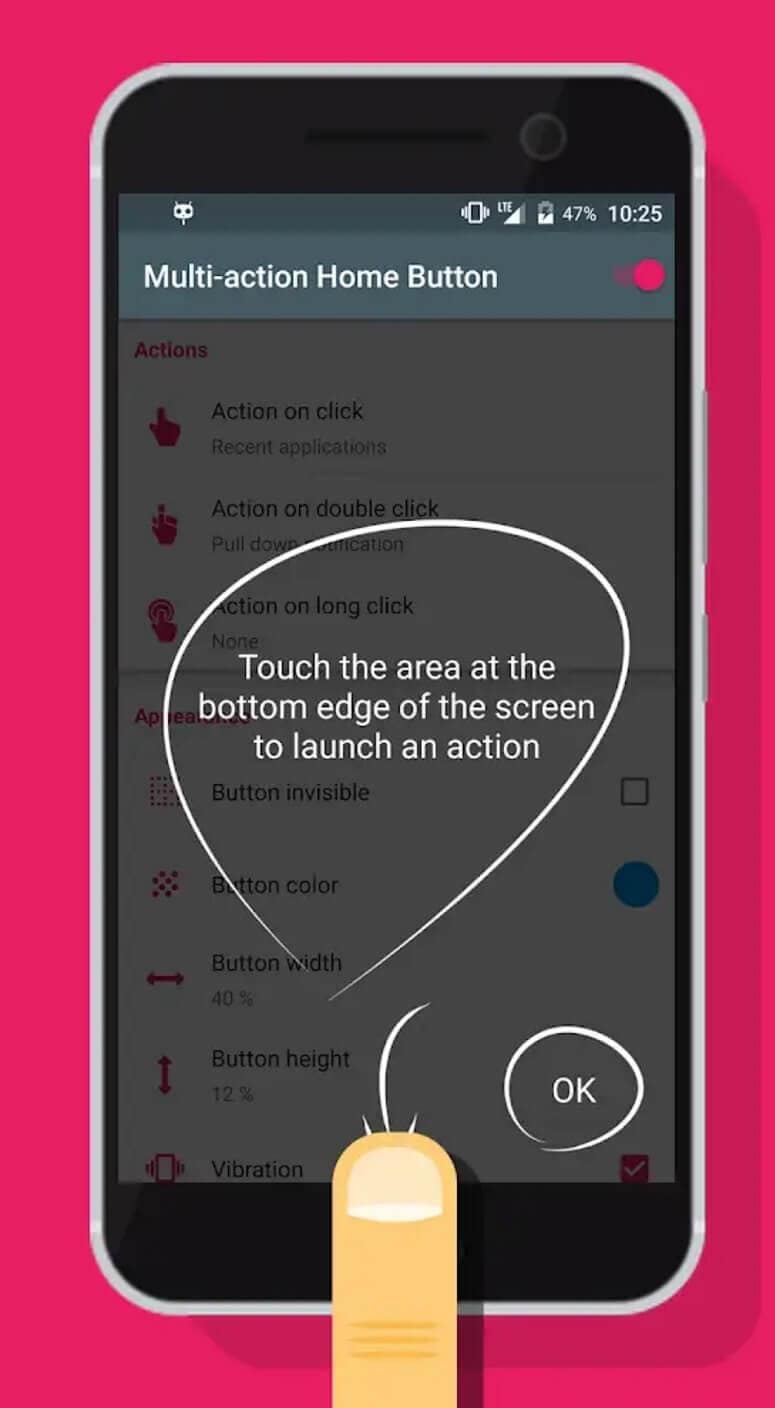
2.5 Multi-action Home Button app
Is your Android physical home button is broken or dead? If yes, then the Multi-action Home Button app can help you to fix it with ease. With the help of it, you can create a button in centre-bottom of your device screen, and you can also add numerous actions to that button.
Pros:
- It provides various actions with the button.
- It is very simple and easy to use.
Cons:
- The app’s very useful feature comes with its pro version.
URL: https://play.google.com/store/apps/details?id=com.home.button.bottom
Conclusion
Hopefully, the methods covered in this post helps you to fix Android home and back button not working problem for you. If it is a system issue, then the best thing you can do is to take advantage of Dr.Fone - System Repair (Android) software. It can surely help you to fix your Android system to normal within a few minutes.
Troubleshooting Guide: How to Fix an Unresponsive Poco X6 Screen
 vMix Basic HD - Software based live production. vMix Basic HD includes 4 inputs, 3 cameras, streaming, recording, playlist.
Smart devices have become an integral part of our lives, and Poco X6 phones are increasingly popular due to their advanced features and affordable prices. These phones offer numerous benefits, including high-quality cameras, fast processors, long-lasting batteries, and sleek designs.
However, like any other electronic device, Poco X6 phones can sometimes encounter issues that may impede their functionality. One common problem that users face is an unresponsive screen, which can be frustrating and disruptive to daily activities.
This article will discuss some valuable solutions for dealing with Poco X6 phone screen unresponsiveness. We will provide step-by-step instructions for troubleshooting and getting your phone back in working order. Whether you’re a novice or an experienced user, these tips and tricks will help you navigate this problem and get back to using your phone without any issues. So, let’s dive in and explore how to fix a Poco X6 phone with an unresponsive screen.
What causes the Poco X6 Screen unresponsive?
The Poco X6 screen may become unresponsive due to various reasons. Here are some common situations and their possible causes:
During Use/Gaming: The screen may become unresponsive due to overheating when using or gaming on a Poco X6 phone. This can be caused by running too many apps simultaneously or playing games for an extended period, especially on models such as the Poco X6 9 Pro, which generates much heat during gaming.
**No Response When Touching the Screen:**Sometimes, the Poco X6 screen may not respond when touched due to a faulty touch screen or display. This can happen due to physical damage or a manufacturing defect. Some Poco X6 Nord 2 users have reported this issue.
After Dropping the Phone: If a Poco X6 phone has been dropped, the screen may become unresponsive due to physical damage or a loose connection. This can happen to any model, including the Poco X6.
Overheating, physical damage, and manufacturing defects are some common causes of Poco X6 screen unresponsiveness, which may occur during use/gaming, no response when touching the screen, or after dropping the phone.
The common solutions to solve a Poco X6 Screen unresponsive
Here are the three most common solutions to deal with phone screens being unresponsive, regardless of the brand:
Restart the Poco X6 device

Restarting the Poco X6 device is a simple and quick solution to an unresponsive phone screen. To restart the phone, press and hold the power button until the screen turns off, then press and hold the power button again to turn the phone back on.
Check the Charging Port and Battery
Sometimes, an unresponsive screen can be caused by a dead battery or a faulty charging port. To check for these issues:
Step 1: Plug the phone into a charger and wait for at least 30 minutes to see if the battery charges.
Step 2: Try a different charger or cable to see if the issue is with the charging accessories.
Contact the Pros

If the above solutions don’t work, contacting a professional is best. A trained technician can diagnose and fix the problem. Contact the phone manufacturer or an authorized repair center to get help with your phone.
For different Poco X6 models, there may be additional solutions to consider:
Check the Phone’s Temperature

Sometimes, a Poco X6 phone’s screen, specifically Poco X6 8 Pro, may become unresponsive due to overheating. To check the phone’s temperature:
Step 1: Go to Settings > Battery > Battery Temperature.
Step 2: If the phone is overheating, let it cool down before using it again.
Reset to Factory Settings
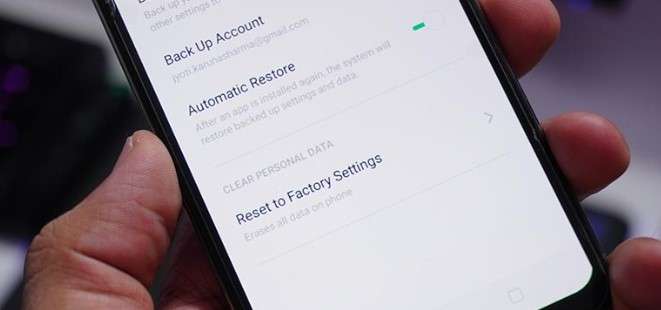
A factory reset may help fix the problem if none of the above solutions work. Note that this will erase all data and settings on the phone, so be sure to back up your data before resetting. To reset the phone:
Step 1: Go to Settings > Additional Settings > Backup and Reset > Erase All Data.
Step 2: Follow the on-screen instructions to reset the phone.
Replace a New Screen

If the phone’s screen is physically damaged or cracked, it may need to be replaced. To replace the screen:
- Contact a professional repair center or the manufacturer for replacement parts and installation.
 Forex Robotron Gold Package
How to avoid Poco X6 Screen being unresponsive?
To avoid Poco X6 screen being unresponsive, here are some suggestions based on the possible causes:
Check Software Updates on Time
Make sure to regularly check for and install software updates on your Poco X6 phone. These updates often include bug fixes and security patches that can help prevent issues like overheating and screen unresponsiveness.
Check Hardware from Time to Time
Regularly inspect your phone’s hardware components such as charging ports, battery, and screen for any signs of damage or wear and tear. If you notice any issues, get them fixed promptly to prevent them from causing further damage.
Avoid extreme temperatures
Keep your Poco X6 device in a temperature-controlled environment. High temperatures can cause the screen to become unresponsive, and low temperatures can cause it to freeze.
Keep the screen clean
Dirt and debris on the screen can cause it to become unresponsive. Use a microfiber cloth to clean the screen regularly.

Reduce the number of running apps
Running too many apps at once can overload the system and cause the screen to become unresponsive. Close any apps you’re not using to free up system resources.
Use Wondershare Dr.Fone to Repair or Manage Your Data
Wondershare Dr.Fone is a helpful tool that can help manage and repair your phone’s data. It can be used to back up your data, transfer files between devices, and even fix issues like an unresponsive screen. Dr.Fone has the DF13 version to be launched, which includes more features to help manage your phone’s data effectively.
By following these suggestions, you can help prevent screen unresponsiveness on your Poco X6 phone. Download Dr.Fone at https://drfone.wondershare.com/ to manage your phone’s data effectively and fix any issues that may arise.

 safe & secure

Conclusion
Poco X6 phones offer numerous benefits, including high-quality cameras, fast processors, long-lasting batteries, and sleek designs. However, like any other electronic device, Poco X6 phones can sometimes encounter issues, such as an unresponsive screen. The causes of an unresponsive screen may include overheating, physical damage, and manufacturing defects.
To deal with an unresponsive screen, users can try restarting the Poco X6 device, checking the charging port and battery, or contacting a professional. Additional solutions for specific Poco X6 models include checking the phone’s temperature, resetting to factory settings, or replacing a new screen. To avoid an unresponsive screen, users can check software updates on time, inspect the phone’s hardware, avoid extreme temperatures, keep the screen clean, and reduce the number of running apps. Dr.Fone is a helpful tool that can help manage and repair your phone’s data.
Poco X6 Bootloop Problem, How to Fix it Without Data Loss
Have you, like many other users, faced the bootloop Android problem and wondered what exactly is Android boot loop. Well, Android boot loop is nothing but an error that makes your phone switch on itself every time you manually turn it off. To be precise, when your Poco X6 does not remain switched off or powered off and starts to boot up automatically after a few seconds, it might be stuck in the boot loop Android.
An Android boot loop is a very common problem and is one of the first symptoms of a soft-bricked device. Also, when your device is experiencing Android boot loop issue, it does not start normally to reach the Home or Locked Screen and remains frozen at the Poco X6 device’s logo, Recovery Mode or a lit-up screen. Many people fear losing their data and other files due to this error and thus, it is a very confusing situation to be in.
We understand the inconvenience caused, therefore, here are ways to tell you how to fix the bootloop problem in Android devices without losing any important data.
However, before moving on, let us learn a little about the causes for the Android boot loop error.
Part 1: What might cause the bootloop issue on Android?
Android boot loop error might seem weird and unexplainable but it occurs because of some specific reasons.
Firstly, please understand that it is a misnomer that boot loop error occurs only in a rooted device. Boot loop Android error can also occur in a stock device with the original software, ROM, and firmware.
In a rooted device, changes made, such as flashing a new ROM or customized firmware which are not compatible with the Poco X6 device’s hardware or existing software, can be blamed for the boot loop problem.
Moving on, when your device’s software is unable to communicate with the system files during the start-up process, Android boot loop problem may arise. Such a glitch is caused if you have recently updated the Android version.
Also, corrupt App update files may also cause the bootloop Android issue. Apps and programs downloaded from unknown sources bring in a particular type of virus that prevents you from using your device smoothly.
All-in-all, Android boot loop error is a direct outcome of when you try to tamper with your device’s internal settings.
Hence, if you are looking for ways to guide you about how to fix boot loop issue, you will have to revamp the Poco X6 device internally by either resetting it or adopting a recovery method.
Read on to know more about how to fix the bootloop error without any data loss when your device suffers from the bootloop Android problem.
 Video Converter Factory Pro
Part 2: One click to Fix Android Bootloop without factory reset
If you are trying to figure out how to fix boot loop, the first option you have is the one-click fix to Android Bootloop which involves using the Dr.Fone - System Repair software.
This is designed to repair any data corruption on your device and restores your firmware to its usual working condition.
Dr.Fone - System Repair (Android)
One click to fix boot loop of Android
- #1 Android repair solution from your PC, can fix a wide range of Android system issues, such as boot loop, black screen, etc.
- The software requires no technical expertise, and anybody can use it
- A one-click solution when learning how to fix Android boot loop
- Not require root Android phones.
- Works with most Poco X6 devices, including the latest Poco X6 phones like S22
- Simple and easy-to-use user interface
4,689,059 people have downloaded it
To help you get started, here’s a step-by-step guide on how to use Dr.Fone - System Repair.
Note: This method can erase data on your device, including your personal files, so make sure you’ve backed up your device before proceeding.
Step #1 Download the Dr.Fone - System Repair software from the website and install it onto your computer.
Open the software and select the System Repair option from the main menu to fix the Android bootloop error.
Step #2 Connect your Poco X6 to your computer using the official cable and select the “Android” option from the three menu items. Click “Start” to confirm.
You’ll then need to input the Poco X6 device information, such as your carrier info, device name, model, and country/region in order to ensure you’re downloading and repairing the correct firmware to your phone.
Step #3 Now you’ll need to put your phone into Download Mode to remove the Android bootloop.
For this, you can simply follow the onscreen instructions for both phones with and without home buttons.

Click “Next”, and the software will begin downloading the firmware repair files.
Step #4 Now you can sit back and watch the magic happen!
Make sure your computer stays connected to the internet, and your device stays connected to your computer throughout the entire process. Once the firmware has been downloaded, it will be automatically installed onto your mobile device, removing the boot loop Android error.

You’ll be notified when the process is done and when you can remove your device and start using free from the boot loop Android error!
safe & secure
Part 3: Soft reset to fix Android bootloop issue
When your device is stuck in Android boot loop, it does not necessarily mean that it is bricked. Boot loop might be occurring due to a simpler problem which can be fixed by turning off your device. This sounds like a home remedy for a serious problem but it works and resolves the problem most of the time.
Follow the steps given below to soft reset your device:
Turn the Poco X6 device off and take out its battery.

If you cannot take the battery out, let the phone be off for about 3 to 5 minutes, and then turn it back on.
Simply performing a soft reset on your device can help you if you are looking for solutions for how to fix the bootloop issue. This a very useful method as it does not result in any kind of loss in data and protects all your media files, documents, settings, etc.
In case the Poco X6 device does not turn on normally and is still stuck in the bootloop Android problem, be prepared to use the troubleshooting techniques given and explained below.
Part 4: Boot into Safe Mode to fix Android boot loop

Booting your Poco X6 into Safe Mode is a useful troubleshooting step to fix boot loop issues caused by third-party apps. When in Safe Mode, the Poco X6 device will start up with only essential system apps, and any downloaded apps that might be causing conflicts won’t run. Here’s how you can boot your Poco X6 into Safe Mode to address the boot loop problem:
Step 1: Power Off Your Device
Hold down the power button until it turns off completely.
Step 2: Access Safe Mode
To enter Safe Mode, follow these steps based on your device model:
- For most Android devices: Press and hold the power button to turn on your device. As soon as the manufacturer’s logo appears, press and hold the Volume Down button until the Poco X6 device finishes booting. You should see “Safe Mode” displayed in the bottom left or right corner of the screen.
- Some devices might require slightly different key combinations. Refer to your device’s user manual or perform an online search for the specific method to enter Safe Mode for your model.
Step 3: Observe the Poco X6 device
Once your device has booted into Safe Mode, use it for a while to see if the boot loop issue persists. If the boot loop doesn’t occur in Safe Mode, it indicates that the problem is likely caused by a third-party app.
Step 4: Identify and Uninstall Problematic Apps
Now that you’re in Safe Mode, it’s time to identify the troublesome app. Start by uninstalling recently installed apps one by one until the boot loop problem is resolved. After each uninstallation, restart your device normally to check if the boot loop still occurs. Continue this process until you find the problematic app.
Step 5: Restart Normally
Once you’ve identified and uninstalled the problematic app, restart your device normally to exit Safe Mode. Your Android device should now start up without getting stuck in a boot loop.
By following these steps and using Safe Mode to isolate problematic apps, you can effectively troubleshoot and resolve boot loop issues on your Poco X6.
Part 4: Factory reset to fix Android bootloop issue
Factory reset, also known as Hard Reset, is a one-stop solution for all your software resulting in issues. Android boot loop being such problem, can be easily overcome by performing a factory reset.
Please note that all your device’s data and settings will be deleted by adopting this method. However, if you have a Google account signed in on your Poco X6, you will be able to retrieve most of your data once the Poco X6 device turns on.
To factory reset your Android boot loop device, you must first boot into the Recovery Mode screen.
To do this:
Press the volume down button and power button together until you see a screen with multiple options before you.

When you are at the Recovery Mode screen, scroll down using the volume down key, and from the options given, select “Factory Reset” using the power key.

Wait for your device to perform the task and then:
Reboot the phone in Recovery Mode by selecting the first option.

This solution is known to fix the boot loop error 9 out of 10 times, but if you still can’t start your Poco X6 normally, consider using a CWM Recovery to resolve the Android boot loop issue.
Part 5: Use CWM Recovery to fix bootloop on rooted Android
CWM stands for ClockworkMod and it is a very popular custom recovery system. To use this system to solve the boot loop Android error, your Poco X6 must be rooted with CWM Recovery System which basically means CWM must be downloaded and installed on your device.
Furthermore, to use CWM Recovery to fix boot loop on rooted Android devices, follow the steps given below:
Press the home, power, and volume up buttons to launch the CWM Recovery screen.
Note: you might have to use a different combination of keys to enter into Recovery Mode, depending on your device’s model.

Scroll down using” the volume key to select “Advanced”.

Now select “Wipe” and choose to wipe “Dalvik Cache”.

In this step, select “Mounts and Storage” to click on “Wipe” or “Cache”.
Once this is done, make sure to reboot your Poco X6.
This process with successfully fix the Android boot loop error and not cause any loss of data stored on your device stuck in boot loop.
So the bottom line is that boot loop Android issue may seem like an irreparable error but it can be resolved by carefully following the techniques explained above. These methods not only tell you how to fix the bootloop problem but also prevent it from occurring in the future.
An Android boot loop is a common phenomenon with all Android devices because we tend to tamper with our device’s internal settings. Once the ROM, firmware, kernel, etc are damaged or rendered incompatible with the Poco X6 device’s software, you cannot expect it to function smoothly, hence, the boot loop error occurs. Since you are not the only one suffering from the Android boot loop problem, be rest assured that the ways, given above, to combat it are recommended by users facing similar troubles. So, don’t hesitate and go ahead to try them on.
safe & secure
- Title: Home Button Not Working on Poco X6? Here Are Real Fixes | Dr.fone
- Author: Nova
- Created at : 2024-07-19 22:16:29
- Updated at : 2024-07-20 22:16:29
- Link: https://change-location.techidaily.com/home-button-not-working-on-poco-x6-here-are-real-fixes-drfone-by-drfone-fix-android-problems-fix-android-problems/
- License: This work is licensed under CC BY-NC-SA 4.0.