
Home Button Not Working on Lenovo ThinkPhone? Here Are Real Fixes | Dr.fone
Home Button Not Working on Lenovo ThinkPhone? Here Are Real Fixes
There is no doubt that it is quite frustrating when your device buttons, such as home and back don’t work properly. The reasons can be software as well as hardware issues. If you are wondering whether there is any solution to fix this problem, then you’ve come to the right place. Firstly, yes some methods can probably help you to come out of this issue. Here, in this guide, we have covered various solutions you can try to resolve the “home button not working Android” problem no matter whether it is due to software or hardware reason.
Part 1: 4 Common Measures to Fix Home Button Not Working Android
Here, we are going to mention four common methods that you can try to resolve the home button problem on your Lenovo ThinkPhone with ease.
1.1 One click to fix Android Home Button Not Working
[Try It Free](https://download.wondershare.com/drfone_repair_full3371.exe)When it comes to the home button not working Lenovo ThinkPhone problem, the most common reason is the unknown system issues. In such a scenario, the best solution is using Dr.Fone - System Repair (Android) software to repair your Android system to normal in one click. This tool is powerful enough to resolve various Android issues within a few minutes.
Dr.Fone - System Repair (Android)
Android repair tool to fix home button not working on Android
- The tool can help you to fix the Android operating system in a wide range of scenarios.
- It is compatible with all Lenovo ThinkPhone devices.
- There is no need for technical skills to use the software.
- The software comes with a high success rate for fixing the Android system.
- It provides easy steps to resolve Android issues.
3981454 people have downloaded it
To learn how to fix home button not working problem, download and install the Dr.Fone - System Repair (Android) software on your computer, follow the below step-by-step guide:
Step 1: To begin with the process, launch the software on your computer and select the “System Repair” option from the software main window.


Step 2: Thereafter, connect your Lenovo ThinkPhone to the computer using a USB cable and select the “Android Repair” tab from the left menu.

Step 3: Next, you will navigate to a device information page where you have to provide your device information.

Step 4: After that, the software will download the appropriate firmware to repair your Android system.
 Allavsoft Batch Download Online Videos, Music Offline to MP4, MP3, MOV, etc format

Step 5: After downloading the firmware, the software will start the repair process. Wait for a few seconds, the problem should get fixed and your phone will get back to its normal state.


1.2 Force Restart your Android
Whenever you encounter with Android virtual soft keys, not working problem, the first thing you should try is to force restart your phone . If the problem is due to a software issue, then it can be probably fixed by simply force restarting your Android.
Here are simple steps on how to force restart on Android:
Step 1: To begin with, press and hold the power button and either volume up or down button at the same time until your device screen goes off.
Step 2: Next, press the power button for a few moments to force restart your device.

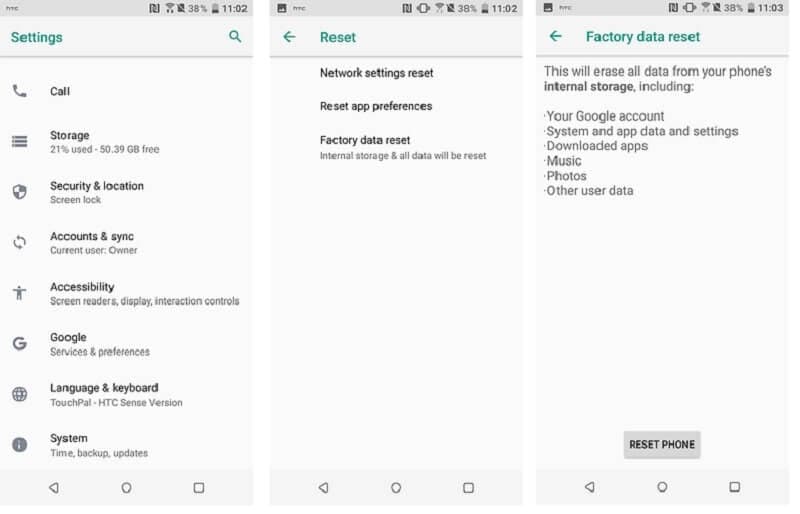
1.3 Restore Factory Settings
If force restarting won’t help you to fix the problem you are facing, it’s time to reset your Lenovo ThinkPhone to factory settings. The factory reset on an Android device will erase all of your phone settings, third-party apps, user data, and other app data to restore your device to its original manufacturer condition or settings. It means that this can bring back your device to its normal state.
To learn how to restore factory settings, follow the below steps:
Step 1: Go to your ‘Settings” and then, go to “System”>” Advanced”>” Reset options”.
Step 2: Next, tap on “Erase all data”>” Reset phone” to factory reset on your phone. Here, you may need to enter the password or pin or pattern.
Once you are done with the above steps, restart your phone and restore your data and this might be fixed the problem for you. If not, then try the next solution.
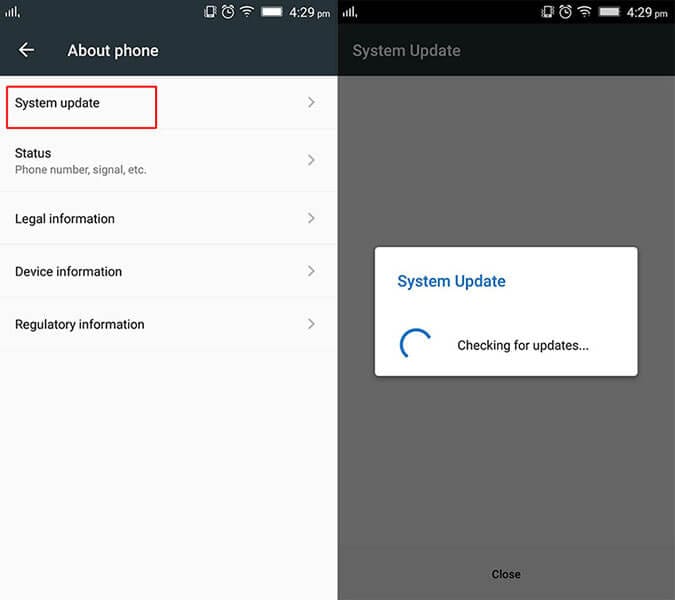
1.4 Update Android Firmware
It might be the case that your Android firmware is not updated and that’s why you are experiencing the home button not working Android problem. Sometimes, not updating your Android firmware can cause various issues and problems while using your device. So, you should update it, and here are steps on how to do it:
Step 1: Open the Settings and then, go to “About device”. Next, click “System updates”.
Step 2: After that, click “Check for updates” and if updates are available, then download and install it to update your Android version.


Part 2: What if the Home Button fails due to hardware reasons?
When your Android home and back button not working because of hardware reasons, you can’t get the problem resolved by simply rebooting your device. In such cases, you have to use alternative apps to replace the home button.
2.1 Simple Control app
The Simple Control app is the first and foremost solution to fix the Android home button not working issue. With the help of this app, you can fix many soft keys of your device. It is specially designed for Android users facing trouble using home, volume, back, and camera buttons. Plus, the app utilizes Accessibility service, but it doesn’t get access to your sensitive and personal information.
Pros:
- It can easily replace broken and failed buttons.
- The app is quite easy to use.
Cons:
- It is not as much efficient as other similar apps available out there.
URL: https://play.google.com/store/apps/details?id=ace.jun.simplecontrol&hl=en_US

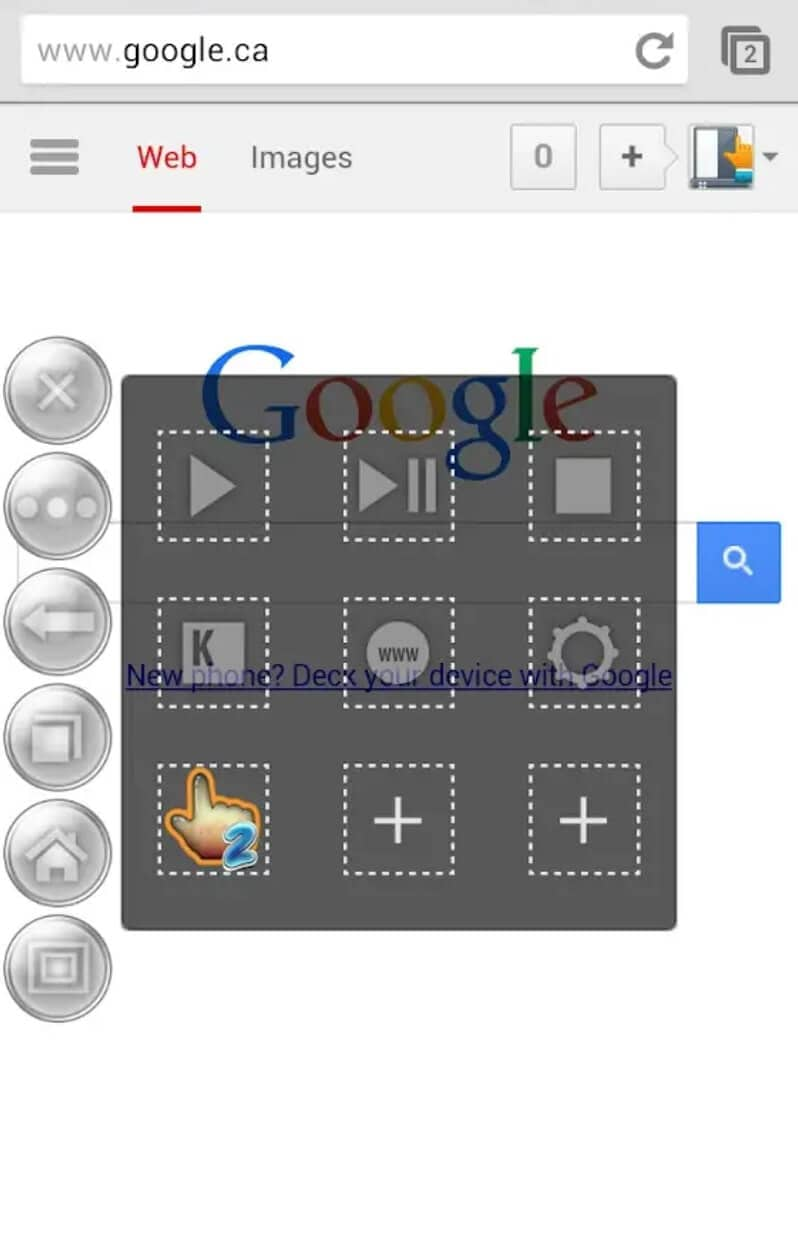
2.2 Button Savior app
Button Savior app is one of the ultimate apps that can help you to fix the Android home button not working problem with ease. For this app, root and no root versions are available on the Google Play store. To fix the Home button not working issue, no root version is the right one. But, if you want to fix the Back button or other buttons, then you need to go for the root version.
Pros:
- It comes with a root as well as no root version.
- The app is powerful enough to fix a wide range of buttons.
- It shows information regarding the date and time and battery.
Cons:
- The root version of the app can cause data loss.
URL: https://play.google.com/store/apps/details?id=com.smart.swkey" target="_blank” rel=”nofollow
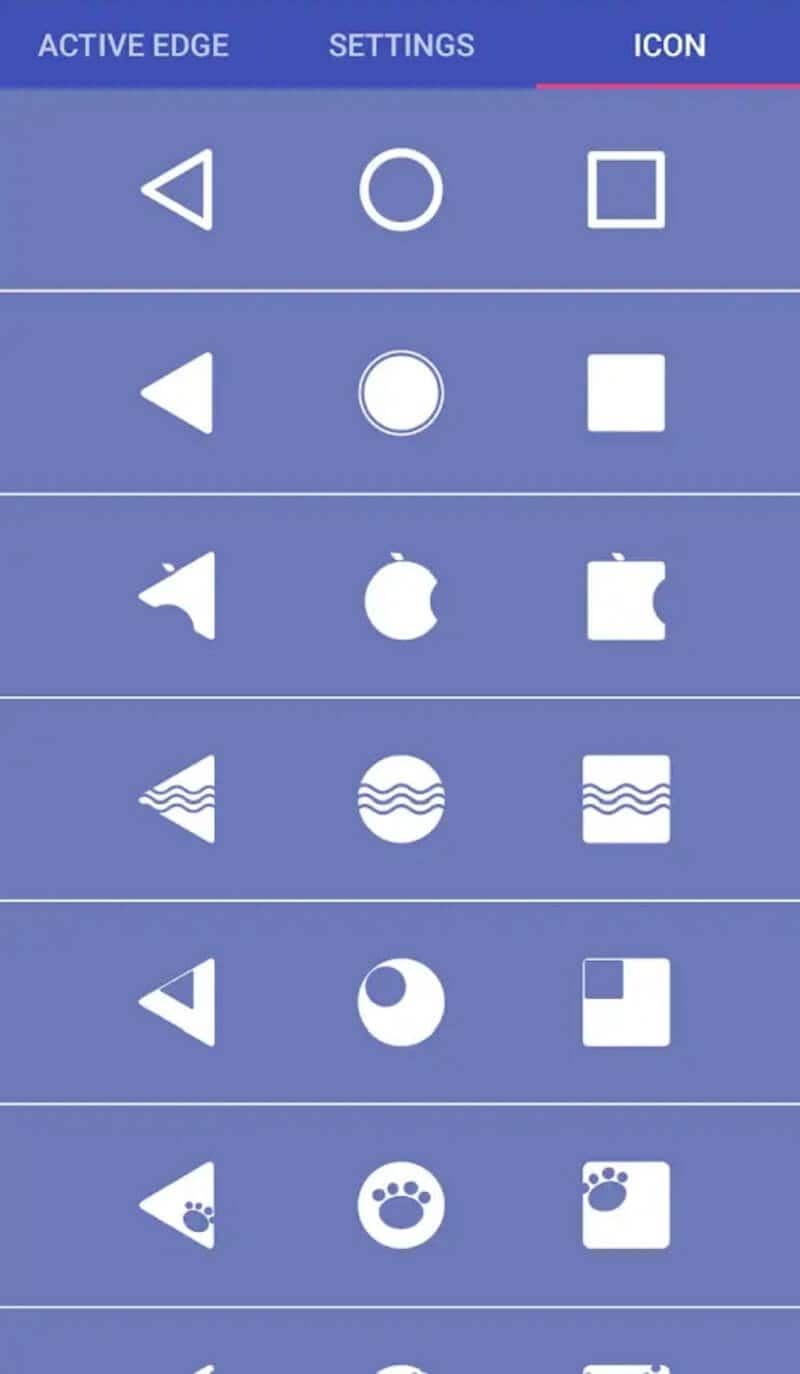
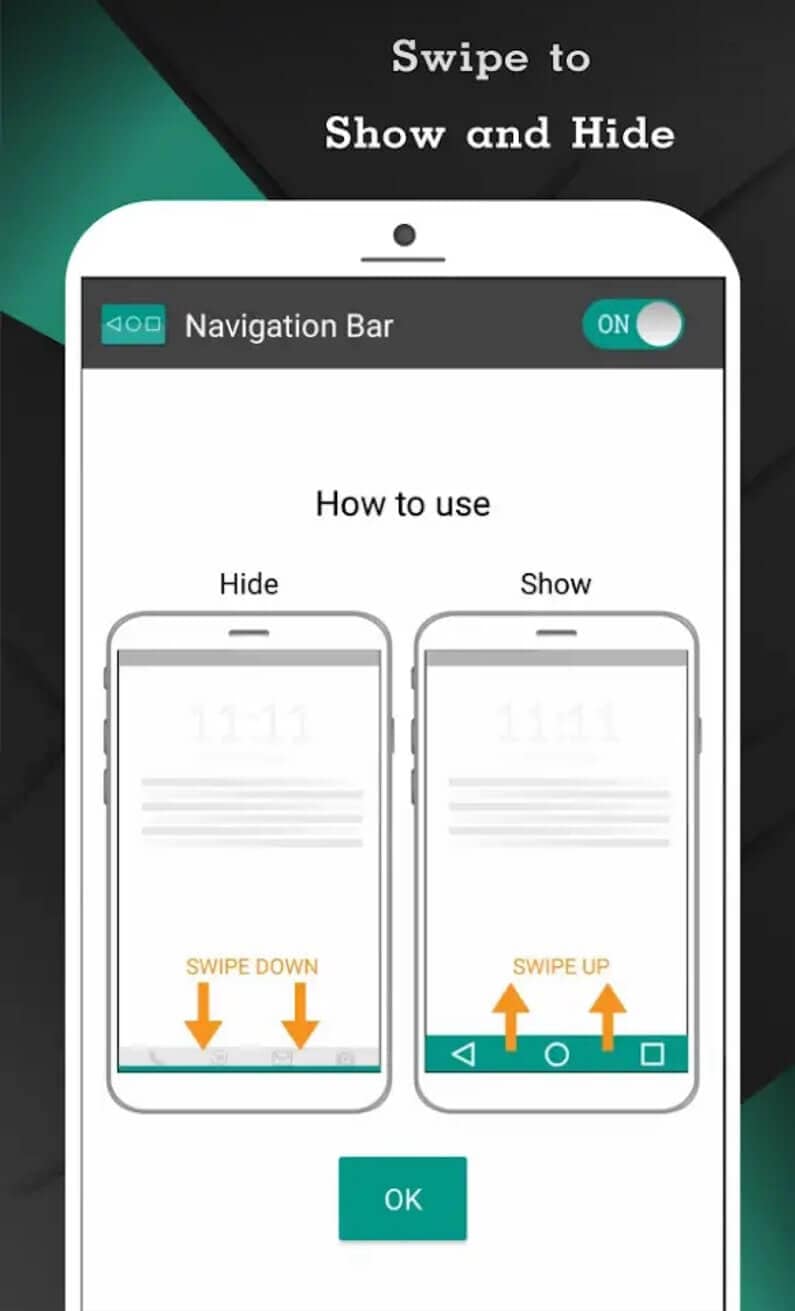
2.3 Navigation Bar (Back, Home, Recent Button) app
Navigation Bar app is another great solution to fix the home button not responding problem. It can replace broken and failed button for users who are facing difficulty using navigation bar panel or buttons not working properly. The app offers numerous features, and it is easy to use.
Pros:
- It offers many colors to make an incredible navigation bar.
- The app provides 15 themes for customization.
- It comes with the ability to change the size of the navigation bar.
Cons:
- Sometimes, the navigation bar stopped working.
- It comes with ads.
URL: https://play.google.com/store/apps/details?id=nu.nav.bar
2.4 Home Button app
Home button app is another remarkable solution to replace broken and failed home buttons for users having trouble while using buttons. With this app, it is quite easy to press or even long press on the home button as assistive touch.
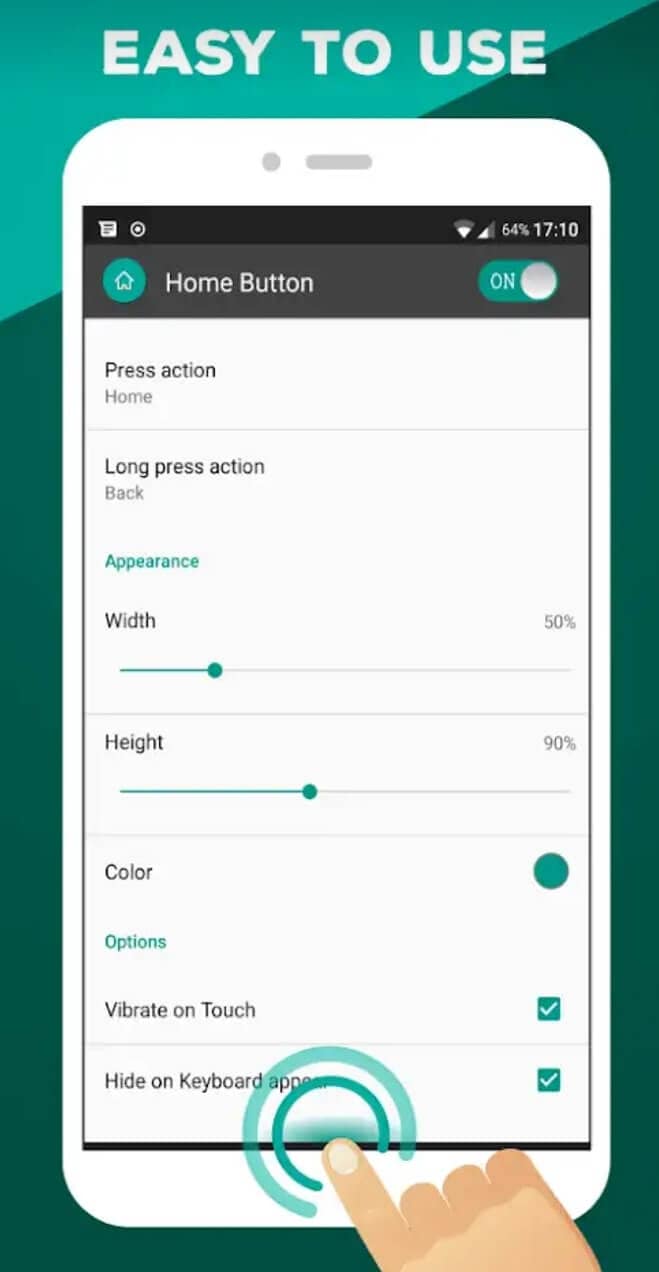
Pros:
- You can change the button of color using the app.
- With the help of it, you can set a vibrate setting on touch.
- It provides support for many press actions, such as home, back, power menu, etc.
Cons:
- It doesn’t come with a lot of features, unlike other apps.
- Sometimes, it shuts down automatically.
URL: https://play.google.com/store/apps/details?id=nu.home.button
2.5 Multi-action Home Button app
Is your Android physical home button is broken or dead? If yes, then the Multi-action Home Button app can help you to fix it with ease. With the help of it, you can create a button in centre-bottom of your device screen, and you can also add numerous actions to that button.
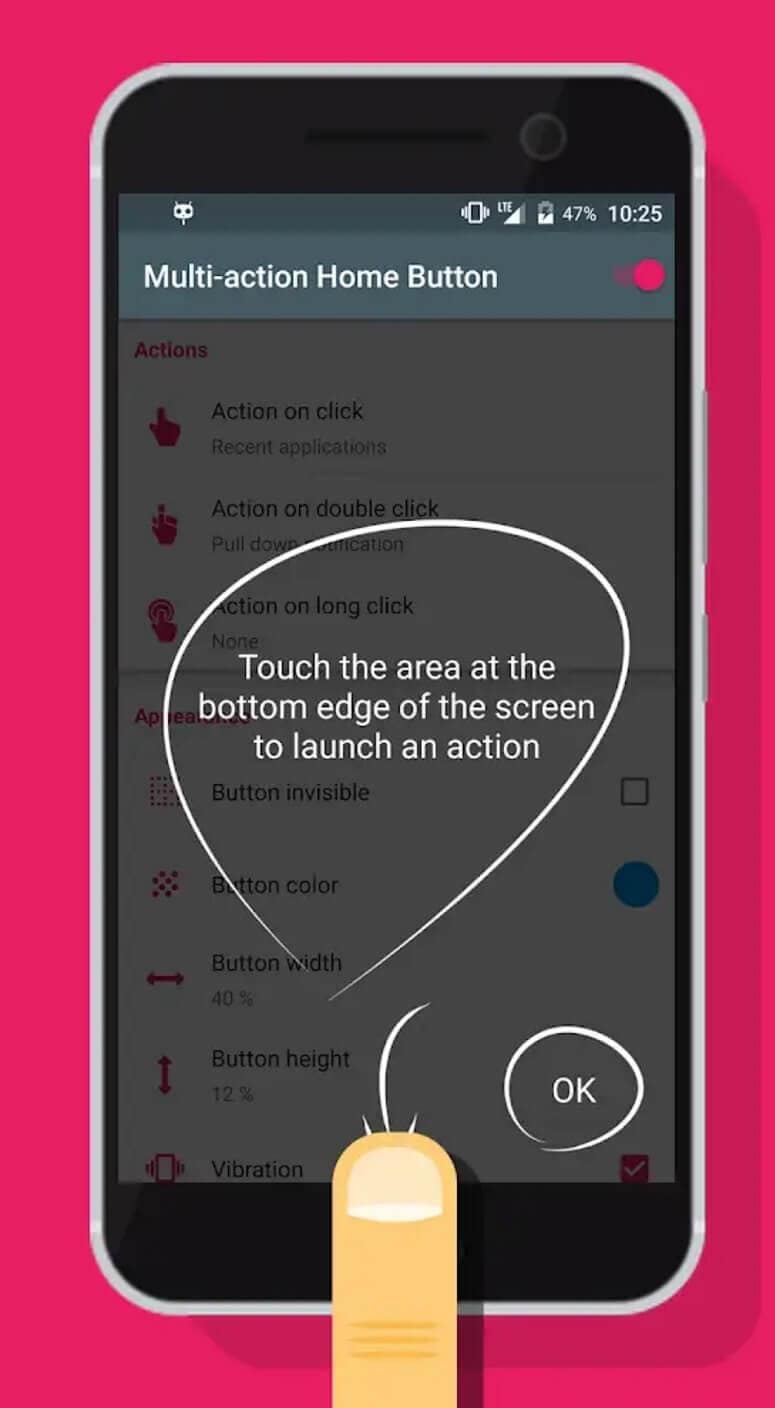
Pros:
- It provides various actions with the button.
- It is very simple and easy to use.
Cons:
- The app’s very useful feature comes with its pro version.
URL: https://play.google.com/store/apps/details?id=com.home.button.bottom
Conclusion
Hopefully, the methods covered in this post helps you to fix Android home and back button not working problem for you. If it is a system issue, then the best thing you can do is to take advantage of Dr.Fone - System Repair (Android) software. It can surely help you to fix your Android system to normal within a few minutes.
How to Fix Android.Process.Media Has Stopped on Lenovo ThinkPhone
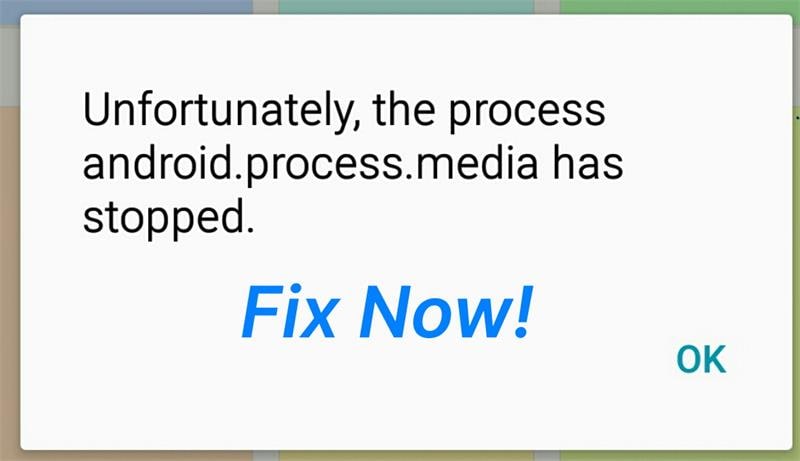
Like any other technological system, Android is not without its fair share of problems. One of the most common issues that Android users face is the android.process.media error. If you have encountered this problem lately, you don’t need to worry, this article will clearly explain what exactly causes this error and how to fix it safely.
Part 1. Why this error pops up?
There are several reasons why this error can occur repeatedly and it is worth noting the various reasons why this happens so that you can avoid the problem in the future. Some of the most common ones include:
- 1. Moving from one custom ROM to another can cause this error to occur
- 2. A failed firmware upgrade may also be to blame
- 3. A virus attack can also result in this error among many others
- 4. Restoring apps via a Titanium backup is also a major cause
- 5. Failure of certain apps such as the download manager and the media storage

Part 2. Back up your Android Data First
It is always a good idea to back up your data especially before embarking on any attempt to fix any problem with your device. This way you will always have your data with you just in case something goes wrong and you lose all your data. Wondershare Dr.Fone will help you easily back up your Lenovo ThinkPhone. The application will allow you to back up your device with a few clicks and you can restore what you want from your backup .
Wondershare Dr.Fone
Flexibly Back up and Restore Android Data
- One-click to back up Android data to the computer.
- Preview and selectively restore the backup to any Android device.
- Supports 8000+ Android devices.
- There is no data lost during backup, export, or restore.
4,503,800 people have downloaded it
Follow the steps below to learn how to back up your phone in steps.
Step 1. Download, install, and run the program
Click the “Start Download” button above to get the software installed on your computer. Then run it. The primary window of the software looks like below.
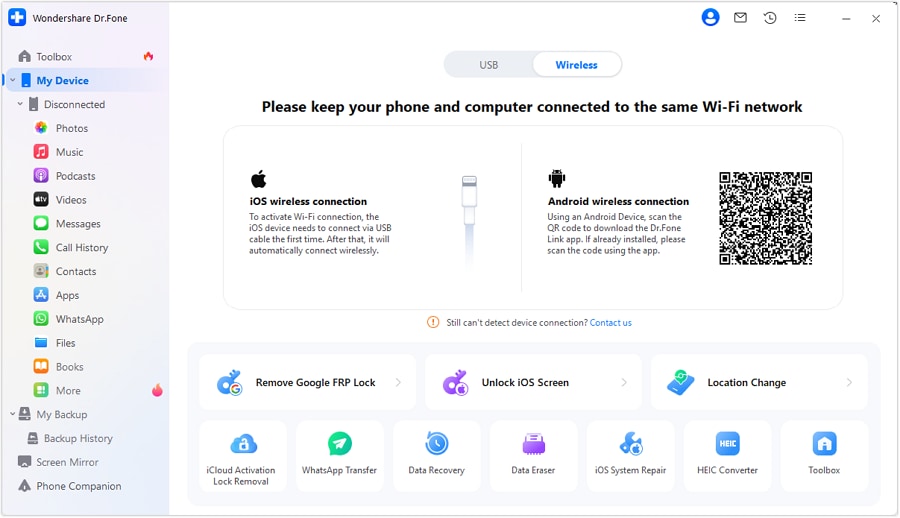
Step 2. Connect your device
Then connect your Lenovo ThinkPhone to the computer and make sure that it can be recognized by your computer. Then click on “My Backup” on Dr.Fone.

Step 3. Begin to backup
When your device is displayed on the window of the program, click “Back Up Now “ to begin. The rest will be done by the program.

 safe & secure
Part 3. How to Fix “Android. Process. Media” Error
With a full backup of your Lenovo ThinkPhone, you can now embark on a mission to fix the error. There are several methods to clear this error. We have outlined three of the most effective solutions here.

Method 1: Ensure app and system updates
Updates often include patches for known issues and vulnerabilities. Ensuring that both apps and the system are up to date can resolve many potential problems.
Step 1: Visit the Google Play Store to check for available app updates.
Step 2: In “Settings,” go to “System” > “Software Update” to check for system updates.
Method 2: Reset app preferences
App preference settings might sometimes lead to conflicts or anomalies. Resetting these settings can revert apps to their default state, resolving potential issues.
Step 1: Go to “Settings” on your device.
Step 2: Access “Apps.”
Step 3: Tap the menu icon in the upper-right corner and select “Reset App Preferences.”
Method 3: Clear the cache and data on your device
Step 1: Go to Settings> Applications> Manage Applications and find the Google Services framework.
Step 2: Next, find Google Play from the same Manage Applications page.
Step 3: Tap on it and then Tap on clear cache.
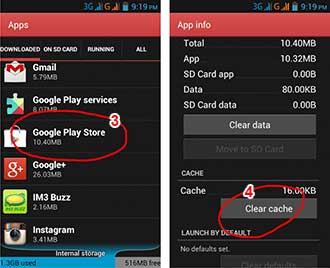
Step 4: Press the back button to go back to the Google Services framework and then choose Force stop > clear cache > OK
Step 5: Next you need to open Google Play and when presented with an error, click OK
Step 6: Turn off the Lenovo ThinkPhone device and then turn it back on. Go to the Google Services framework again and turn it on to see if the issue has been resolved.
Method 4: Check Google Sync & Media Storage settings
Step 1: Go to Settings > Accounts and Personal> Google Sync and uncheck all the checkboxes to stop the Google Synchronization.
Step 2: Disable and Clear all Media Storage data by going to Settings> Apps> All Apps. Find the Media Storage> Clear Data> Disable
Step 3: Use the same method as above to clear the Download Manager data
Step 4: Turn off your device and then turn it on
This Should clear the error message for good.
Method 5: Boot your device into safe mode
Safe mode can temporarily disable third-party apps, allowing only core system apps. This detects if a third-party app causes the “Android process media keeps stopping” error. If the problem disappears in safe mode, a third-party app might be the cause. Uninstalling it can restore normal function. If the problem persists in safe mode, a deeper system issue might exist, needing further investigation or support.
Method 6: Fix the error by using a dedicated repair tool

Dr.Fone - System Repair (Android)
Fix Android process media has stopped issue in one click
- Fix all Android system issues like black screen of death, won’t turn on, system UI not working, etc.
- Industry’s 1st tool for one-click Android repair. Without any data loss.
- Supports all the new Lenovo ThinkPhone devices like Galaxy S8, S9, S22, etc.
- Step-by-step instructions provided. No technical skills required.
4,989,253 people have downloaded it
Step 1. Connect your Lenovo ThinkPhone
After launching Dr.Fone, click on “System Repair” from the main window.
Then connect your Lenovo ThinkPhone with the correct cable and choose “Android” > click “Start”.
In the Lenovo ThinkPhone device information interface, remember to select the correct information. Then confirm the warning and click “Next”.
 PCDJ DEX 3 for Windows & MAC is the total entertainment DJ software solution, offering audio, video, and karaoke mixing ability. Automatic beat-sync, smart looping, 4 decks, DJ MIDI controller support, Karaoke Streaming and much more.
To confirm the Android repair may erase all data on your device, you need to type in “000000” to proceed.
 Glary Utilities PRO - Premium all-in-one utility to clean, speed up, maintain and protect your PC

Step 2. Repair your Lenovo ThinkPhone in Download mode.
Read and follow the guide here to boot your Lenovo ThinkPhone in Download mode.

Then click “Next” to start downloading the firmware.
It may take a while, so you could have a cup of coffee to wait for the repair process completed.

safe & secure
Method 7: Factory Reset your device
If the above steps fail, you might need to perform a factory reset. A factory reset restores the Lenovo ThinkPhone device to its initial state, which can eliminate many problems, but it will also erase all data. Ensure you back up your important data before proceeding.
Method 8: Seek Manufacturer Support
If the problem persists after trying the above steps, it could be related to specific device or software issues. It’s advisable to contact your device manufacturer’s support team for more detailed guidance and assistance.
It is our hope that when faced with this fairly common error, you will not panic. This is a fairly mild issue that can easily be fixed as we have seen above.
 vMix Basic HD - Software based live production. vMix Basic HD includes 4 inputs, 3 cameras, streaming, recording, playlist.
 safe & secure
 Power Tools add-on for Google Sheets, Lifetime subscription
7 Solutions to Fix Chrome Crashes or Won’t Open on Lenovo ThinkPhone
Google Chrome is one of the most popular web browsers in the world. It is fast, secure, and easy to use. However, like any other app, it is not free from errors. Many users have reported that Chrome crashes or won’t open on their Lenovo ThinkPhone. If you are also facing this issue, then you have come to the right place. In this article, we will discuss the reasons behind this problem and provide you with 7 solutions to fix Chrome crashes or won’t open on Lenovo ThinkPhone.
Being one of the widely used browsers, Chrome is always our rescue whenever vital information is our need. Imagine, you launched Chrome for some urgent work and all of a sudden, got “Unfortunately Chrome has stopped” error. You re-opened it thinking about proper functioning of it now but to no avail. Does this situation sound familiar? Are you in a same problem as well? Fret not! We will discuss in this article why your Chrome is crashing on Android and the potential solutions to do away with the problem. Please read the article attentively and know what helps you best.
Part 1: Too many tabs opened
One of the main reasons why Chrome keeps crashing could be the multiple opened tabs. If you keep open the tabs, it may slow down the performance of Chrome and the app will use RAM. As a result, it will obviously get stopped midway. Therefore, we suggest you to close the tabs which are opened. And once you do that, exit the app and then launch it again.
Part 2: Too much memory used
When Chrome or any other app keeps running on the background, issues like “Unfortunately Chrome has stopped” are likely to occur. Moreover, the opened apps will eat the memory of your device. Hence, as the next solution, it is suggested that the Chrome should be closed by force quitting and then you need to try to launch it again to work. See if it works or still Chrome is not responding.
1. Simply tap on the Home button twice to get on the recent apps screen. Please note that the button may vary to reach the screen. Please check once and move accordingly.
2. Now simply swipe the app up/left/right (according to the Lenovo ThinkPhone device).
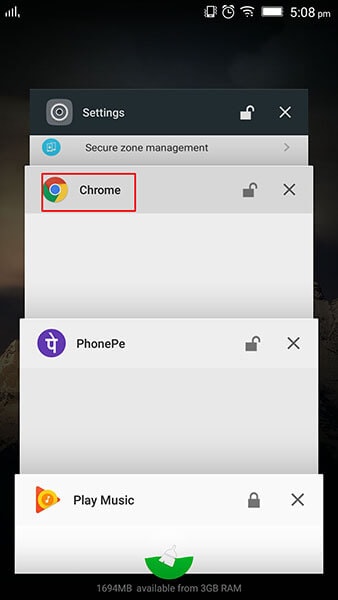
3. The app will be force quit now. You can then start it again to check if thing get back to normal.
Part 3: Chrome cache overflowing
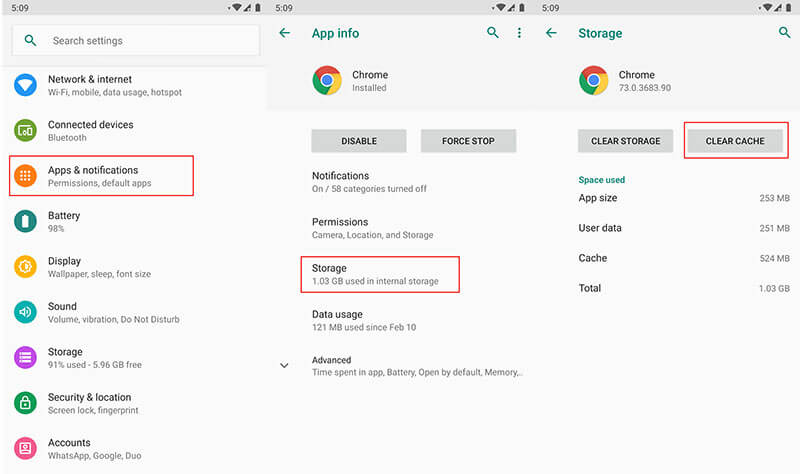
While using any app for long, the temporary files for those gets collected in the form of cache. And when cache is not getting cleared, one may face the freezing, crashing or sluggish apps. And this could also be the cause why your Chrome keeps stopping. Hence, the following steps will show you how to clear cache and make Chrome work as before.
1. Open “Settings” and go to “Apps & Notifications”.
2. Look for “Chrome” and tap on it.
3. Go to “Storage” and click on “Clear Cache”.
 EmEditor Professional (Lifetime License, non-store app)
Part 4: Exclude the issue of website itself
Most probably Chrome is not able to support the website you are trying to access. We doubt if the particular website you are making use of is the culprit and making Chrome keeps stopping. In such case, we would like to recommend you to make use of another browser and try to access the website from there. See if this works or not. If now, please follow the next solution.
Part 5: Android firmware corruption
Another reason why your Chrome has stopped could be the corrupted software. You can’t expect anything normal when your firmware corruption occurs and so in the case of Chrome. If this is the case, the re-flashing the stock ROM is the most recommended solution. And the best that can help you in this is none other than Dr.Fone - System Repair (Android) . Within one click, it vows to help users in flashing the ROM without any complications. Read the advantages offered by this tool.
Dr.Fone - System Repair (Android)
Android repair tool to fix crashing Chrome
- It works like a pro no matter what problem your device is stuck with.
- More than 1000 types of Android devices are compatible with this tool.
- Easy to use and holds higher success rate.
- No need for any special technical knowledge to use this
- Offers an incredible interface from which anyone can work with.
3,605,074 people have downloaded it
How to Use Dr.Fone - System Repair (Android) when Chrome is crashing on Android
Step 1: Install the Tool to Begin
Start downloading it from there. Install it once downloading is completed and open the tool. The main screen will show you some tabs. You need to hit on “System Repair” among those.

Step 2: Get Android Device Connected
Now, you need to connect your Lenovo ThinkPhone with the computer using USB cord. When the Lenovo ThinkPhone device is connected successfully, click on the “Android Repair” option from the left panel.
Step 3: Enter Details
On the following screen, you need to select the right phone brand, name model and enter career details. Check once to confirm and hit on “Next”.
Step 4: Download Firmware
Now, follow the steps displaying on the screen to enter the DFU mode. When you do this, click on “Next” and the program will download the firmware.
Step 5: Repair the Issue
Once the firmware is downloaded, you will notice that the repairing process will start by the program. Wait until it gets finished and try to start Chrome again and you’ll surely get rid of the problem.

Part 6: File Downloading issue from Chrome
While you were trying to download from internet, the file didn’t download properly or it might get stuck and eventually crashing Chrome occurs. In such instances, many times, uninstalling and installing helps. Therefore, follow the steps below to uninstall and install Chrome and fix Chrome keeps stopping
- Go to “Settings” and tap on “Apps”.
- Select “Chrome” and tap on “Uninstall Updates”.
 Jet Profiler for MySQL, Enterprise Version: Jet Profiler for MySQL is real-time query performance and diagnostics tool for the MySQL database server. Its detailed query information, graphical interface and ease of use makes this a great tool for finding performance bottlenecks in your MySQL databases.
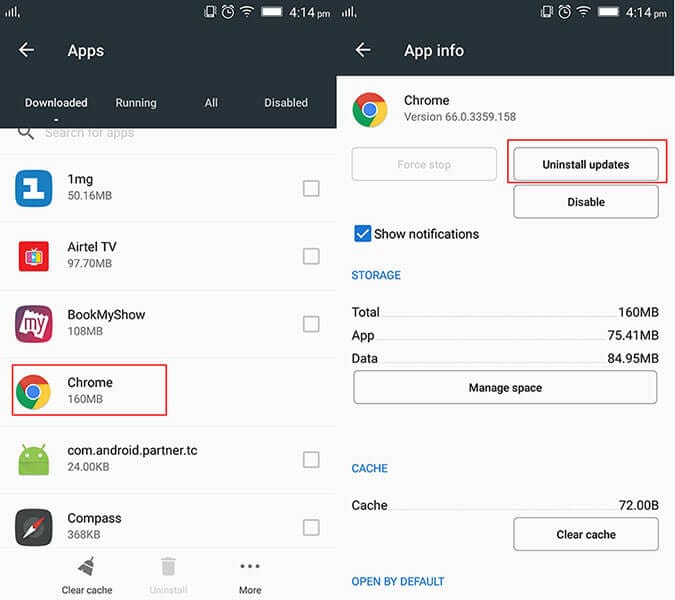
- Now, you need to re-install it from Play Store. From the “My Apps” section, tap on Chrome and update it.
Part 7: Clashes between Chrome and system
Of still you are receiving “Unfortunately Chrome has stopped” pop-up, it might be because of the incompatibility between the Chrome and system. Maybe your device is not updated and therefore is at odds with the Chrome app. So, the last tip that we would like give you is to update your Lenovo ThinkPhone. Following are the steps for it. Follow them and stop the Chrome crashing on Android issue.
- Go to “Settings” and tap on “System”/”About Phone”/”About Device”.
- Now, choose “Software Update”/”System Update” and your device will detect if there is any update present on your device. Proceed accordingly.
- Title: Home Button Not Working on Lenovo ThinkPhone? Here Are Real Fixes | Dr.fone
- Author: Nova
- Created at : 2024-07-19 22:14:14
- Updated at : 2024-07-20 22:14:14
- Link: https://change-location.techidaily.com/home-button-not-working-on-lenovo-thinkphone-here-are-real-fixes-drfone-by-drfone-fix-android-problems-fix-android-problems/
- License: This work is licensed under CC BY-NC-SA 4.0.